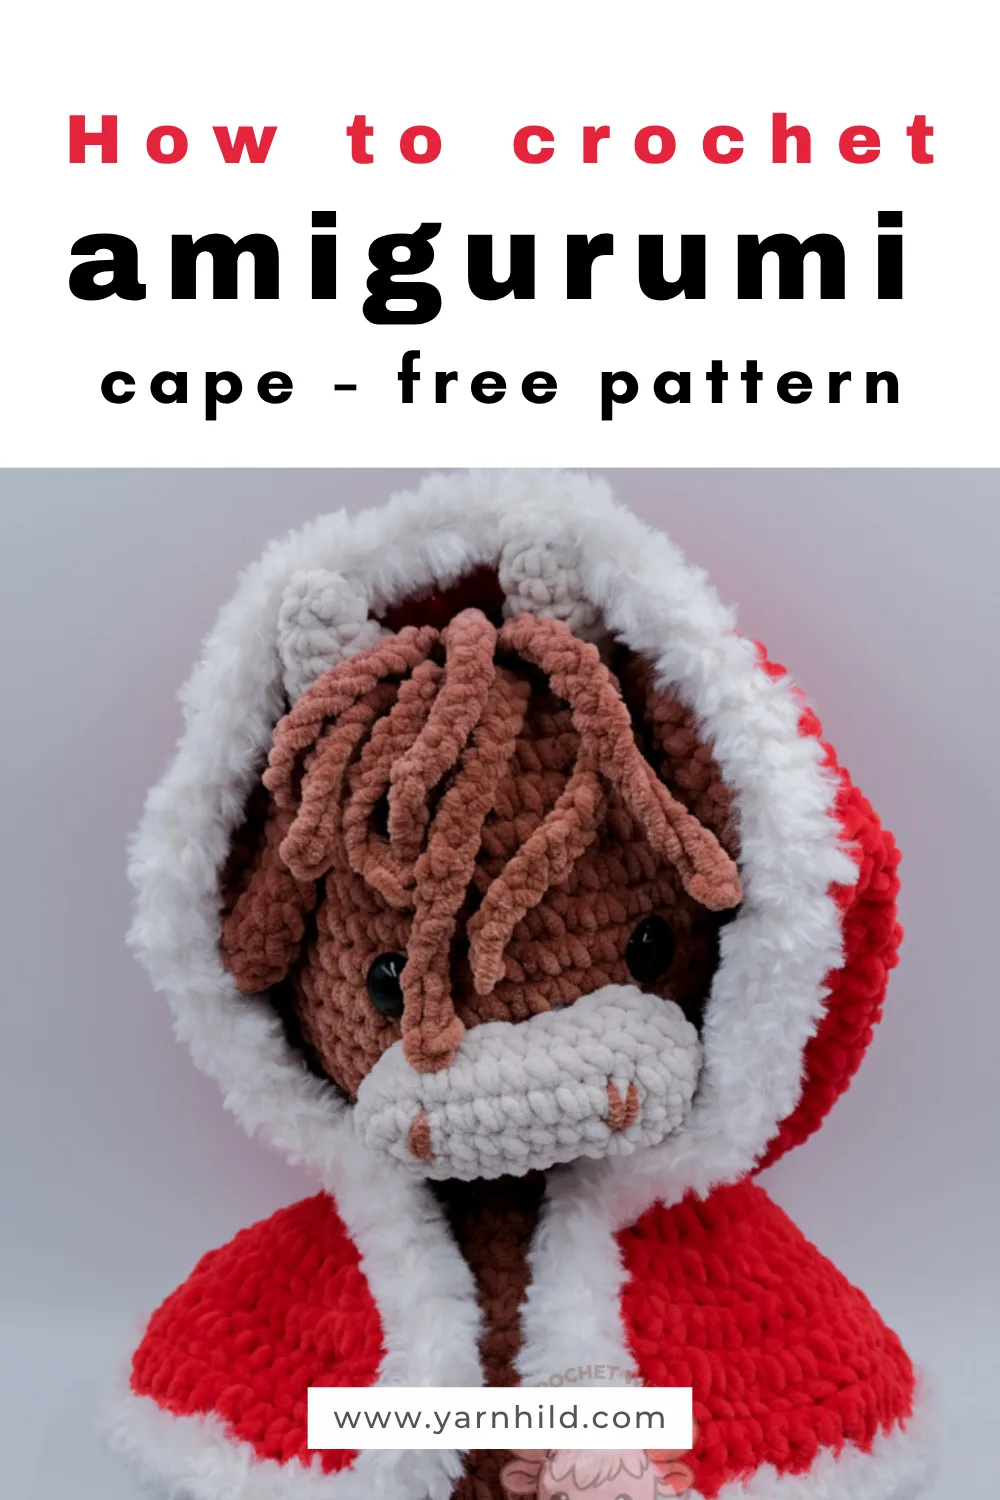
Crochet Winter Cape - Amigurumi addition
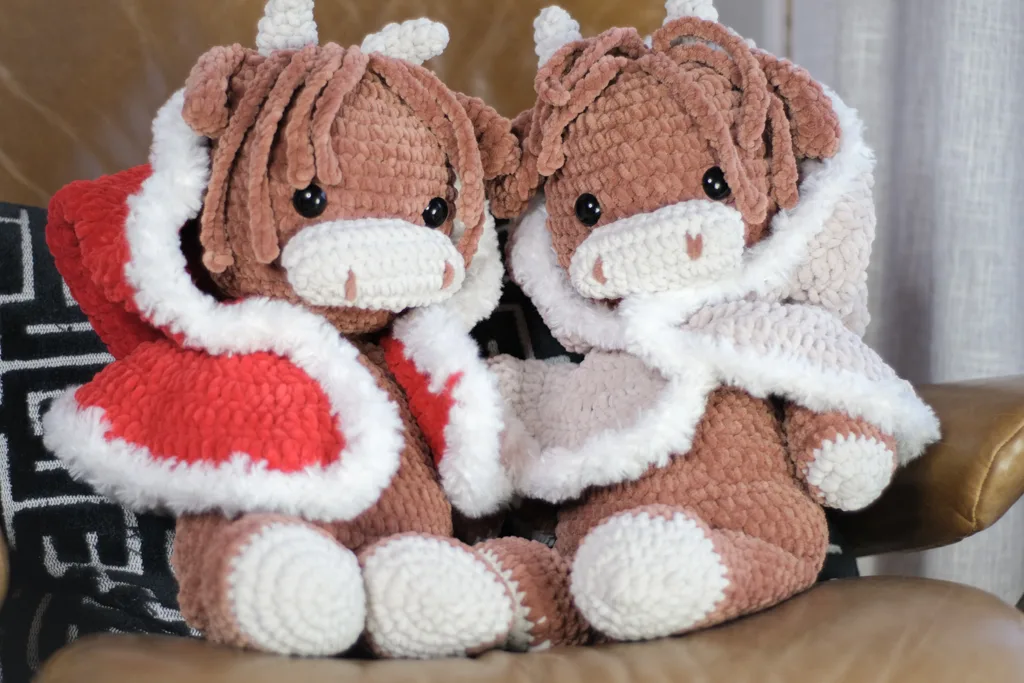
I made a crochet winter cape for my Highland cow, Fergus! When I made this, I discovered that with minor adjustments, this can fit me too!
Scroll down for the FREE pattern, or
GET THE BUNDLE FOR BOTH THE HIGHLAND COW AND THE CAPE HERE.
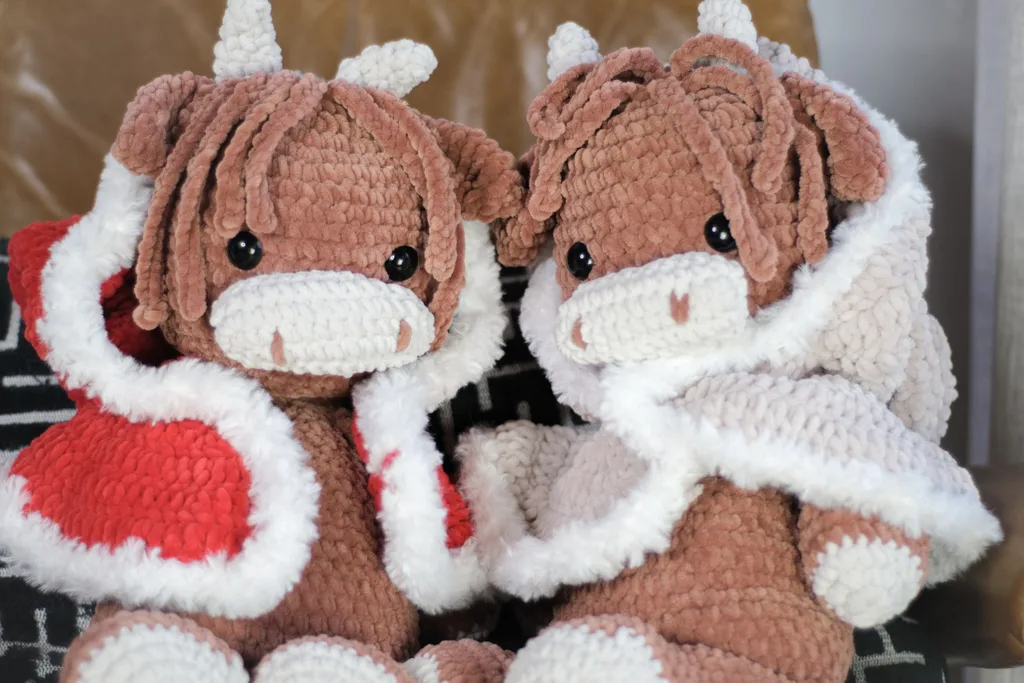
A couple of months ago, I made this amigurumi Highland cow that became quite popular, so when my best friend suggested I make some wearables for it, I got to work!
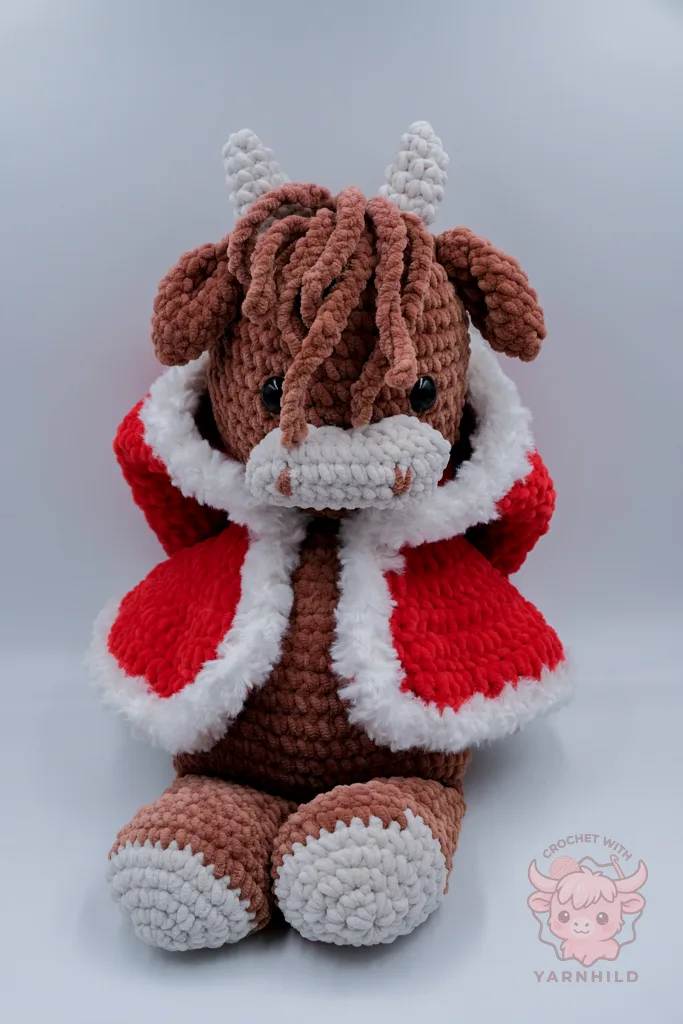
First, I should make a Christmas hat, but the highland cow's horns and ears are getting in the way. To avoid this, I made a cape instead.
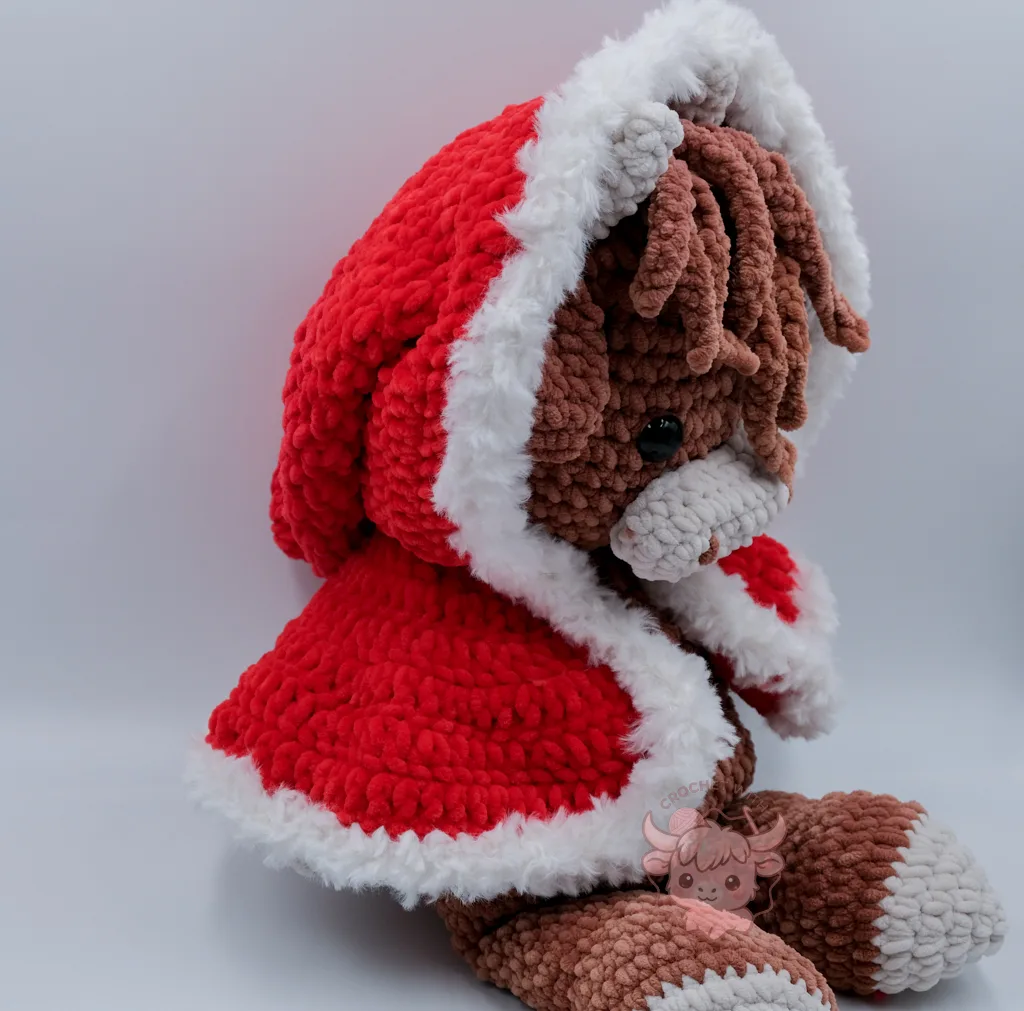
The hood itself is a little oversized, but it adds extra cuteness!
Get the PDF pattern
I'm excited to share some news with you! I have opened a pattern shop! On The Yarnhild Shop, you can purchase my PDF patterns to get the ad-free version.
Crochet Cape - Video tutorial
In the video tutorial, I'm also explaining how you can adjust the cape's size so it fits you or someone you love. This could be a great idea for a Christmas present.
If you haven't made Fergus the Highland cow, you can find the pattern for him here. Don't forget to tag me if you decide to make him!
Sizing and Adjustments for the Crochet Cape
This pattern is written for a medium-sized plush toy (like Fergus the Highland Cow), but it’s very easy to adapt. If you want a wider cape, simply increase the number of stitches in your foundation chain. For extra length, work more dc rows before adding the trim. To make a human-sized version, measure around the shoulders, create a cape base using double crochet rows, and follow the same increase structure used in the pattern. The hood can be adjusted by extending the rectangle and shaping the decreases at the back. You will find more info on this in the video.

Crochet Cape for Fergus
Here is a Christmas Cape designed for Highland Cow Fergus. The cape is worked in rows from the neckline down, increasing each row to create a flared shape. The hood is made separately, attached to the cape, and then shaped with decreases. Optional white trim can be added around the edges for a festive look. Finished size may vary depending on yarn and tension.
Materials
- This pattern uses chenille, but other yarns, such as cotton and acrylic, can be used as well. Just use a hook that fits your yarn.
- You`ll need 2 colors of yarn, the featured example uses:
- (A) Primary color, red: About 150 g
- (B) Fur yarn: About 50 g
- 4,5 mm crochet hook
- Scissors
- Tapestry needle
Tools
- Abbrivations (US terms)
- ch-chain
- rnd–round
- St(s)–stitches
- Inc–increase
- dc2tog - Double crochet decrease
- sc - single crochet
- dc-double crochet
- sl st- slip stitch
- fo - fasten off
Instructions
Cape
Color A
Row 1: ch 29, 1 sc in 2nd ch from hook and in each ch. ch 2, turn. (28 sc)
Switch to DC from here.
Row 2: (1 dc, dc inc) rep across. ch 2, turn. (42 dc)
Row 3: (2 dc, dc inc) rep across. ch 2, turn. (56 dc)
Row 4: (3 dc, dc inc) rep across. ch 2, turn. (70 dc)
Row 5: (4 dc, dc inc) rep across. ch 2, turn. (84 dc)
Row 6: (5 dc, dc inc) rep across. ch 2, turn. (98 dc)
Hood base
In color A
The hood is made of a rectangle worked in rows.
Row 1: Ch 60, 1 dc in the 2. ch from the hook and in each st (58 dc)
Row 2-7: 1 dc in each st, ch 2 turn (58 dc)
Do not fasten off
Fold the rectangle in half. Sl st in the next st. (we are skipping one)
Then sl st into the opposite side of the second stitch. (skip the first one on the other side too). See the extra help section for pictures.
You will now work in rounds, shaping the hood.
We skipped 2 stitches, so now you should have 56. We are going to attach the hood to the cape
with those skipped
stitches.
Extra help.
After the rows on the hood are finished, do not cut the yarn. Sl st one time.
Fold the rectangle and sl st into the opposite side.
Now the sides are joined, and the rest of the hood is made in rounds.
Continue working the rounds for the hood. We do not chat 2 on the decrease rounds here because that will create gaps.
Extra help
Double crochet decrease (dc2tog):
Yarn over, insert hook into next stitch, pull up a loop (3 loops on hook). Yarn over, pull through 2 loops. Yarn over, insert hook into next stitch, pull up a loop (4 loops on hook). Yarn over, pull through 2 loops. Yarn over, pull through all 3 loops.
Rnd 1: 1 dc in each st (56 sc)
Rnd 2: (6 dc, dc2tog) x 7 (49 dc)
Rnd 3: (5 dc, dc2tog) x 7 (42 dc)
Rnd 4:(4 dc, dc2tog x 7 (35 dc)
Rnd 5:(3 dc, dc2tog) x 7 (28 dc)
Rnd 7: (2 dc, dc2tog) x 7 (21 dc)
Rnd 8: (1 dc, dc2tog) x 7 (14 dc)
Rnd 9: dc2tog x 7, rep across (7 dc)
Fasten off. Sew the hole closed
Sew the hood to the cape
Begin by lining up the open edge of the hood with the cape's neckline, ensuring the stitches match evenly along both pieces. Once everything is aligned, use your yarn needle to sew the hood securely to the cape, working stitch by stitch to create a neat and even seam.
Trim
(Color B – Fur Yarn)
With RS facing, join Color B to the bottom corner of the cape.
Work 1 sc in each st evenly around the entire outer edge of the cape.
optional: add 1 extra sc at outer corners to avoid curling.
fasten off and weave in ends.
Do the same for the face opening.
FO and weave in all ends.