In this tutorial, you will learn how to crochet a magic ring. Now why would I need to make a magic ring, you might ask yourself. Can't I just add single crochet in the chain? Of course, you can, but you will get a hole, and when you make a magic ring, the ring can be pulled closed.
You will avoid starting your project with a hole and your work gets a neater look!

Disclaimer: This blogpost contains affiliate links. Read more about it here.
I use this method whenever I am crocheting in rounds. When starting my amigurumis, hats or anything else that
To demonstrate which method I use, I have made a little video tutorial that you can check out. There are many ways to make a magic circle, and if you browse around on YouTube, you can find many other methods.
The magic ring als goes by the name magic loop or magic circle and if you don't know how to make it, watch the video below!
When you have mastered this technique you can practice your skills on a simple amigurumi pattern.
How to crochet a magic ring
Klick on the video or scroll down for the pictures
Hold your hand like this and put the yarn between the little finger and the ring finger. Make sure that the strand you're holding with the other hand is the tail end.
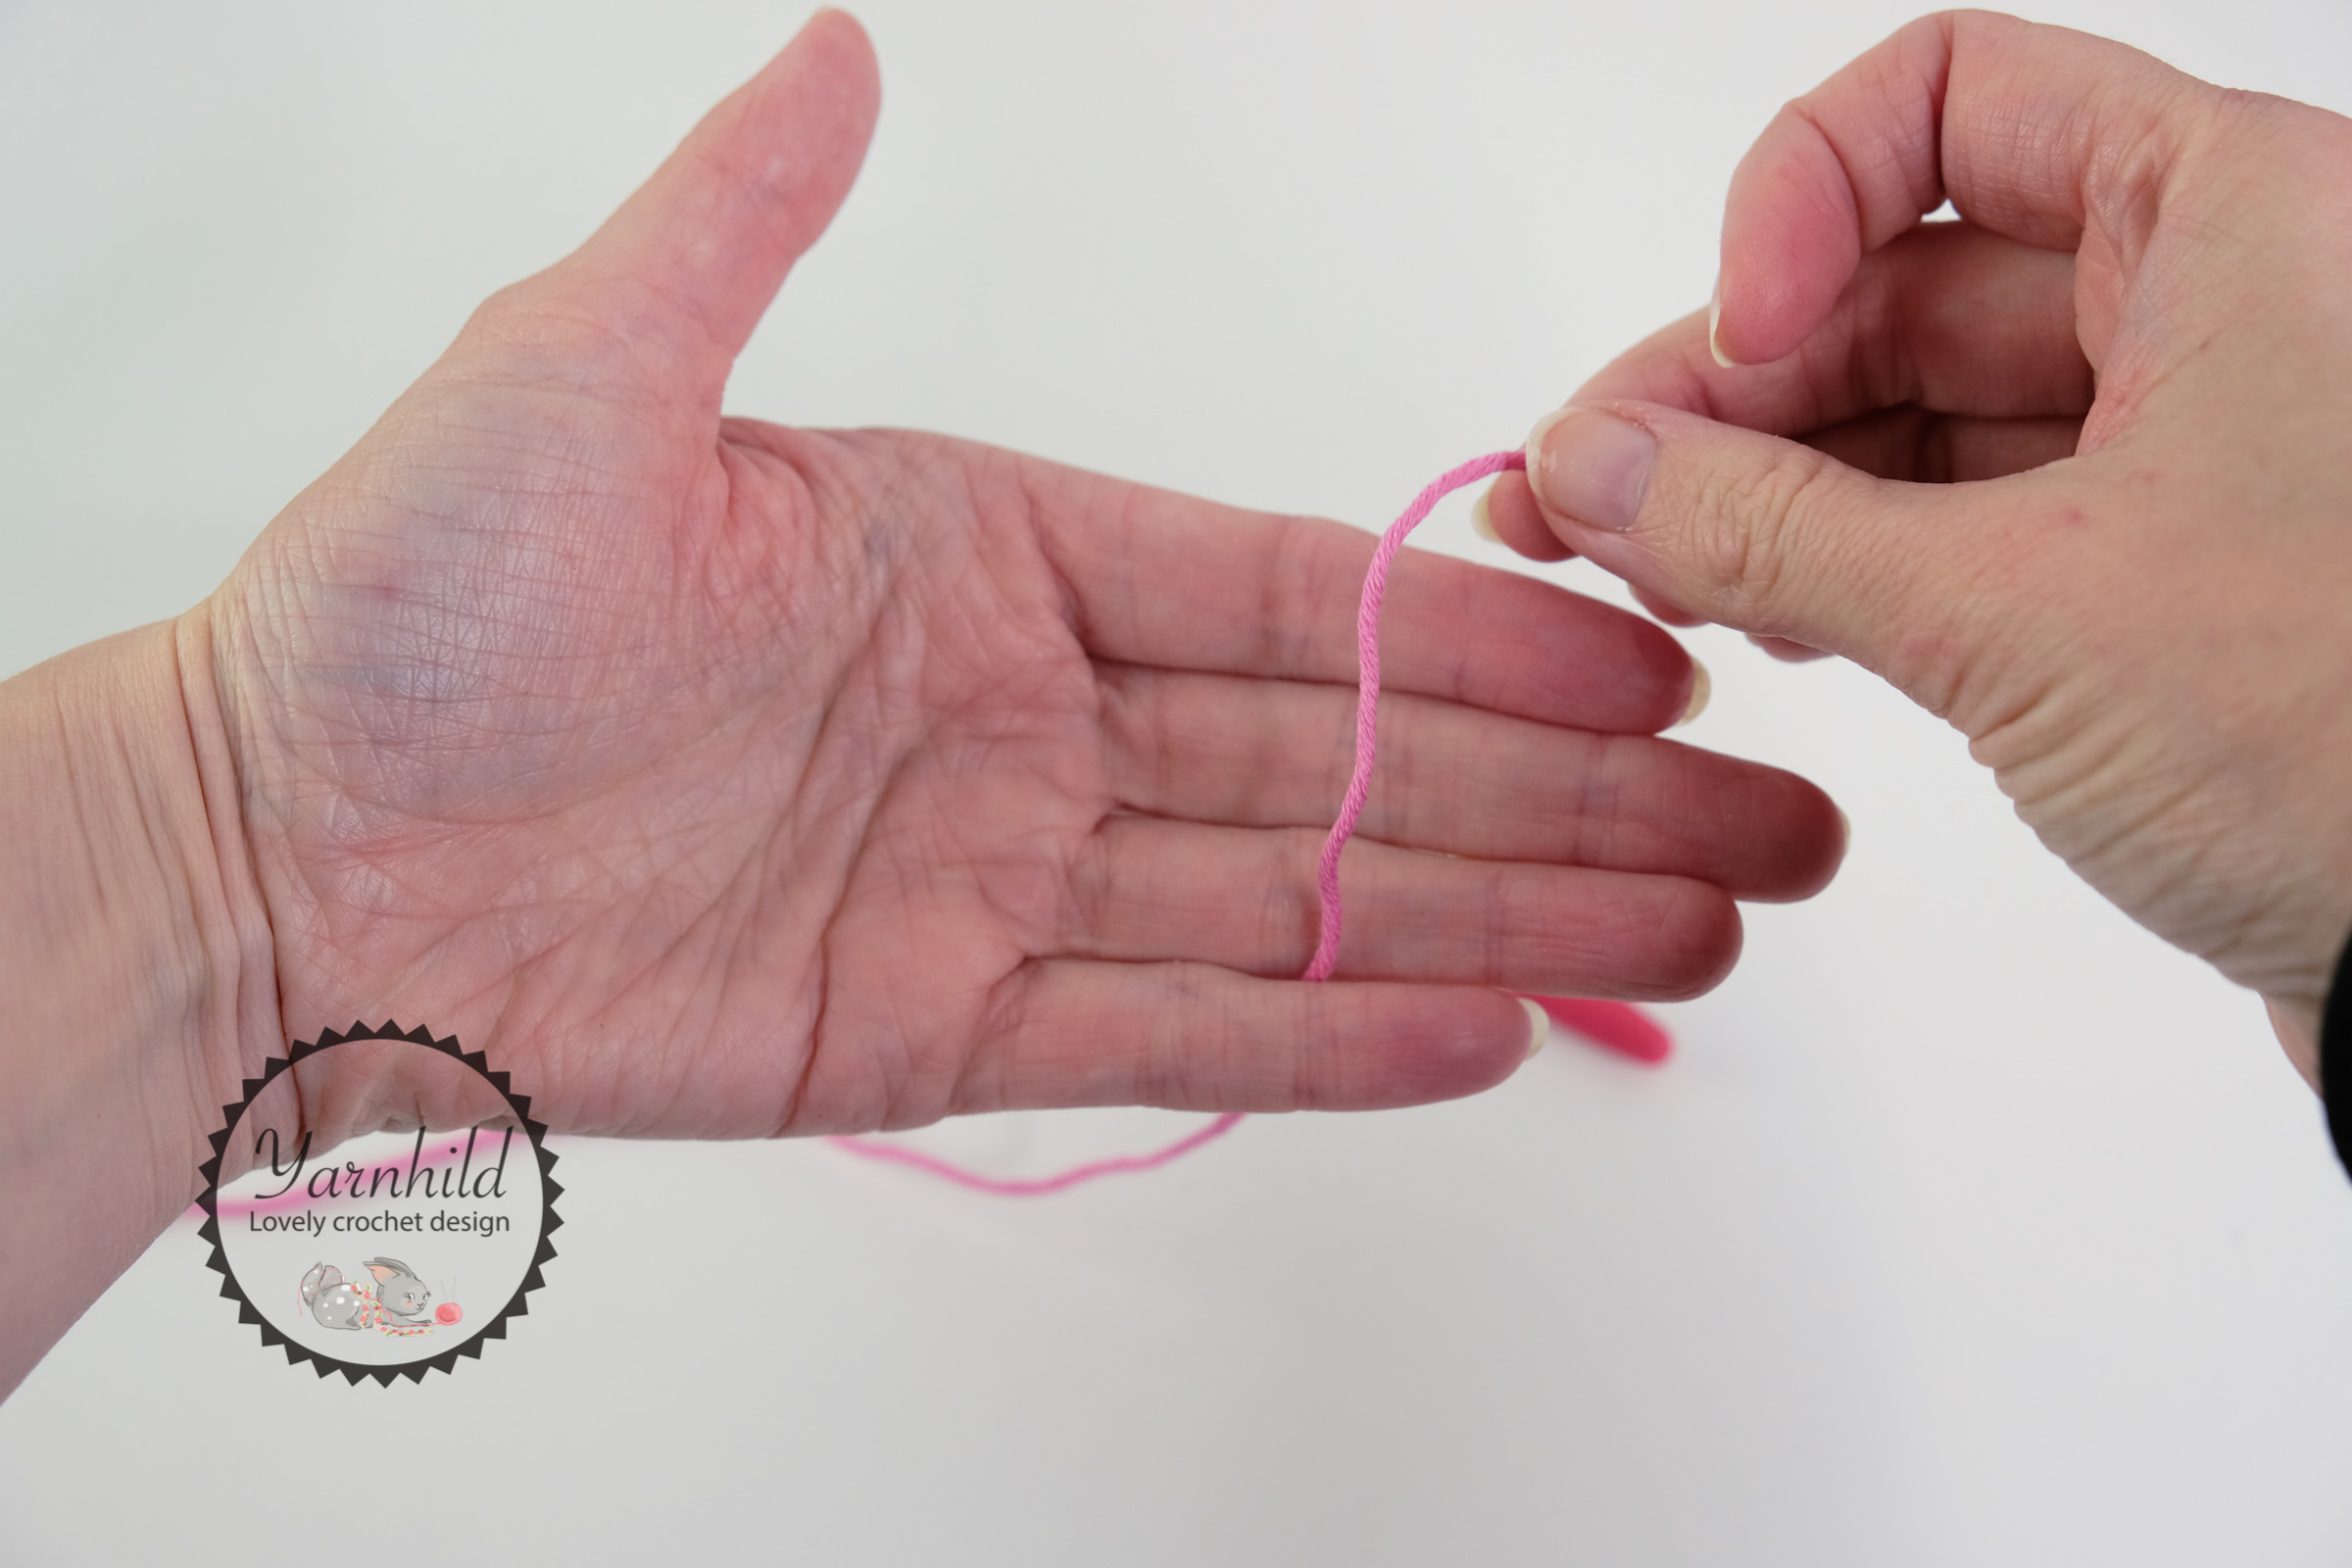
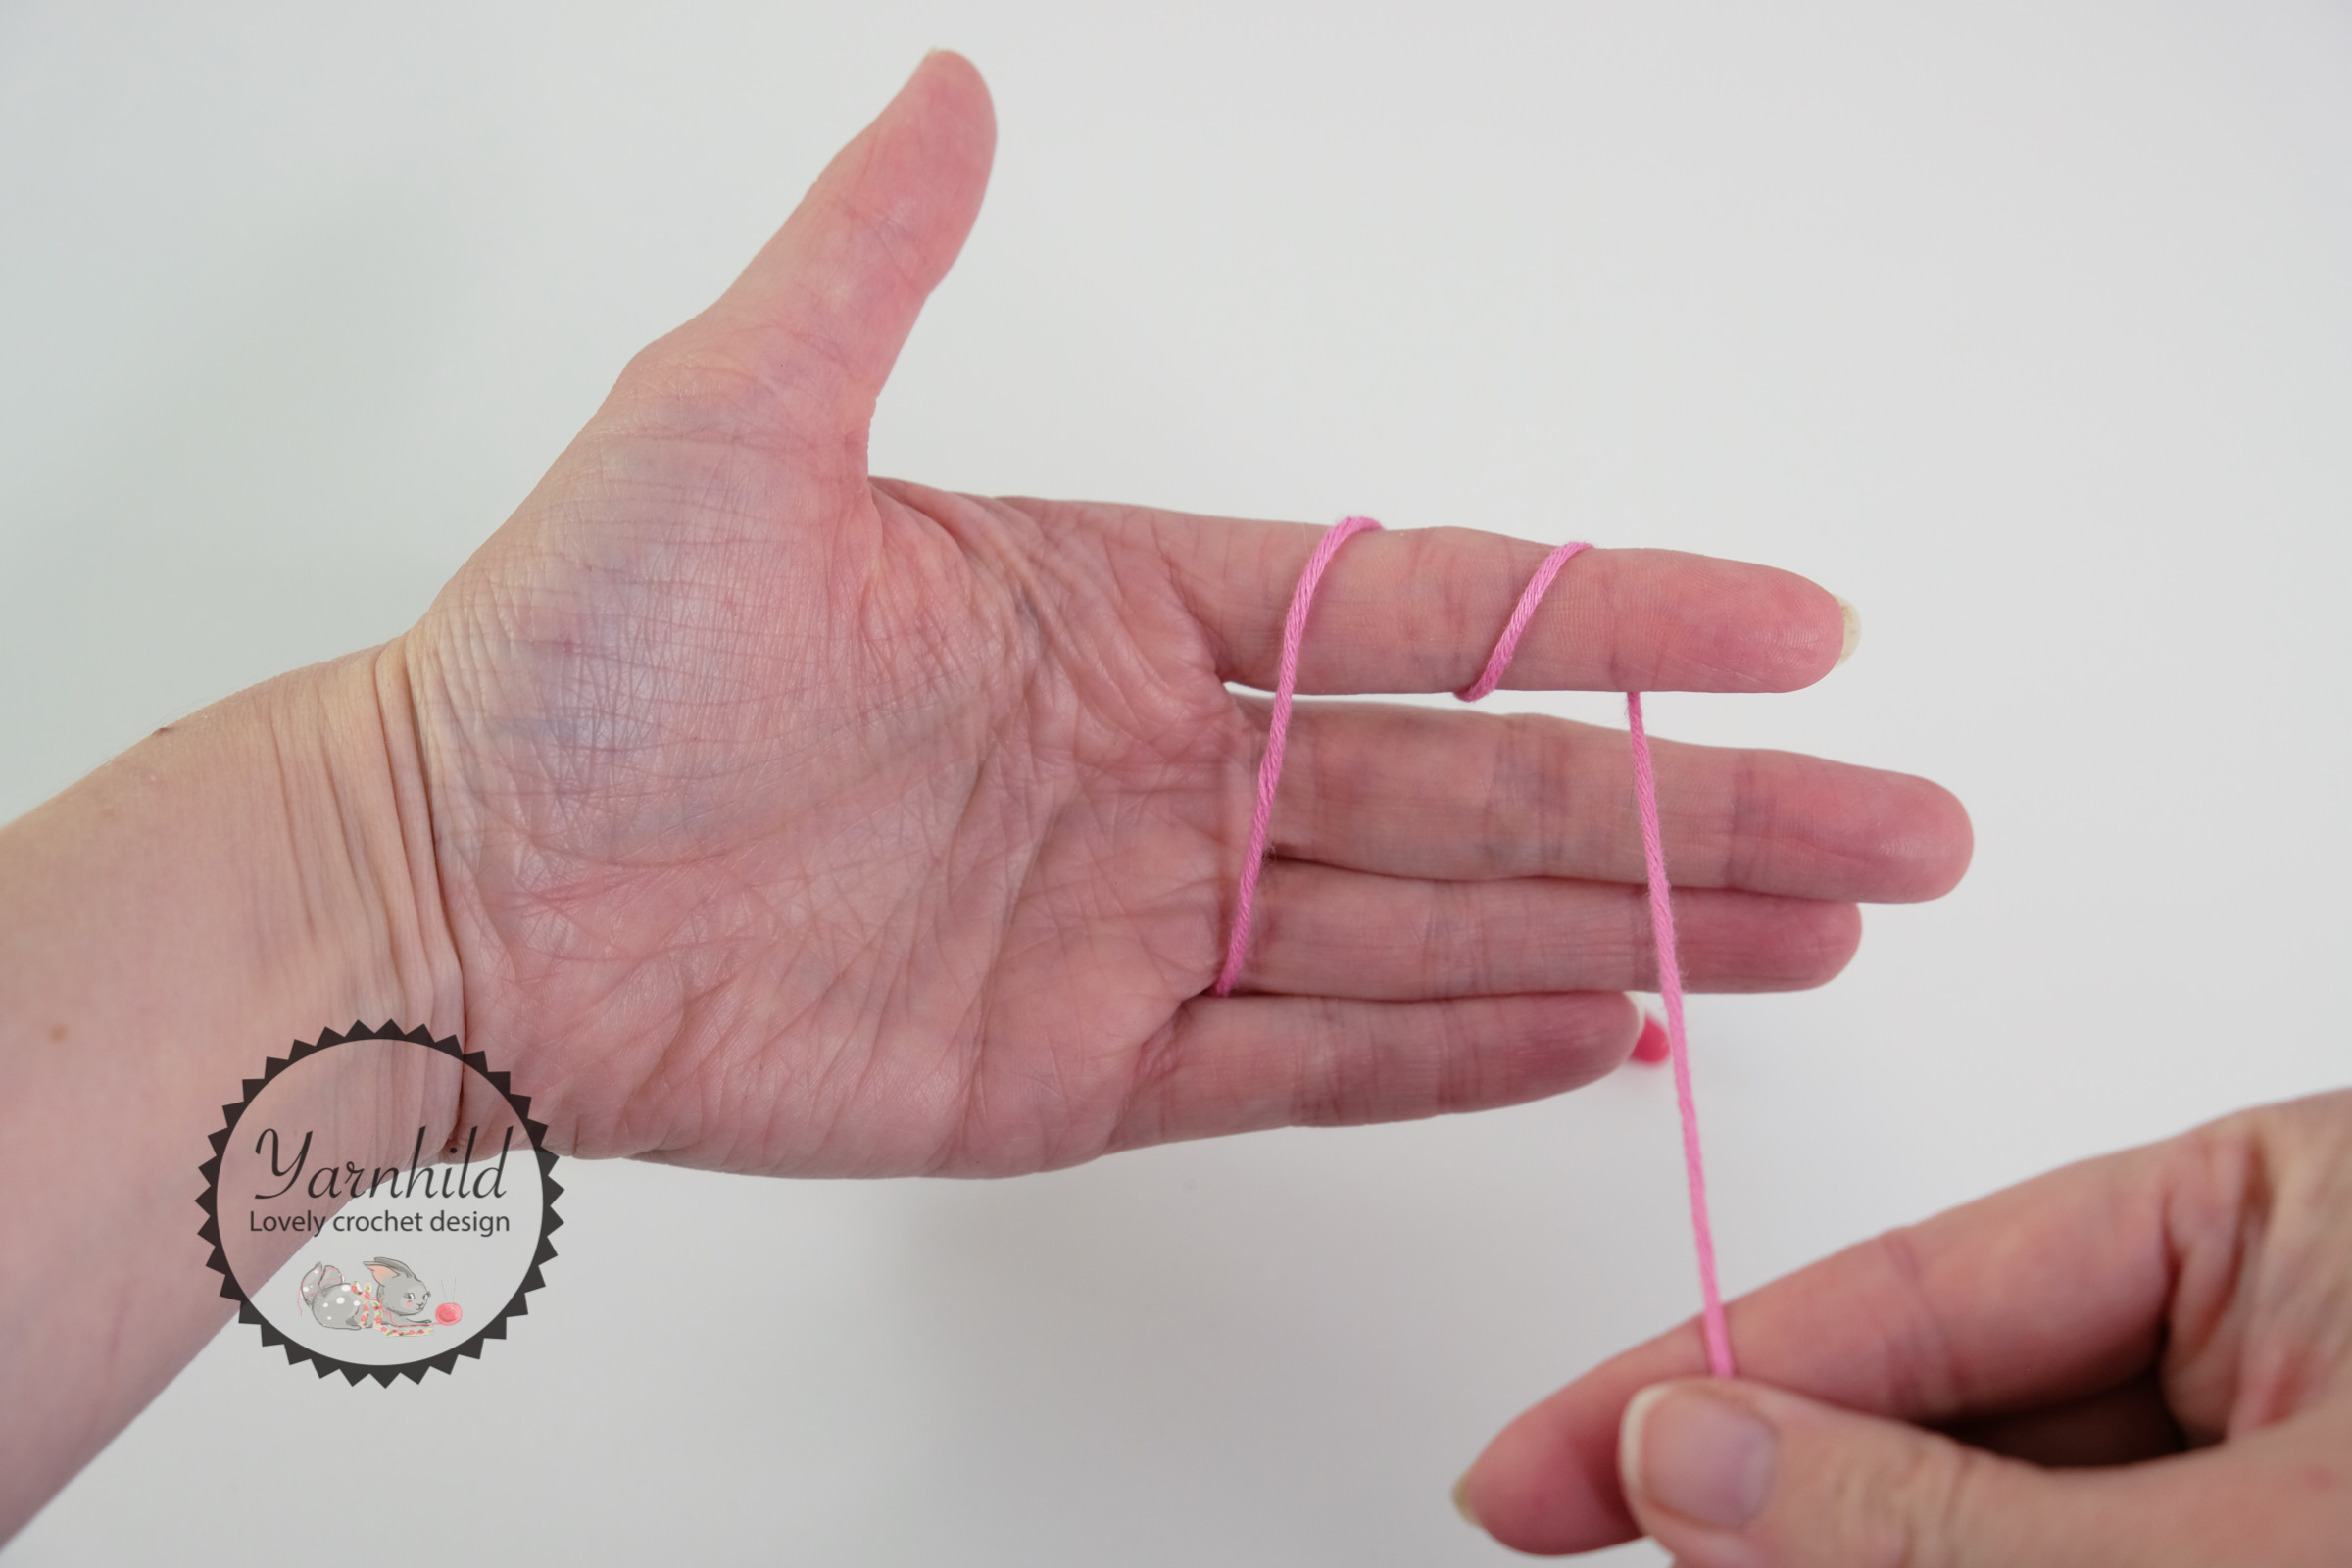
Wrap the yarn two times around your index finger..
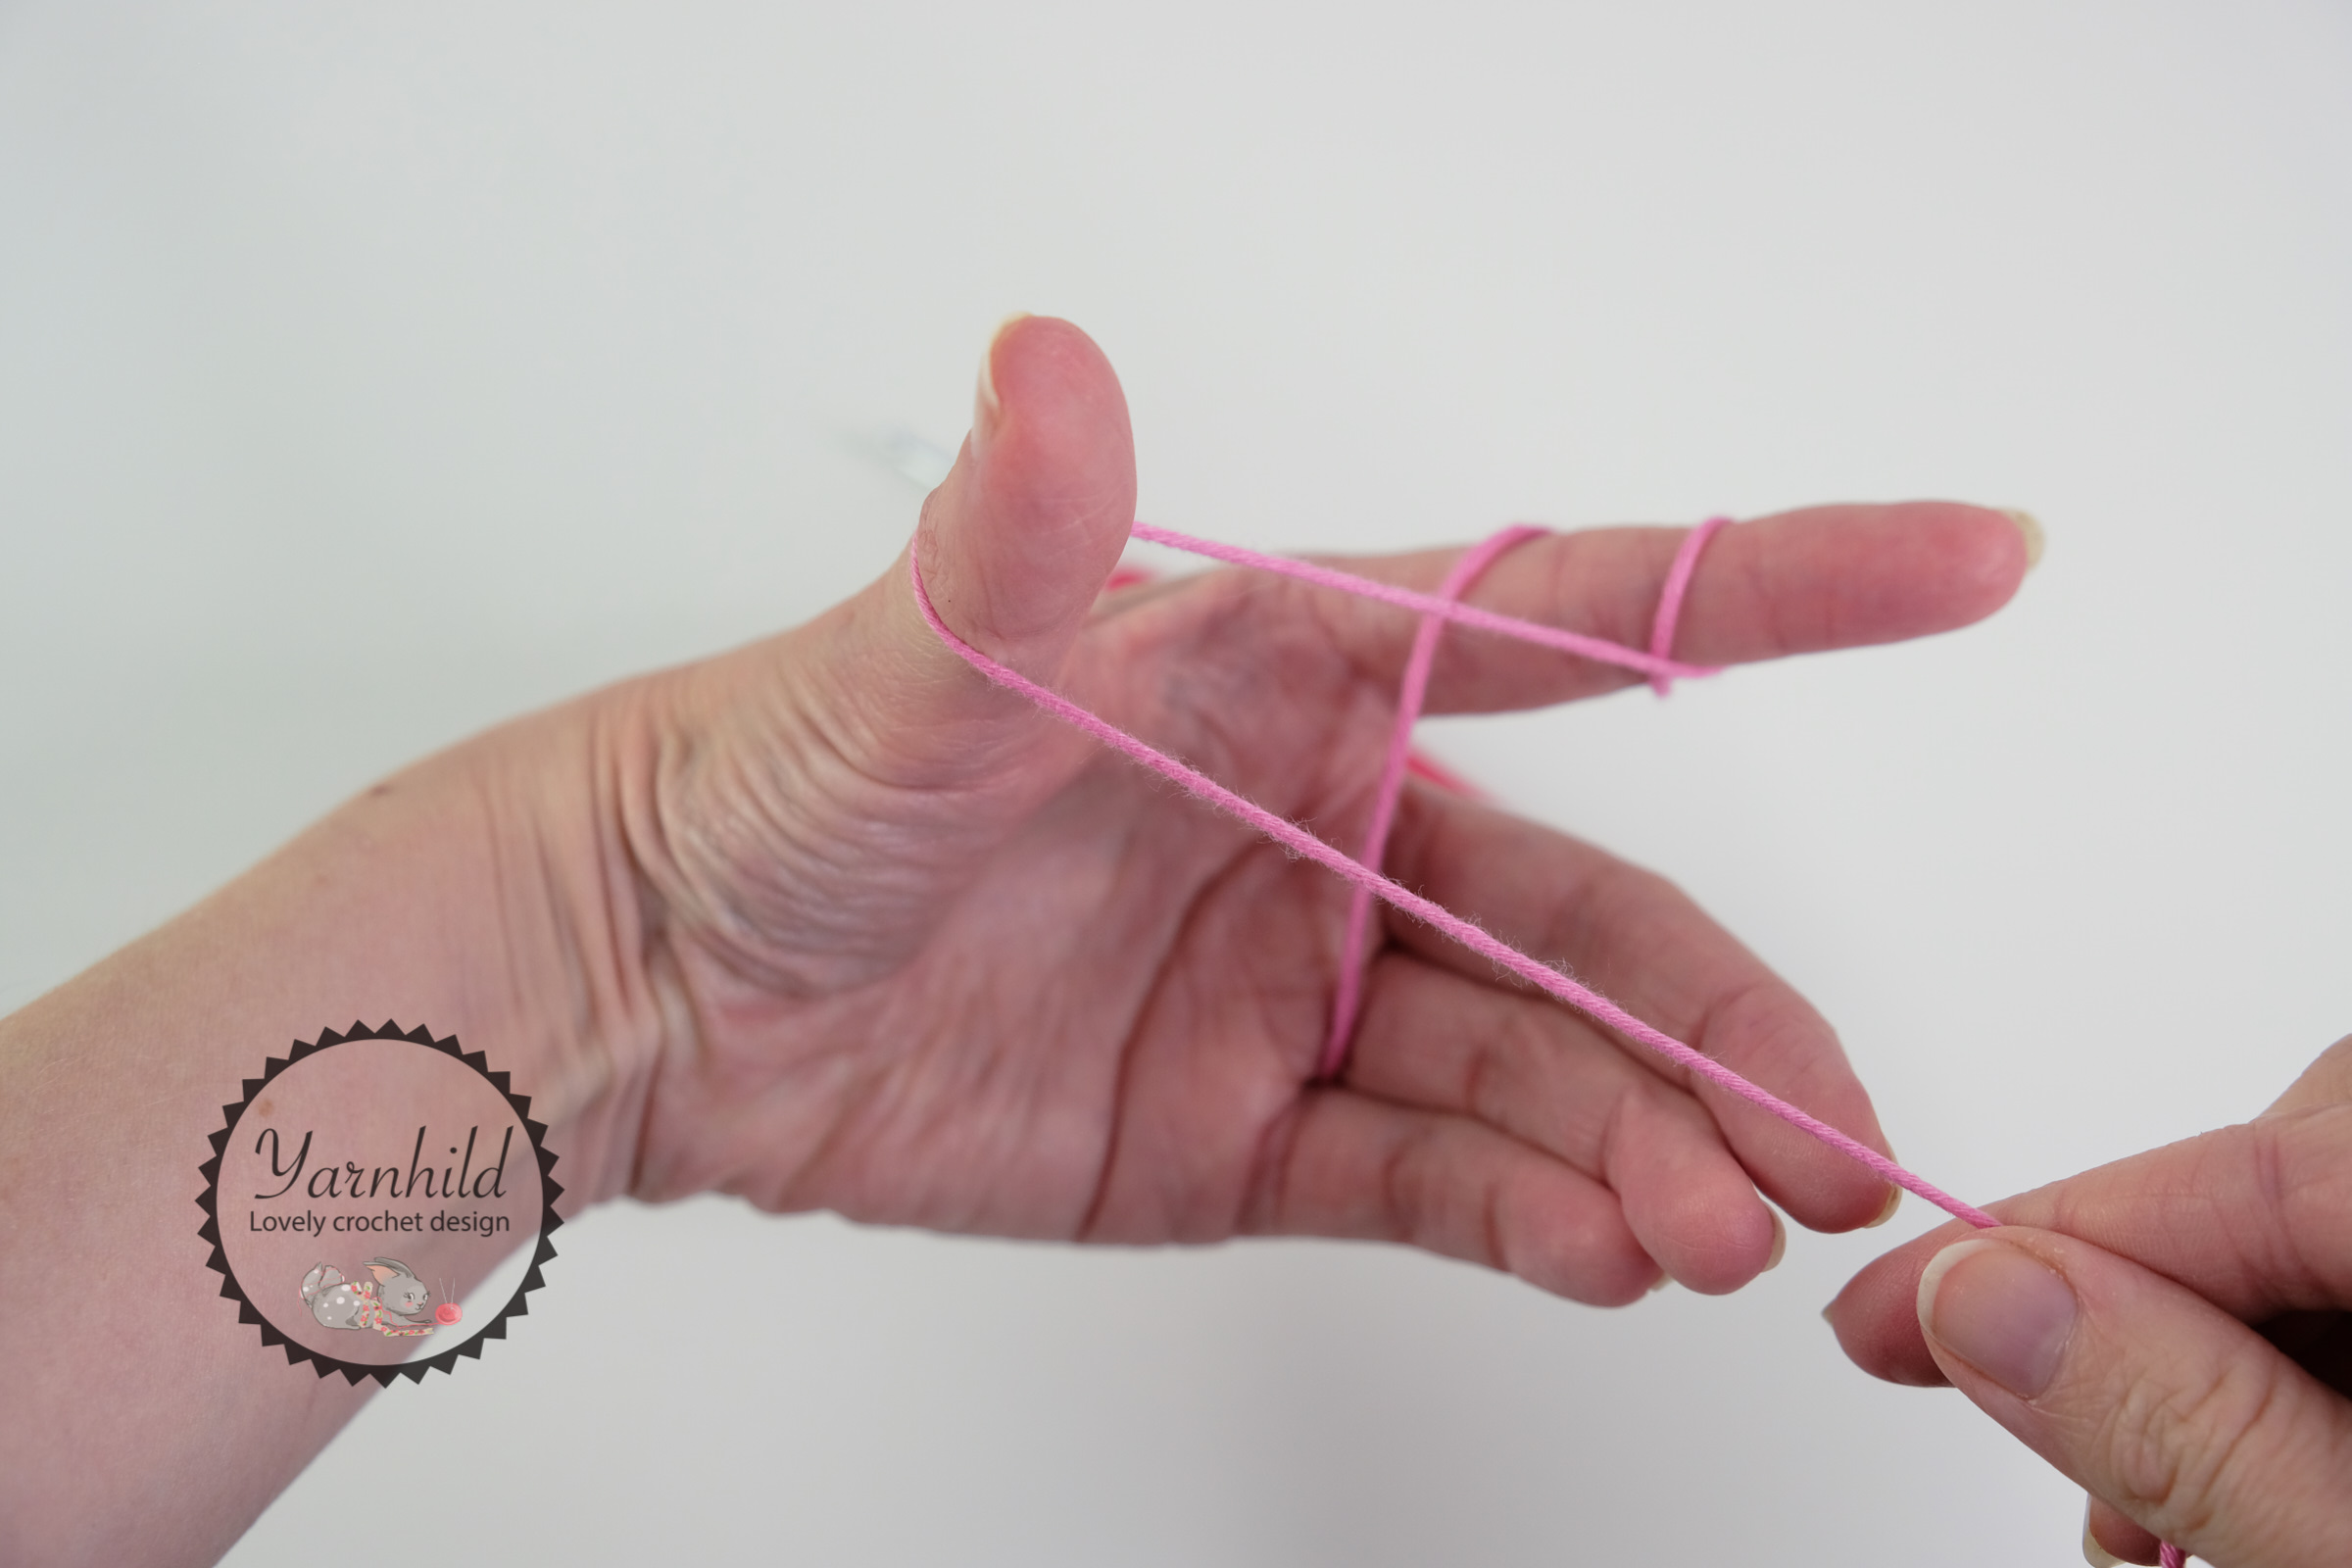
and one time around your thumb.
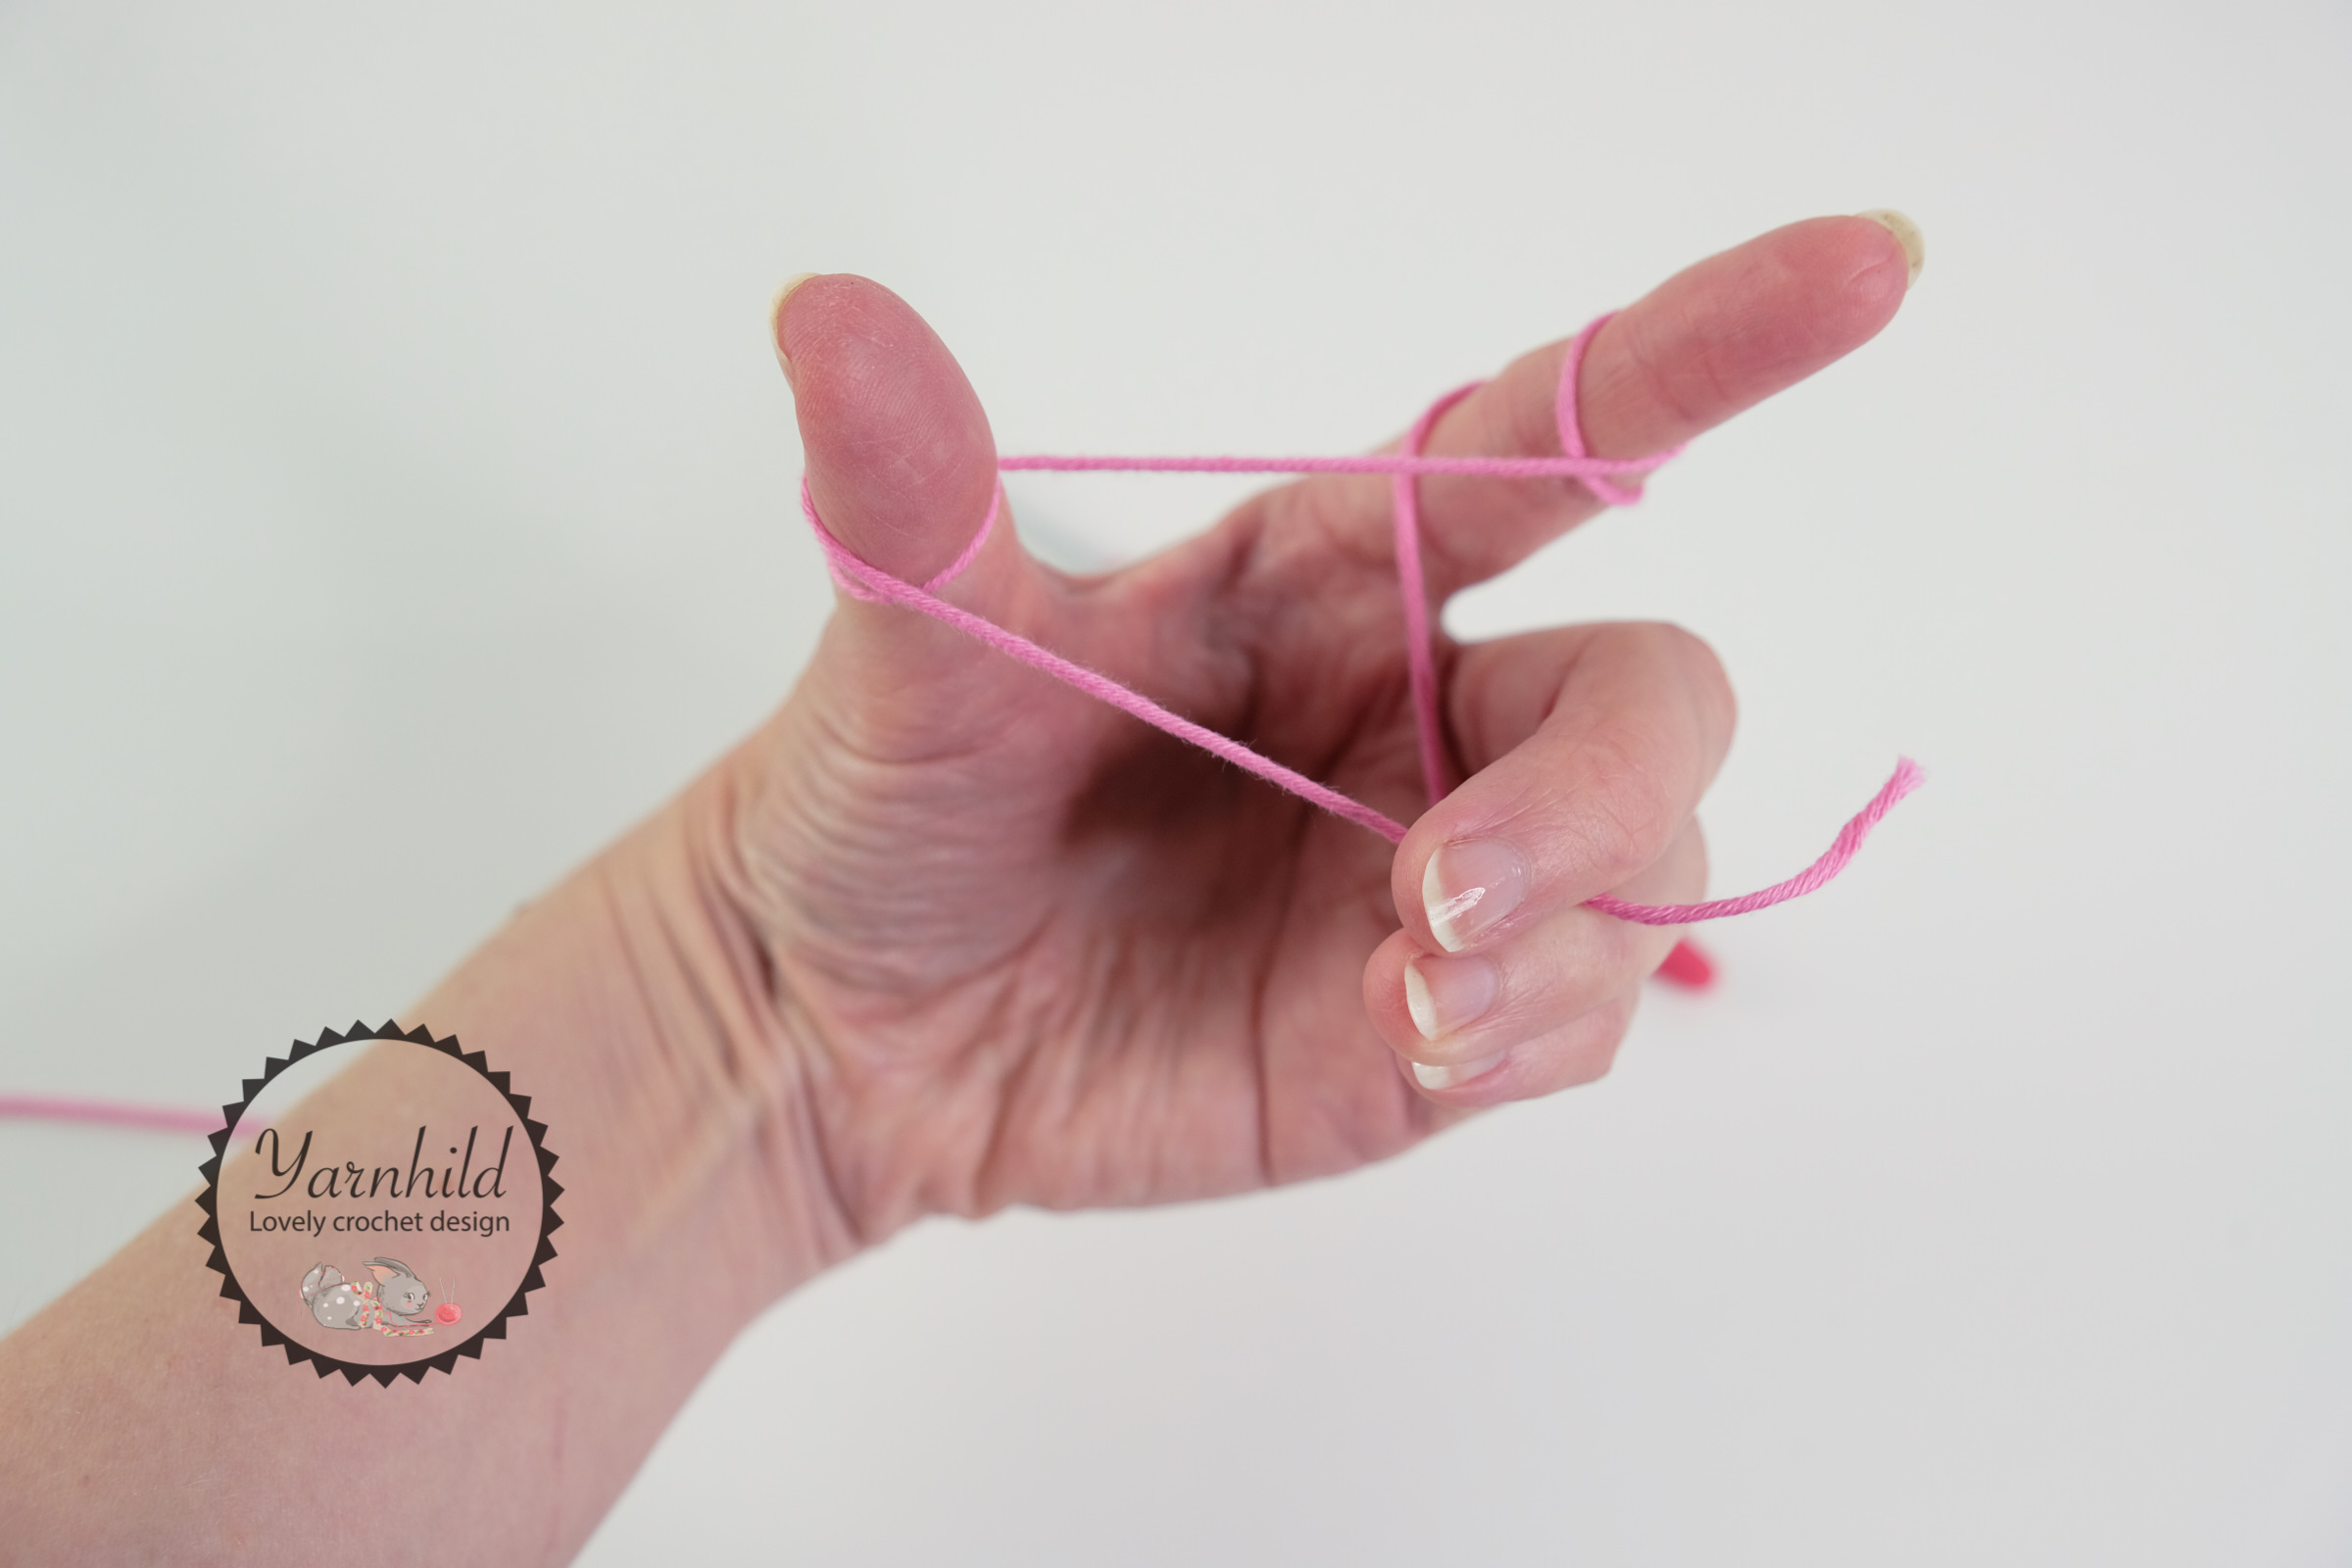
Insert the hook between the thumb and the yarn.
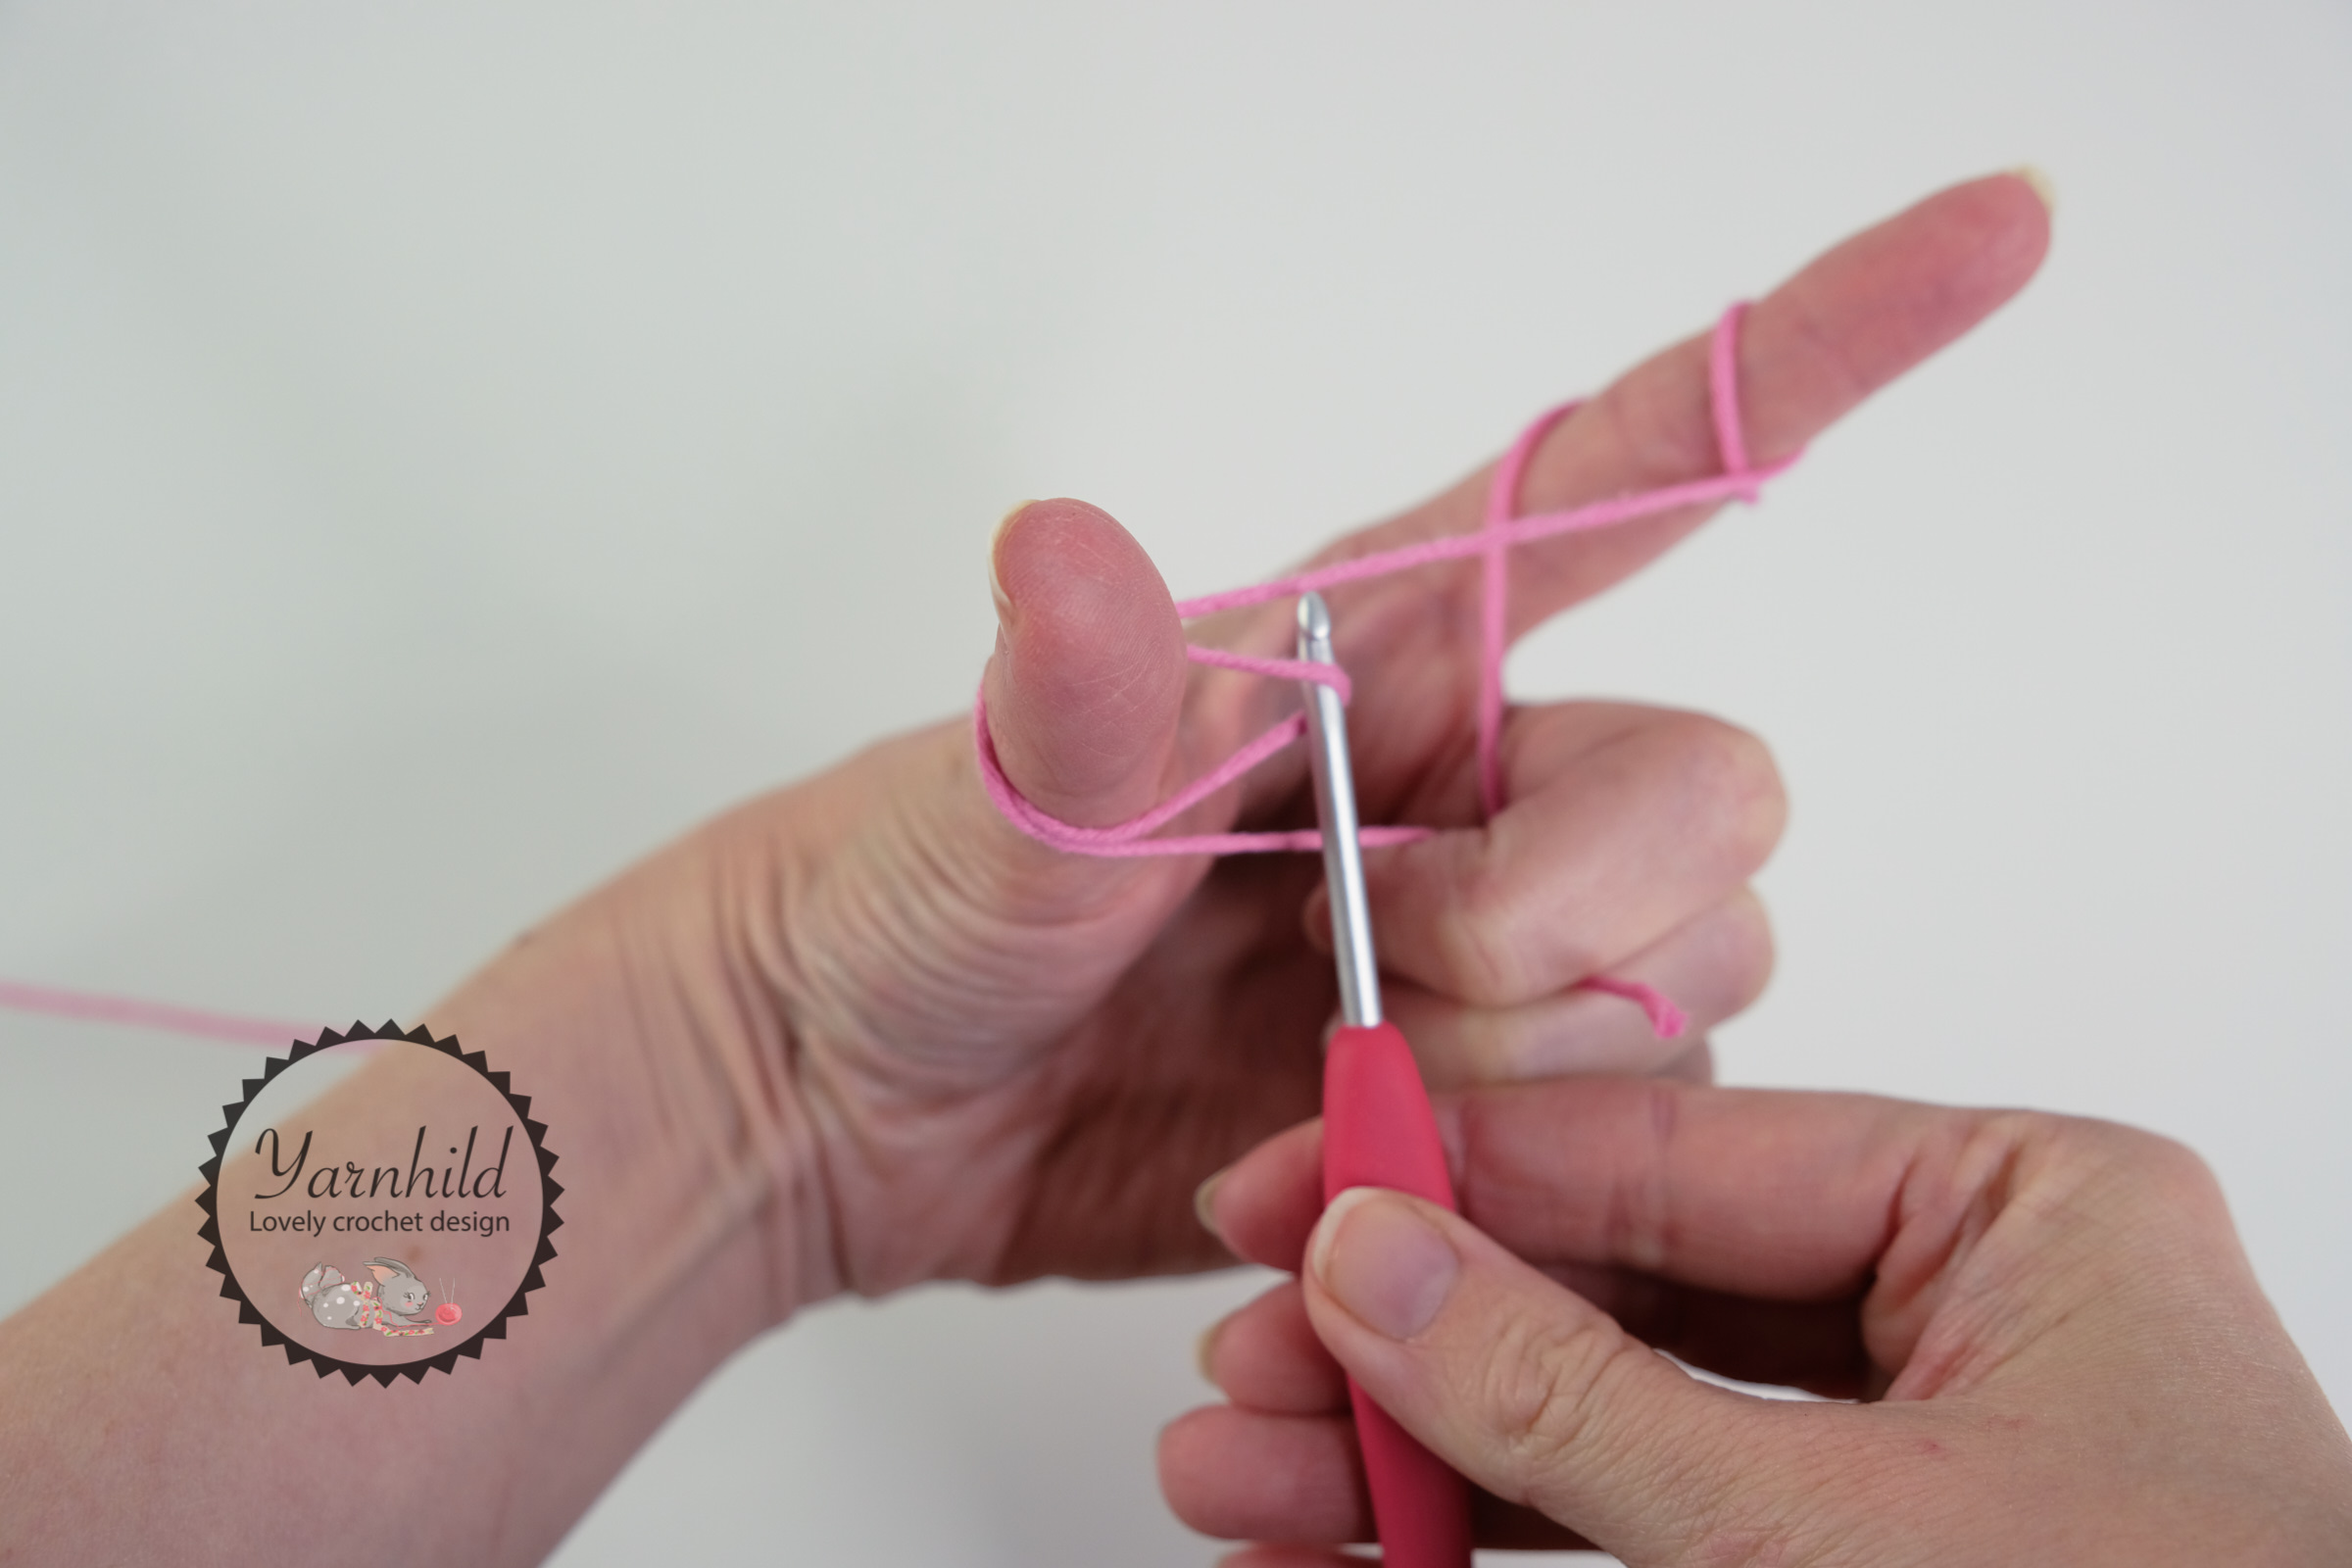
Now grab the strand between your finger and thumb and pull through.
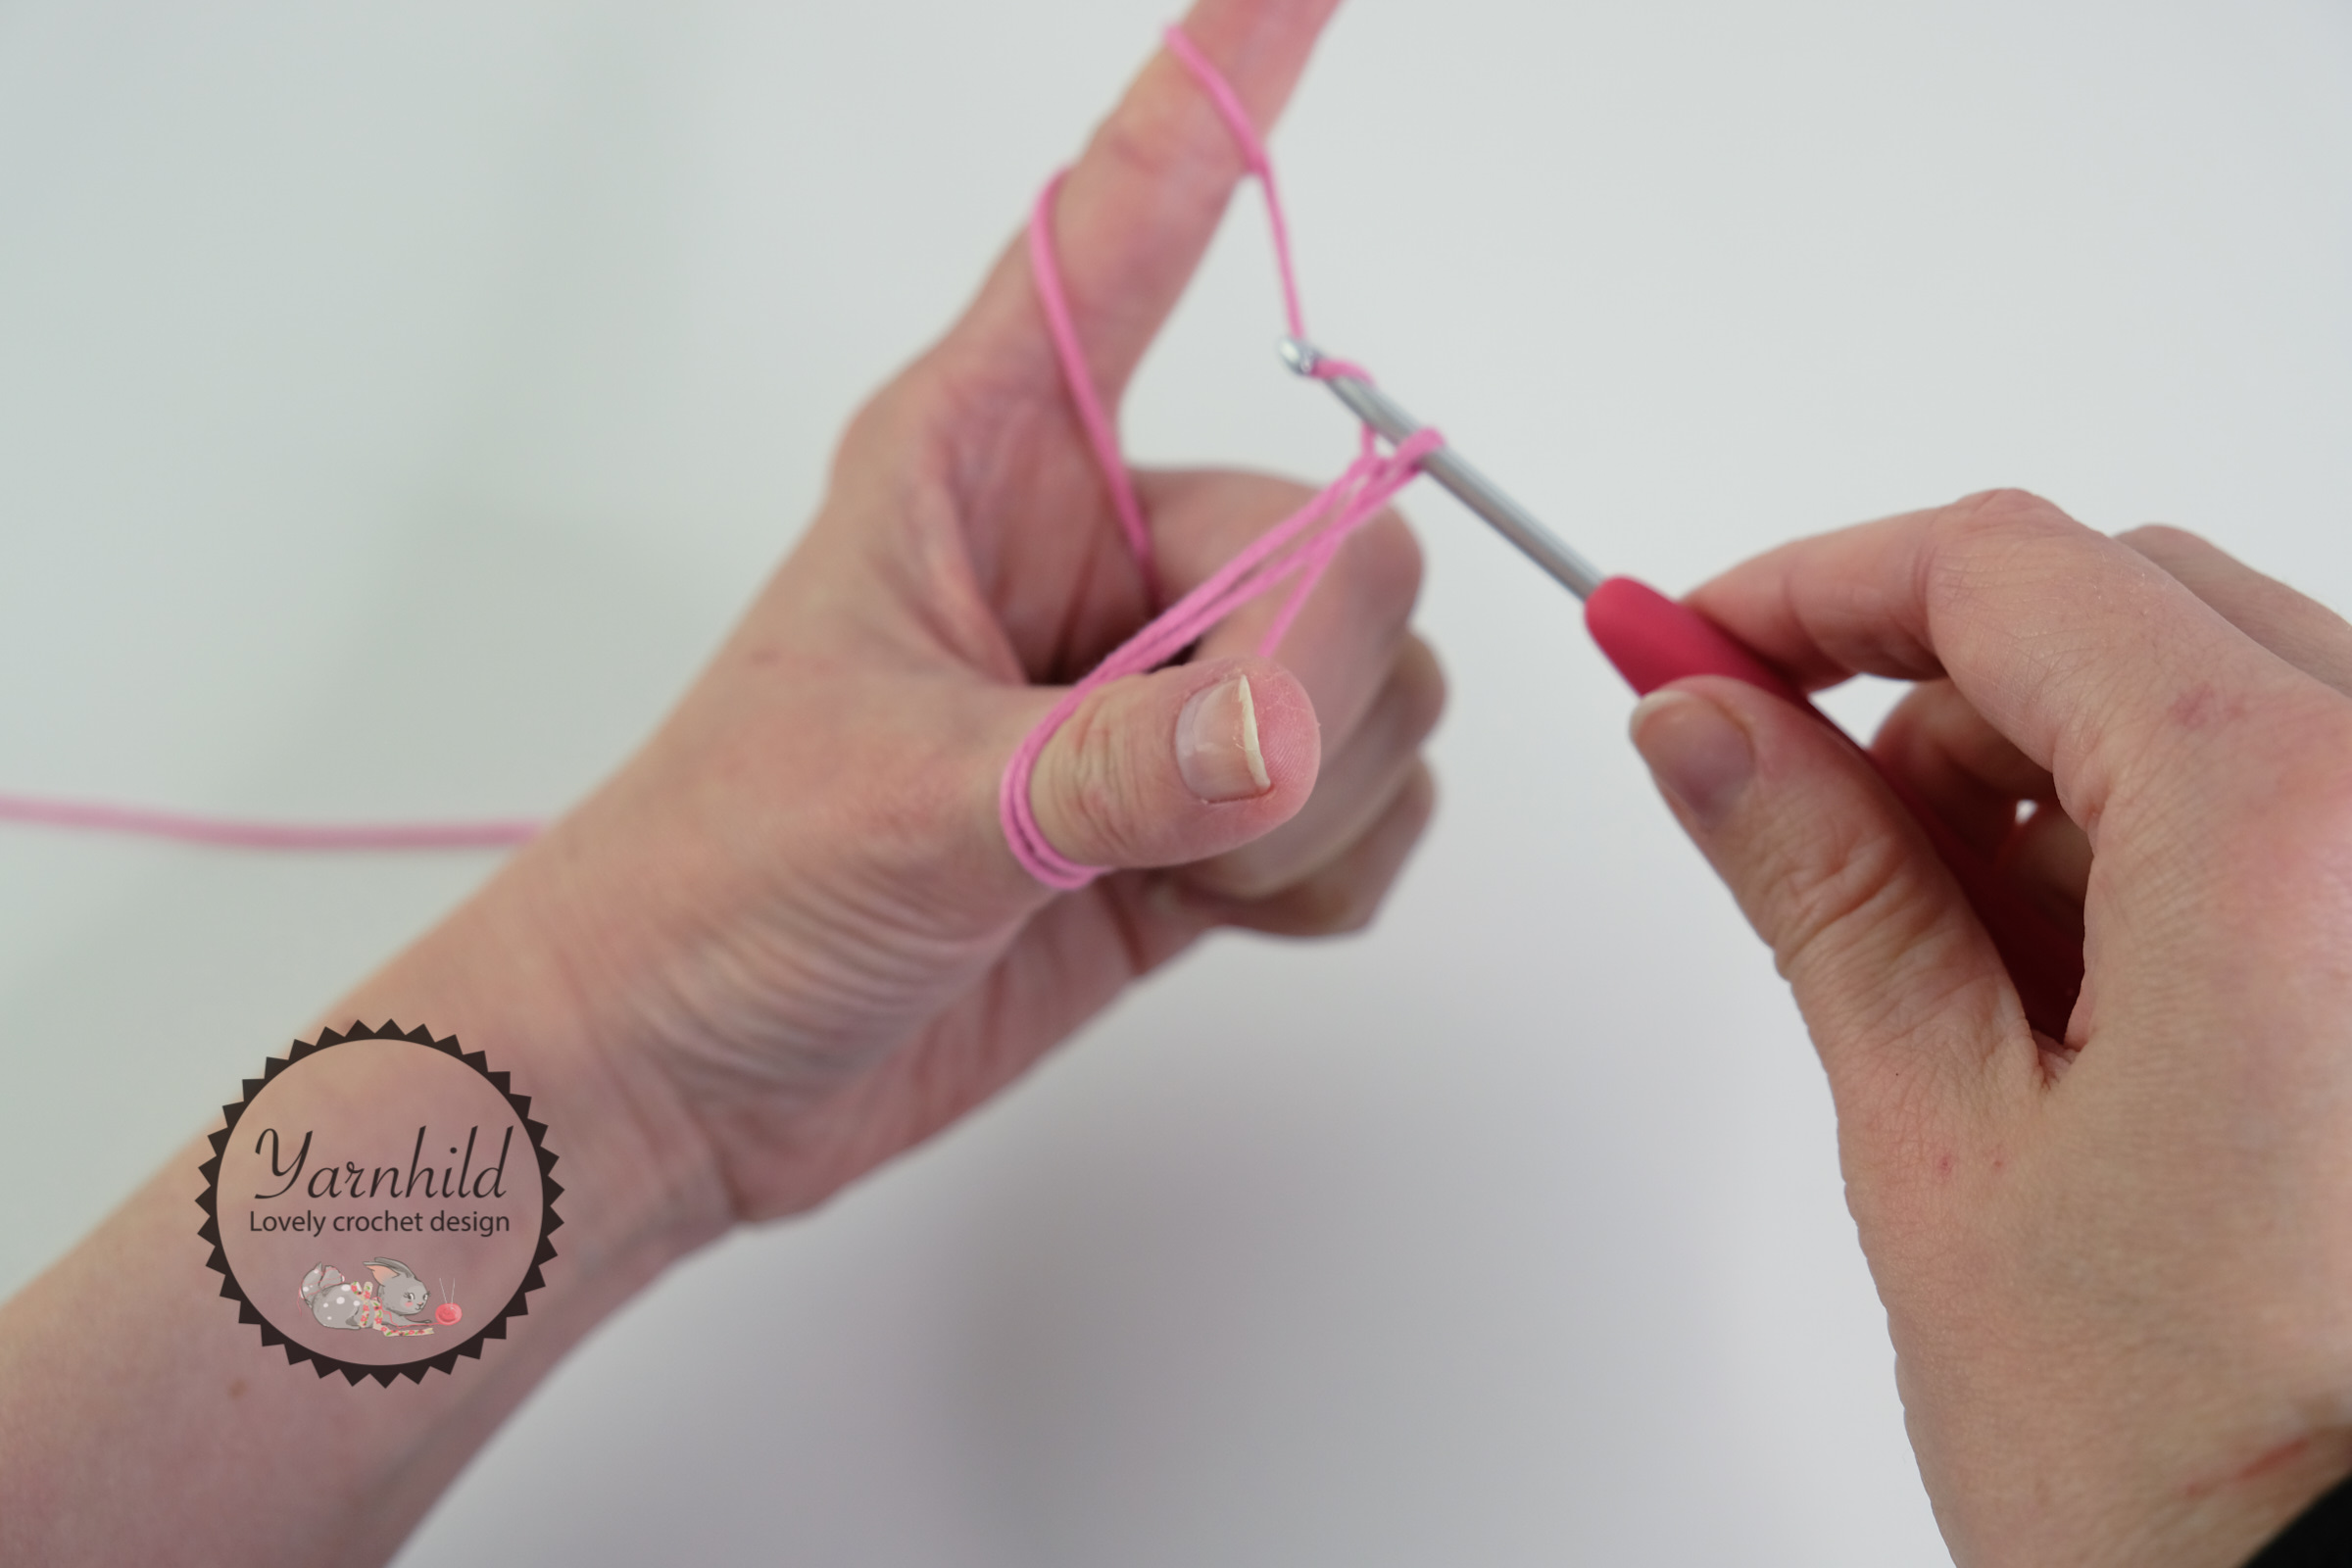
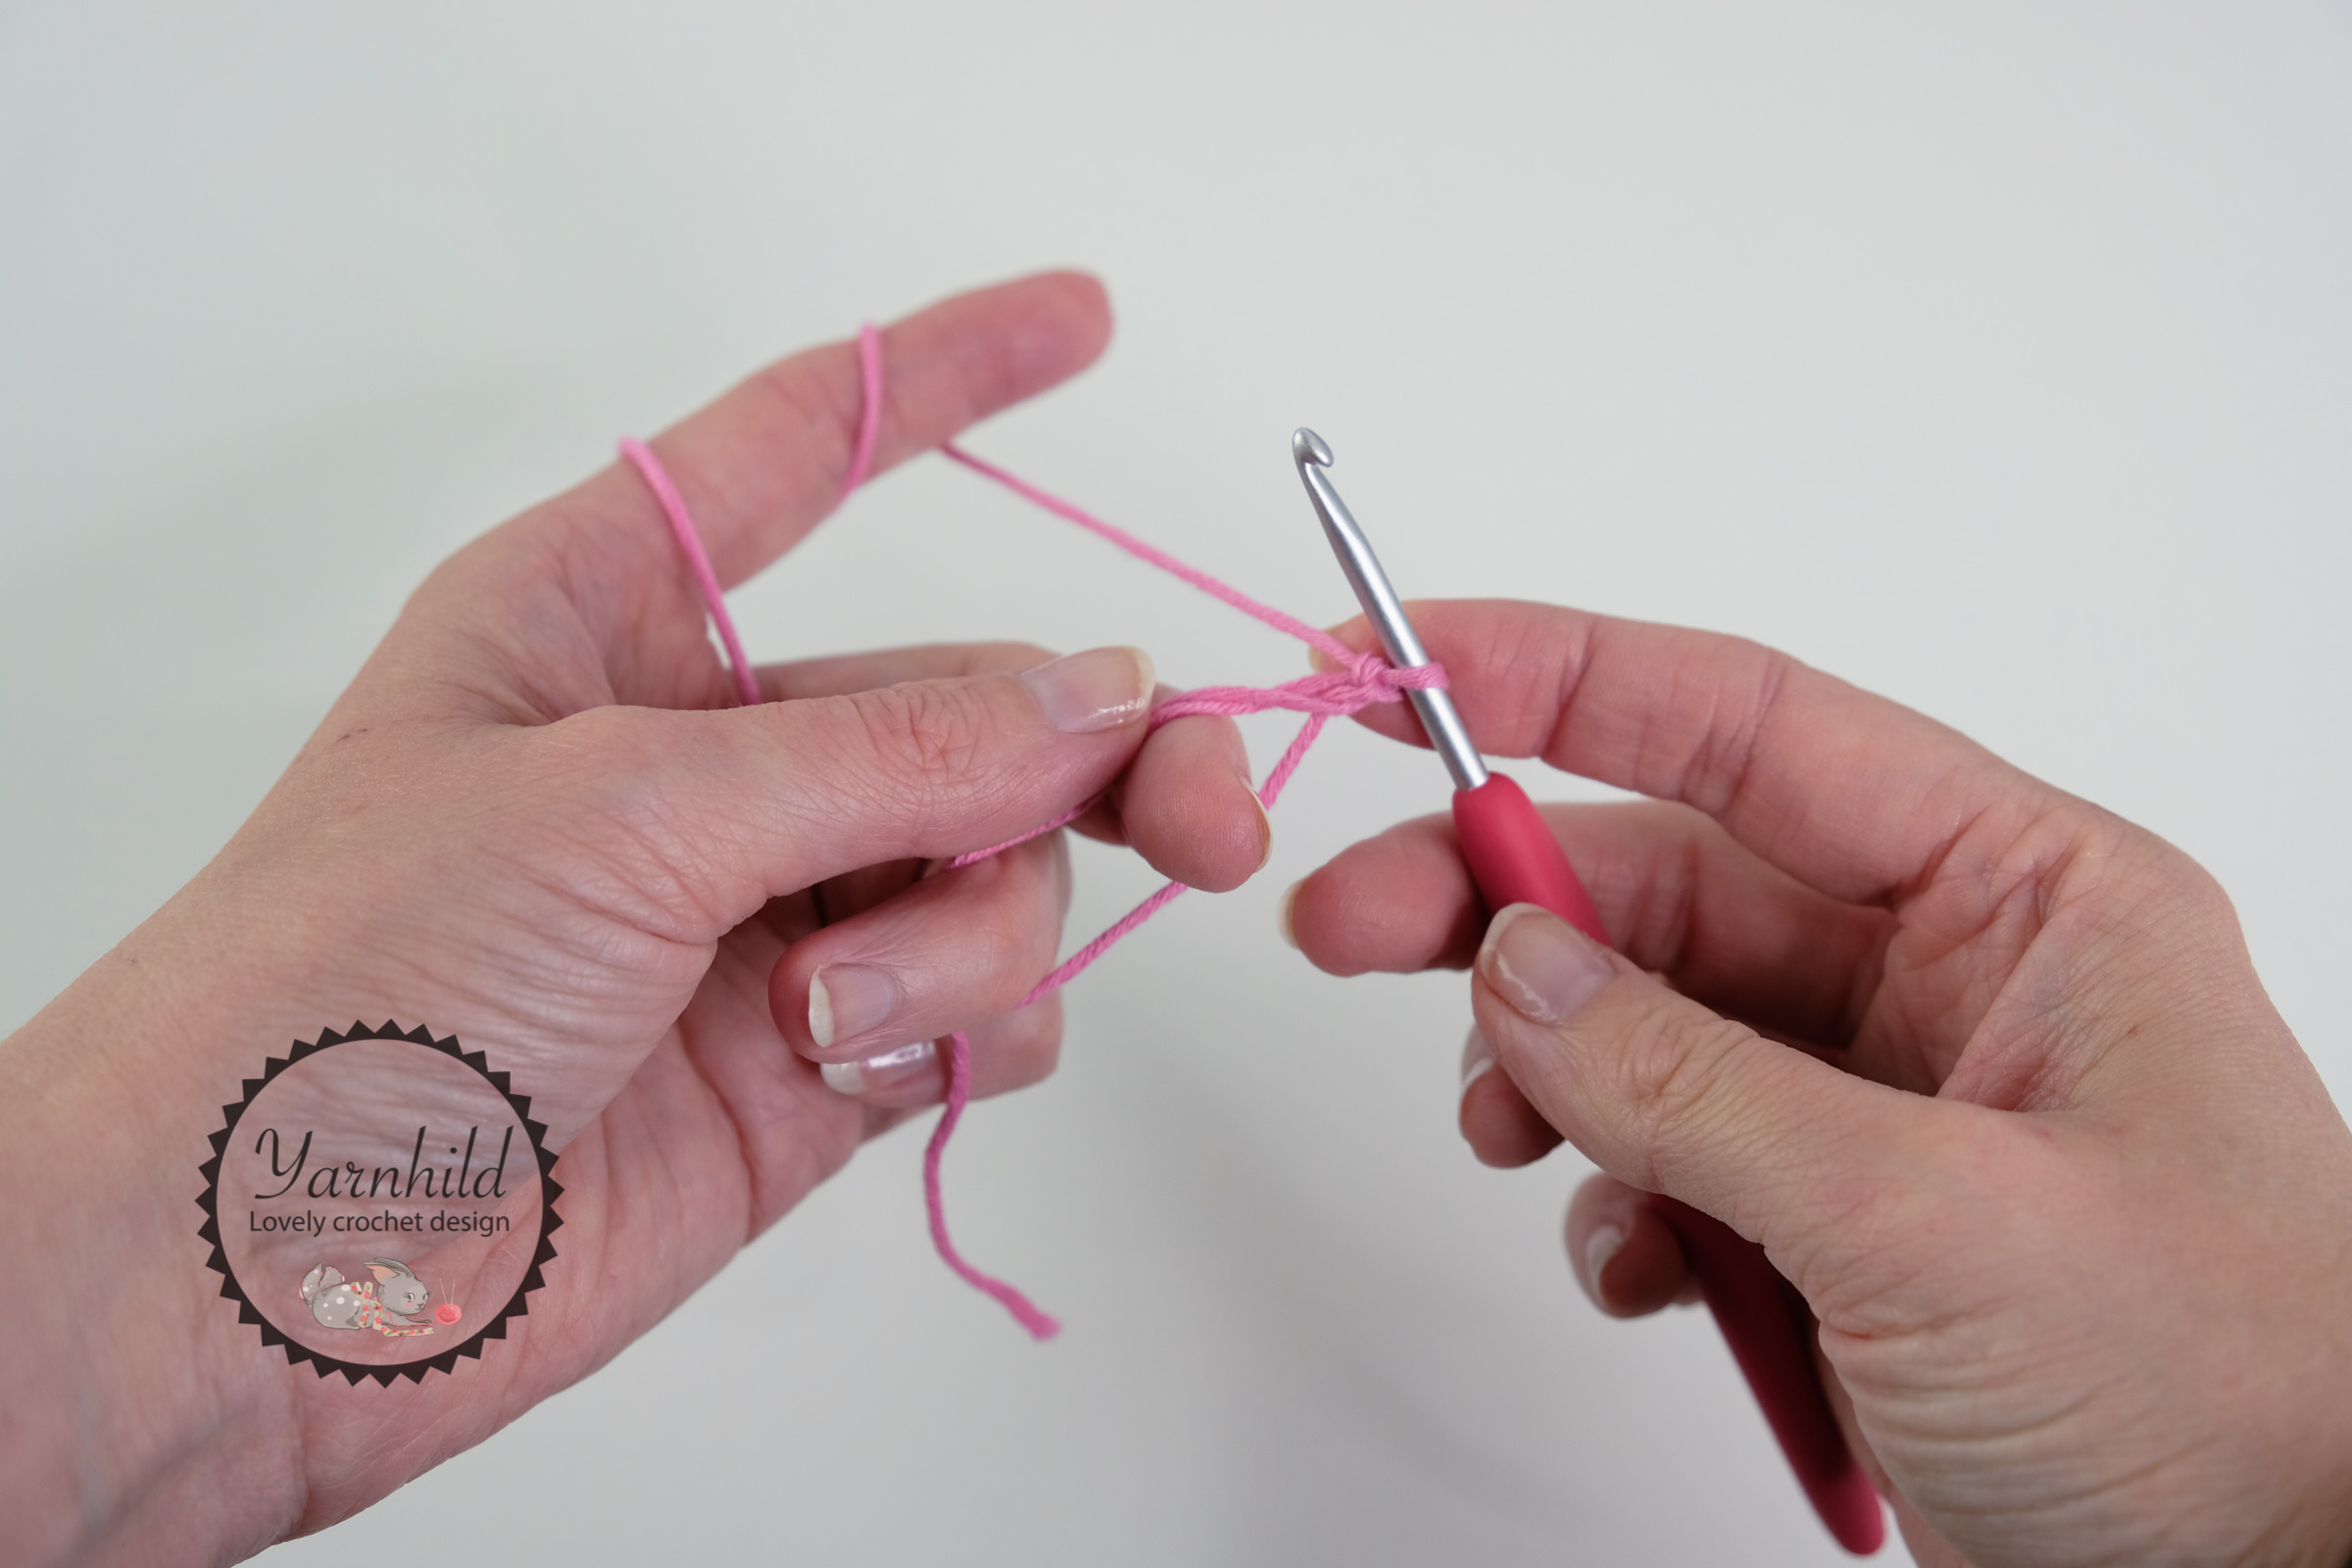
Chain 1.
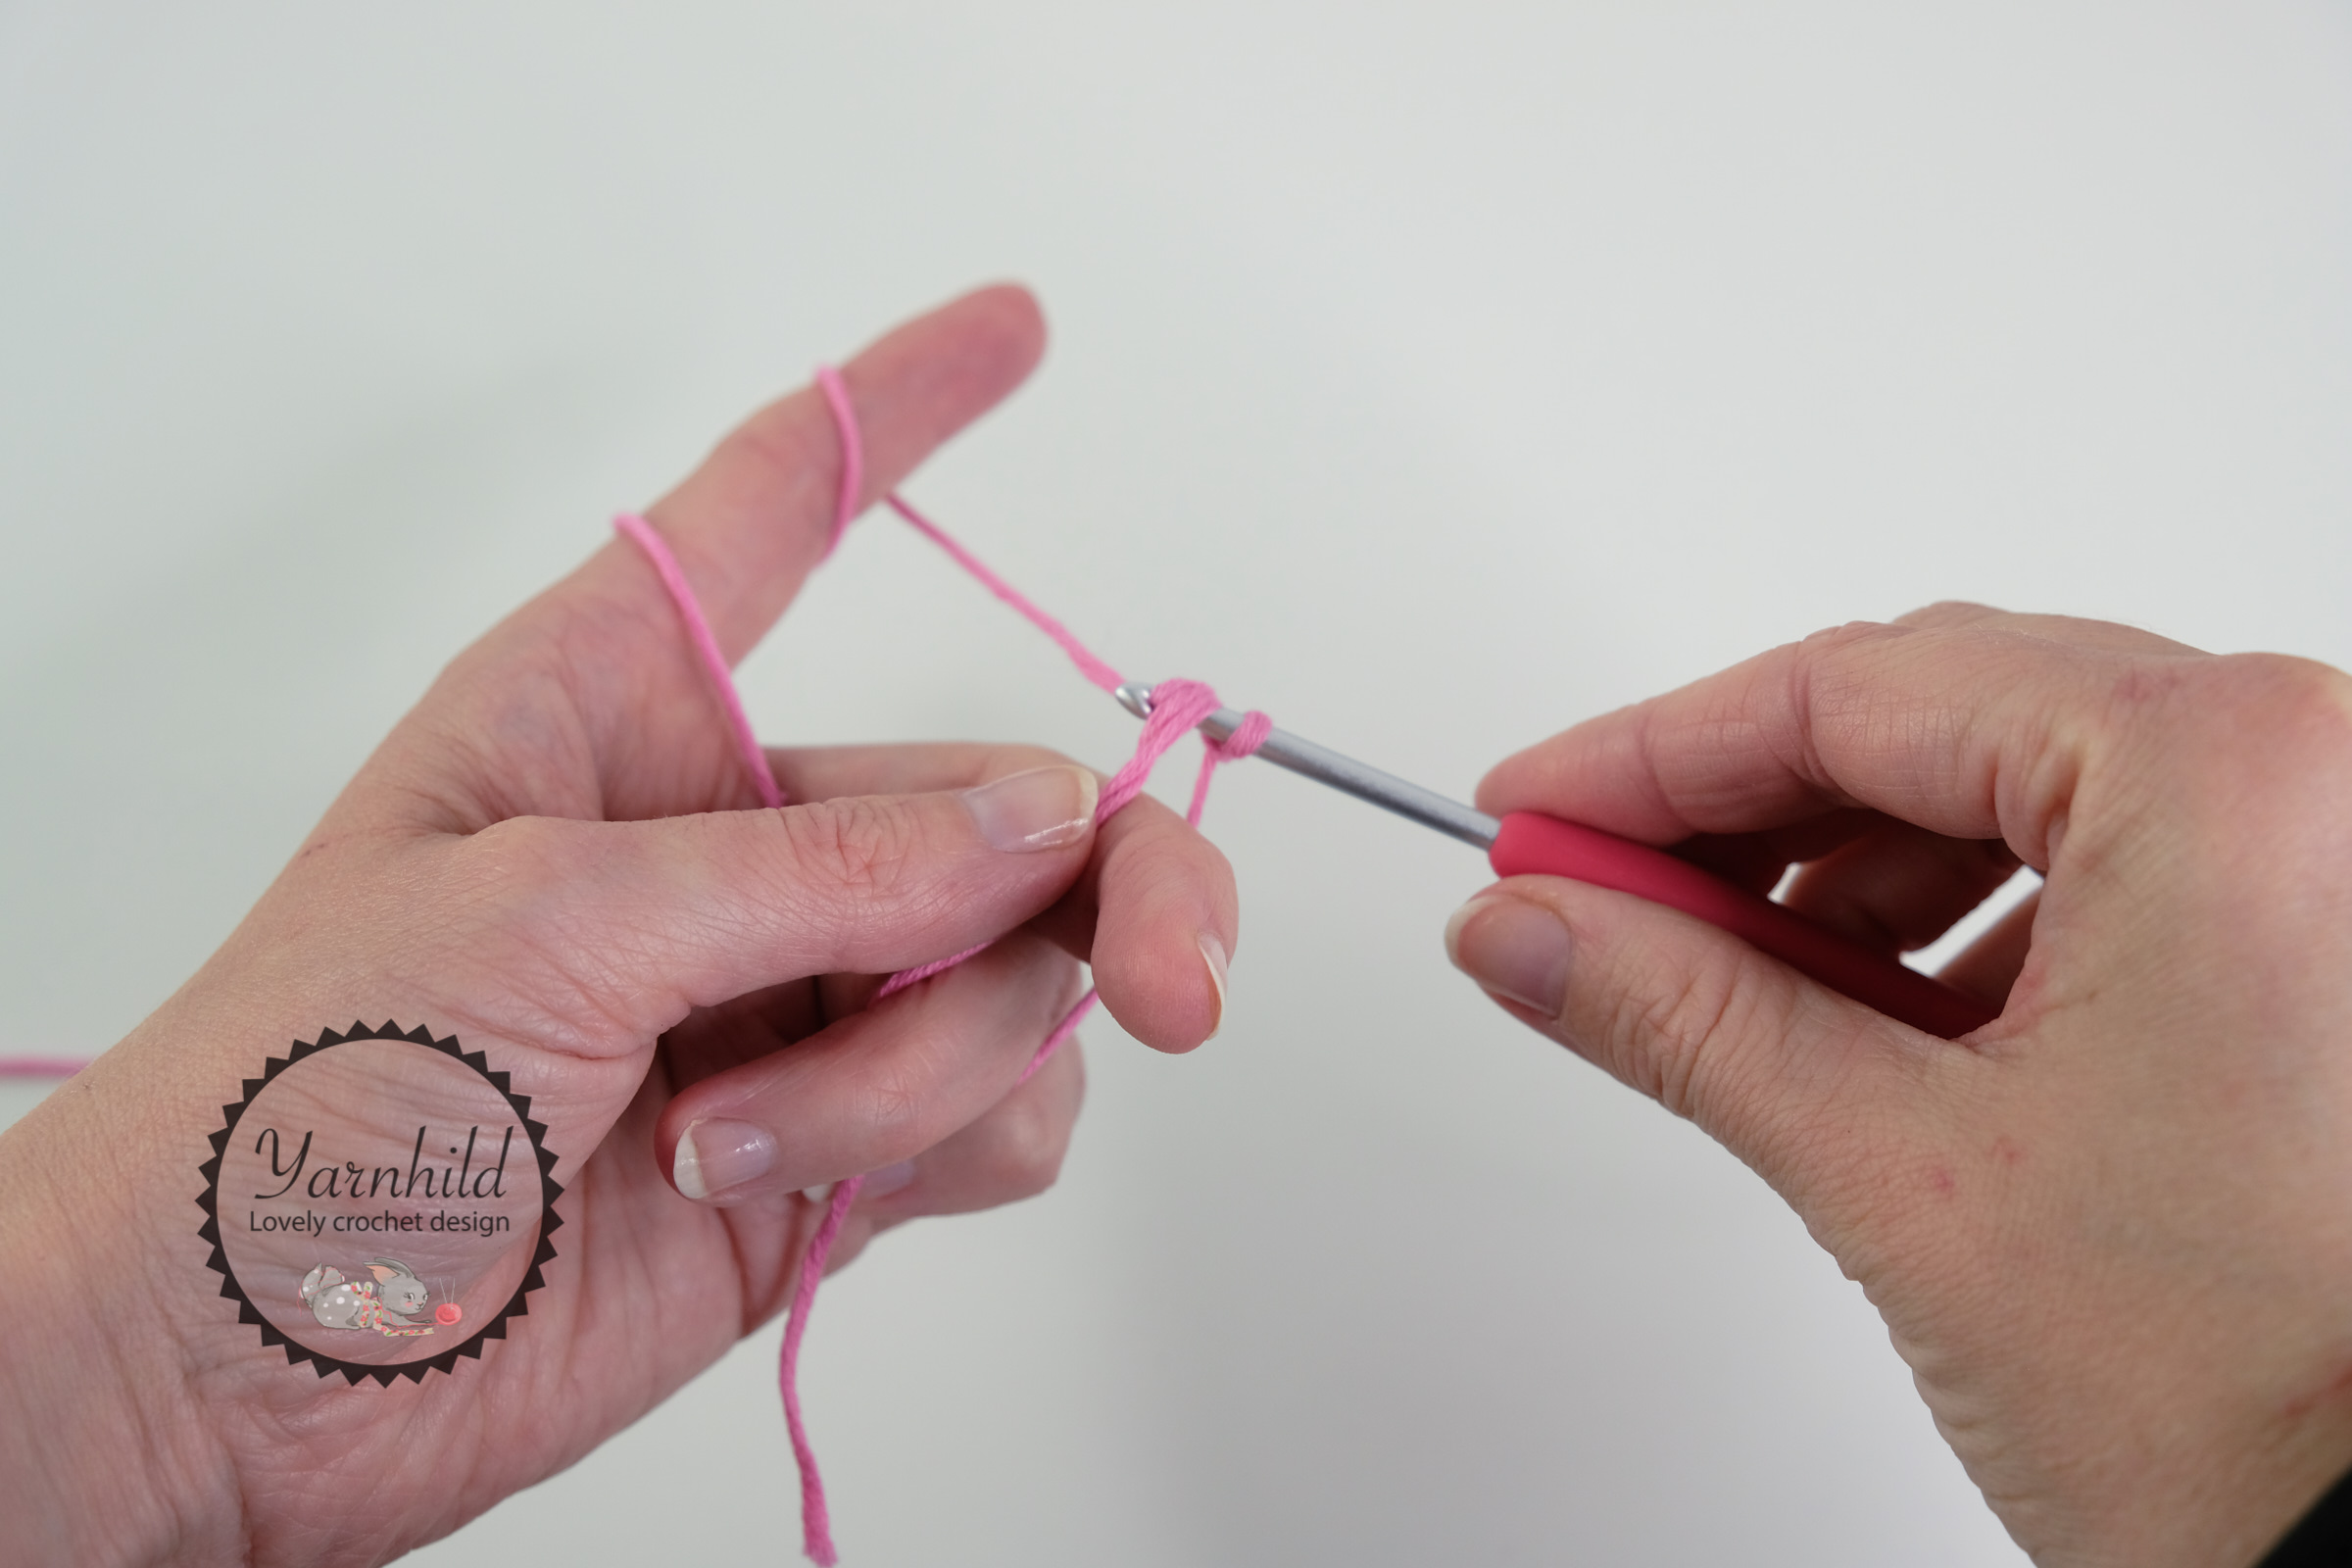
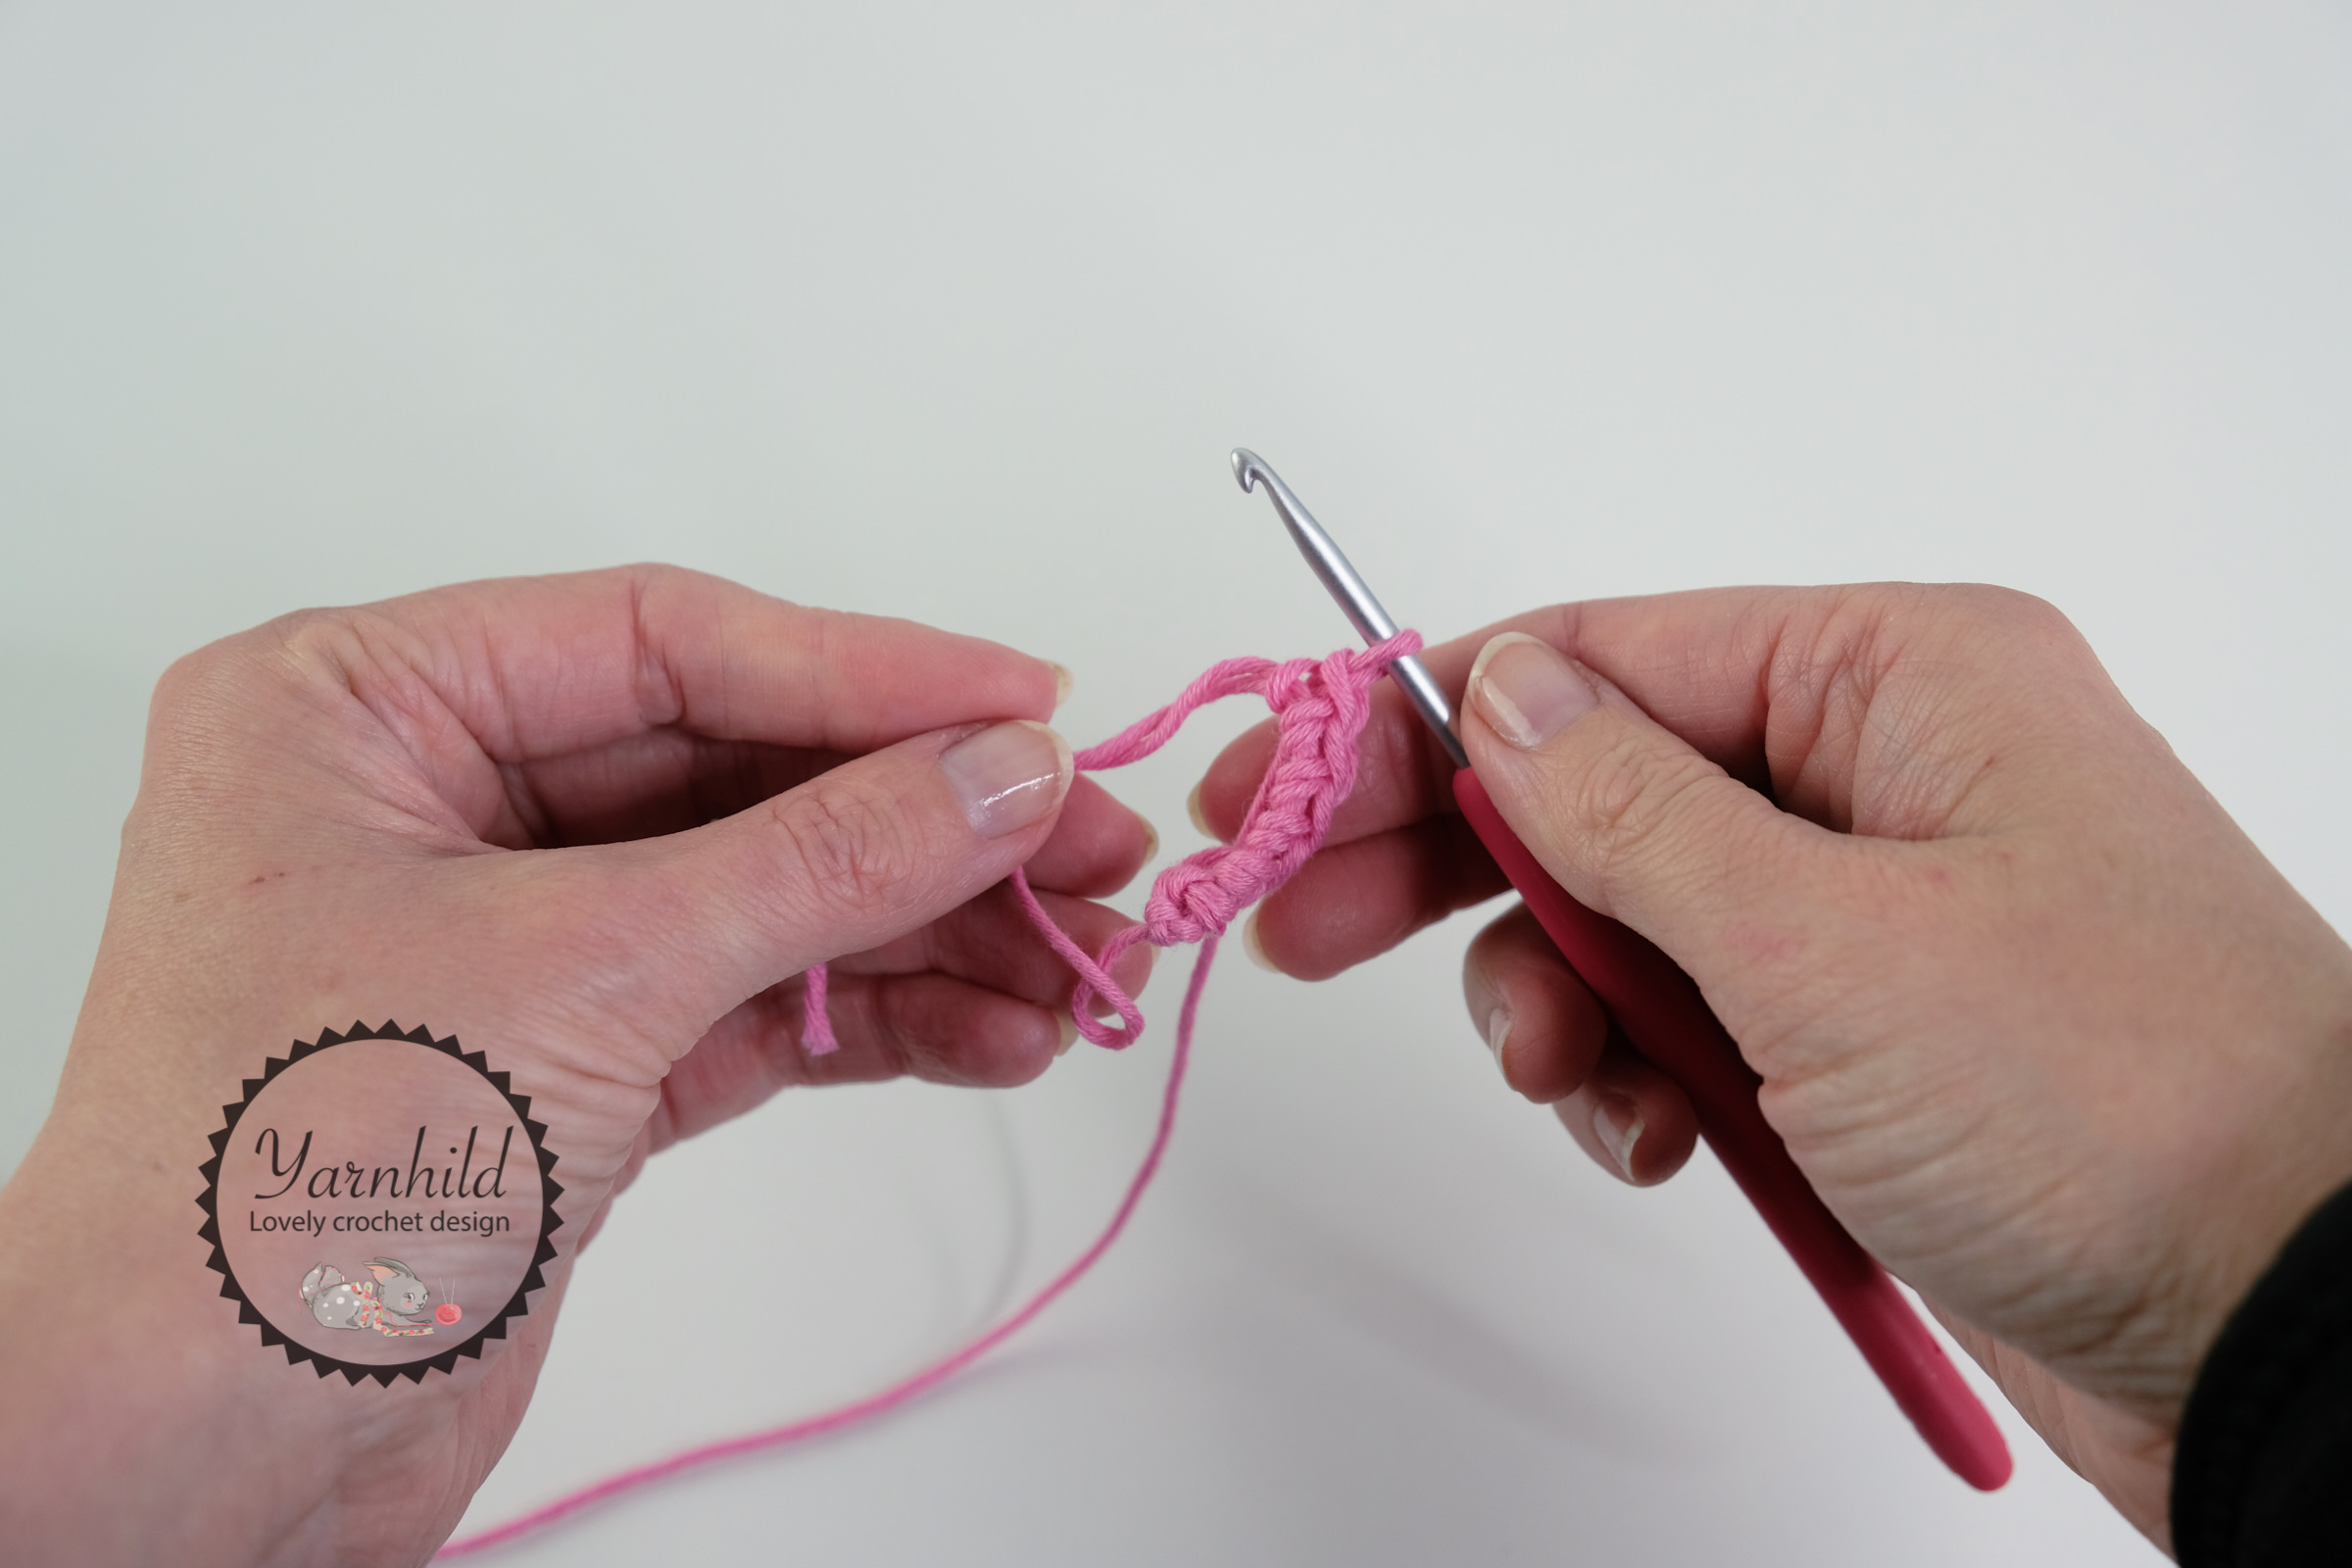
Now you can crochet your stitches inside the ring.
I hope that you liked this tutorial! Be sure to find me on Instagram or join our group on Facebook, - Yarnhild crochet club and tell me what you think!
Hugs, Ragnhild

