BOO! Crochet Bucket Hat – Free Halloween Crochet Pattern.
Looking for a fun crochet bucket hat to make for Halloween? Meet the BOO! Bucket Hat, a slightly spooky, very wearable crochet hat with a bold BOO! design worked around the sides.
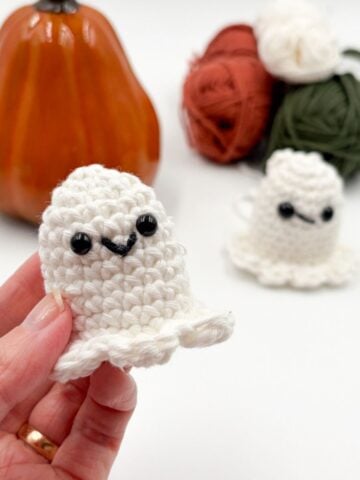
I also added a little ghost who most likely wouldn't scare a soul on Halloween, but is trying his best!
Die Anleitung gibt es auch auf Deutsch - einfach nach unten scrollen!
Save this for later on Pinterest
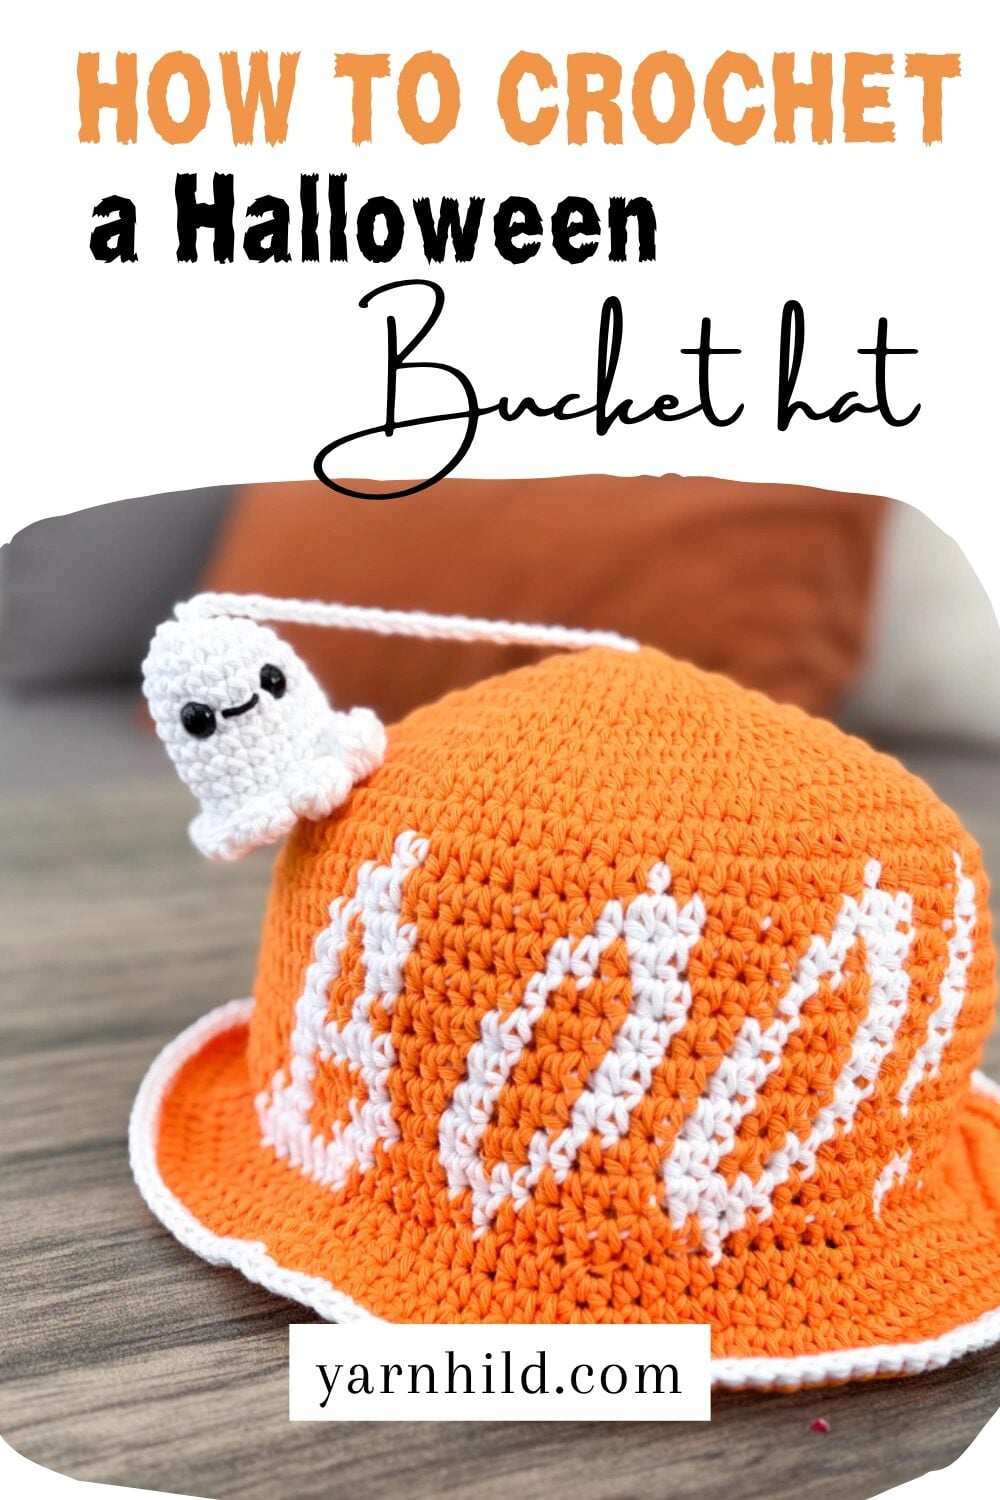
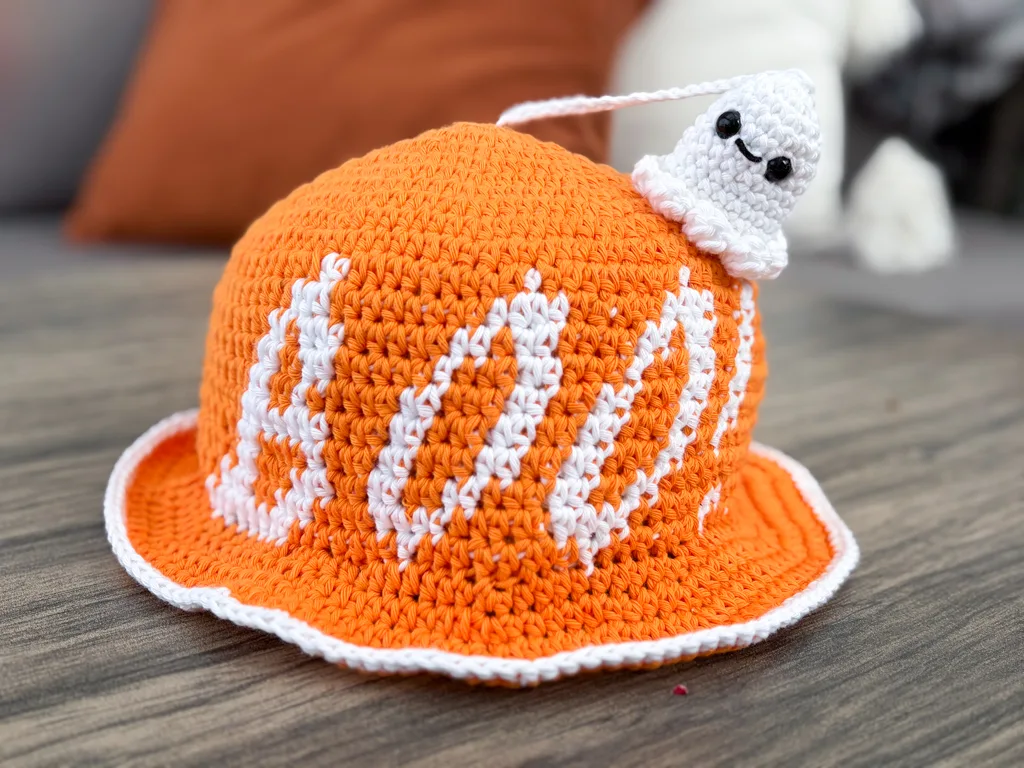
This free crochet bucket hat pattern is worked top-down using simple half double crochet stitches. The BOO! lettering is added using tapestry crochet. Then I made a cute little ghost that you can crochet and sew on to the hat. This was such a fun project, and I am sure this will be popular for kids for Halloween!
Get the ad-free version here
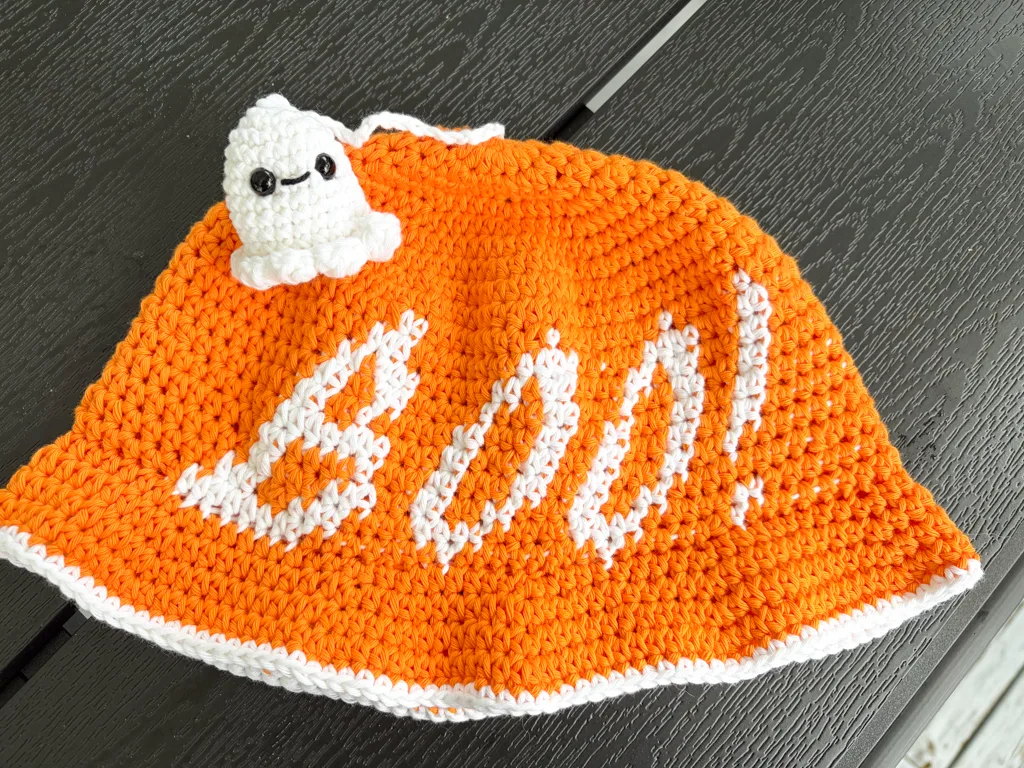
It’s a fun project if you already know the basic crochet stitches and want to try your hand at colorwork. And despite the Halloween theme, there are no complicated stitches hiding in this pattern!
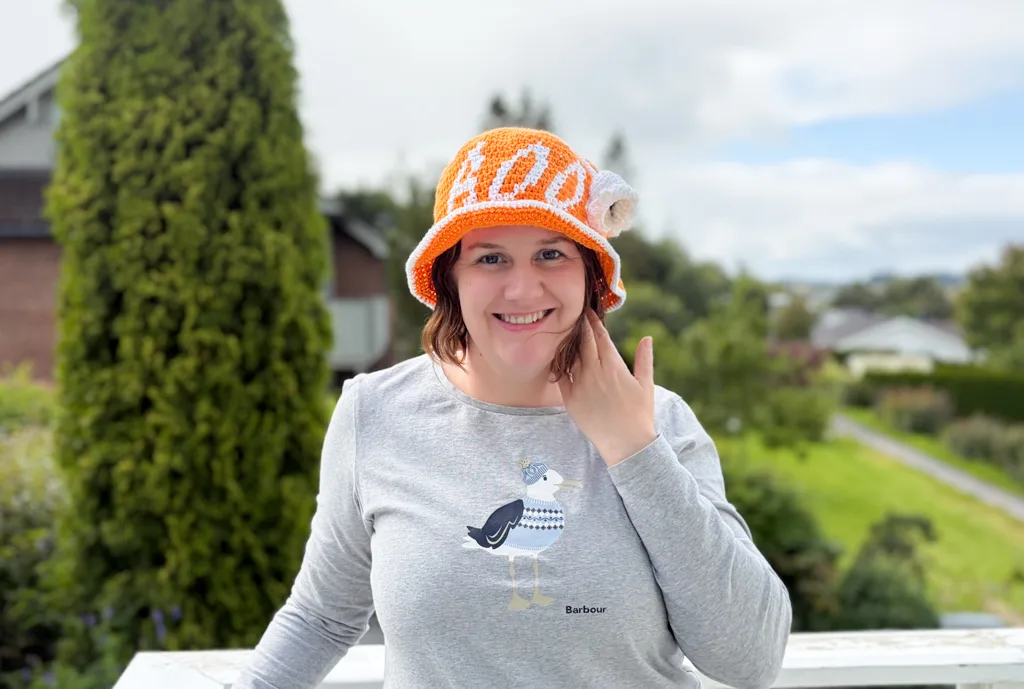
About the BOO! Crochet Bucket Hat
I wanted to make a Halloween crochet project that was a little different from the amigurumi patterns I usually make. During the World Cup, everyone in Norway was making bucket hats with text on them, so that was the inspiration for this design.
This is a fun but also a useful crochet project, and perfect for Halloween.
The hat is crocheted from the crown down. First, you’ll increase to create the flat circle at the top of the hat. Then we’ll work the sides before adding the BOO! design using tapestry crochet.
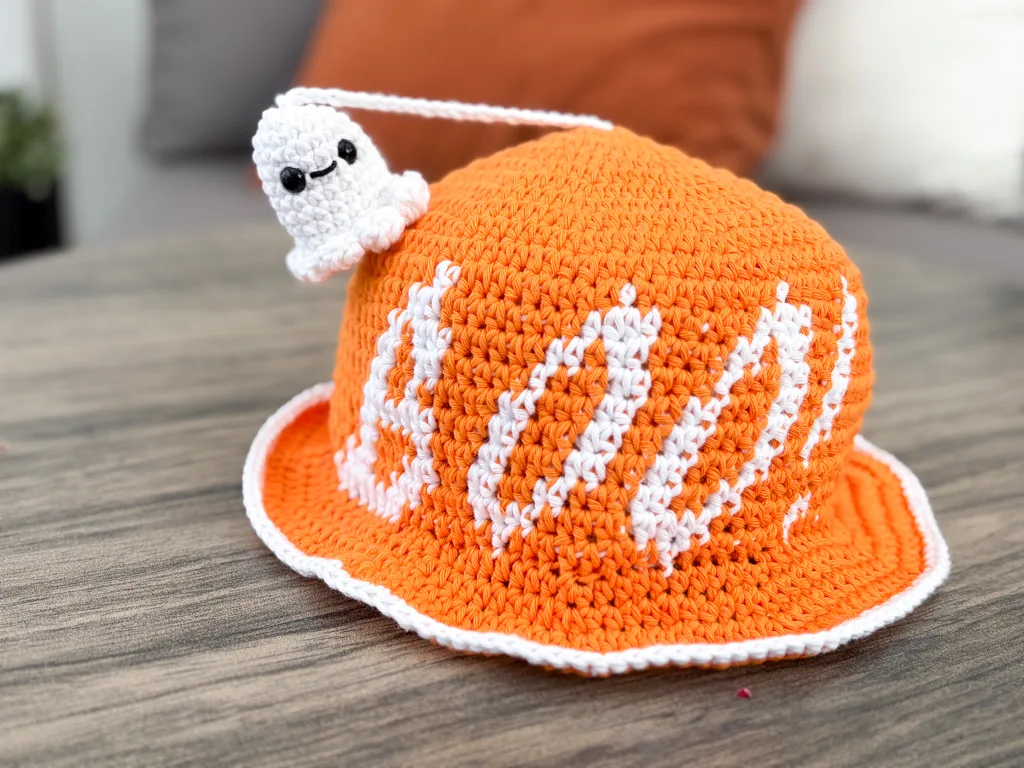
Finally, the brim is worked at the bottom to give the hat its classic bucket hat shape.
The finished hat has a simple shape, while the contrasting BOO! lettering makes it stand out, perfect for Halloween, fall markets, handing out candy, or just showing everyone that spooky season has officially started.
Is This Crochet Bucket Hat Beginner Friendly?
If you are comfortable with the basic crochet stitches, you should be able to make this hat.
The main part of the pattern uses half double crochet, and the hat itself is worked in rounds.
The most challenging part is the colorwork. The BOO! section is made with tapestry crochet, in which you alternate between two colors as you follow the stitch graph.
If tapestry crochet is new to you, don’t worry. I’ll explain how I change colors below, and you can also follow along with the video tutorial.
Colors
For my hat, I used yarn from Viking, that is called Vår. It is a cotton yarn.
You can easily change the colors to make your own version. Black and orange would give it a classic Halloween look, while purple, green, cream or even bright pink could make a really fun BOO! hat.
Gauge
5 rounds = 10 cm / 4 inches measured across the crown
Gauge is important for this project because it determines the finished size of your crochet bucket hat.
If your gauge is too tight, the hat will turn out smaller. If your gauge is too loose, the finished hat will be larger.
Finished Size
Size S is designed to fit a child, M to fit an average head, and L to fit a bigger head.
You can adjust the size by changing the number of rounds of increases.
How to Change Colors for the BOO! Design
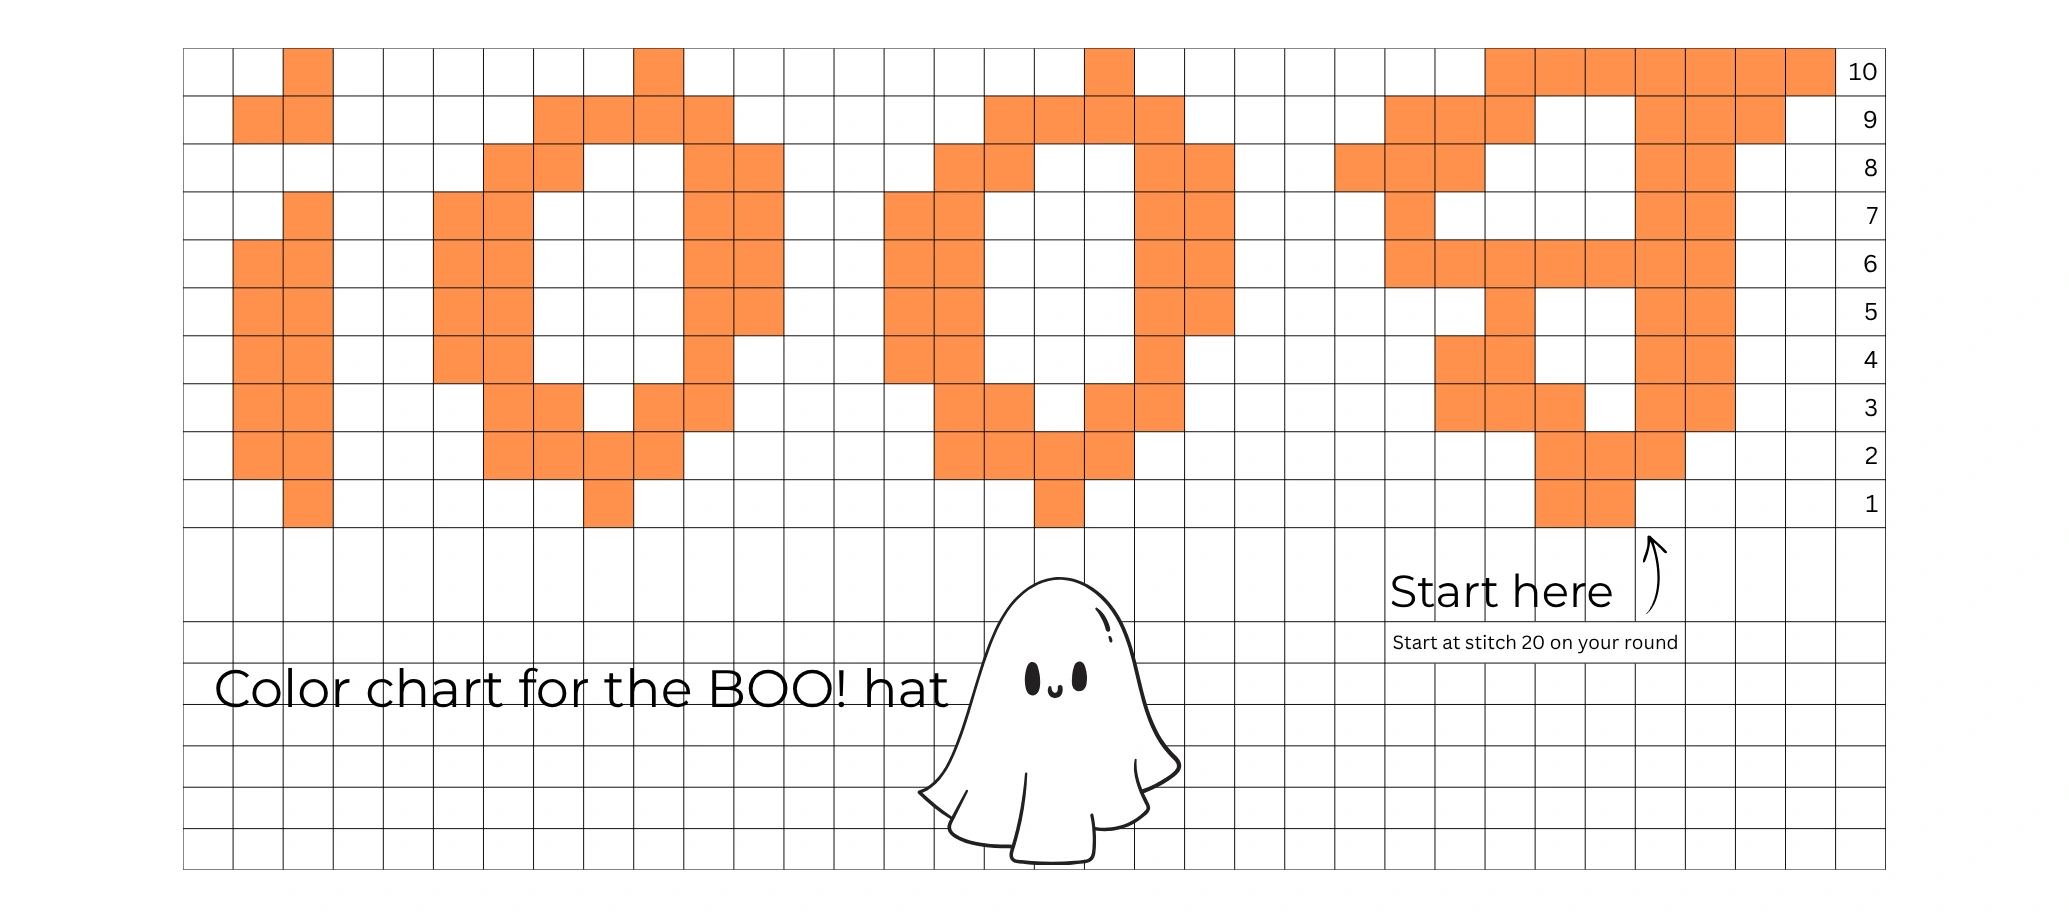
For the next part of the pattern, follow the stitch graph and work the design using tapestry crochet.
Carry the unused yarn inside your stitches as you work through the colored section.
Work the stitch as usual, but stop before completing the final pull-through. Use the new color for the final pull-through, then continue crocheting with it, as this creates a cleaner color change.
Once you have finished the colored section of the round, you can cut the contrast yarn instead of carrying it all the way around the hat.
TIP: Keep an eye on your tension when carrying the unused yarn. If you pull it too tightly, the sides of the hat can start to pucker.
Make It Your Own
One of the fun things about this pattern is how different it can look depending on the colors you choose.
Try:
- Black + orange for a classic Halloween hat
- Cream + black for a more neutral look
- Purple + green for full-on spooky season
- Black + pink for a cute Halloween version
- Orange + cream for a softer fall look
You could also use the basic crochet bucket hat pattern without the BOO! graph if you want to make a simple solid-color hat.
More Halloween Crochet Patterns
If you love making things for spooky season, you might also like my other free Halloween crochet patterns.
I’ll be adding more Halloween crochet ideas, so be sure to check back for new patterns.
Save This Crochet Bucket Hat Pattern for Later
I hope you enjoy making your BOO! Bucket Hat!
If you make one, I would love to see which colors you choose. Tag me on social media so I can see your finished hat. You can find me @Yarnhild across on social media.
Happy crocheting – and happy spooky season! 👻
Free Crochet Bucket Hat Pattern
The Crochet BOO! Bucket hat. English and German pattern
Get ready for fall with this fun BOO! Bucket Hat! The hat is worked from the top down in half double crochet, with the BOO! lettering added using simple tapestry crochet. Finish it off with a classic bucket hat brim for a cute and cozy Halloween accessory.
Materials
- ch-chain
- rnd–round
- St(s)–stitches
- Inc–increase
- hdc - half double crochet
- mr–magic ring
- sl st- slip stitch
- FLO - front loop only
- sc- single crochet
- Deutsch
- LM – Luftmasche
- Rd – Runde
- M – Masche(n)
- Zun – Zunahme
- hStb – halbes Stäbchen
- FR – Fadenring
- KM – Kettmasche
- vMg – nur ins vordere Maschenglied häkeln
- fM – feste Masche
Tools
- Yarn (body): Worsted cotton in 2 different colors. One main color for the hat, and one contrasting color for the letters. In this pattern I used orange, brown and some green for the greenery on top.
- Yarn: Worsted Weight (#4) cotton yarn
- Sample made with: Viking Garn Vår (100% cotton, 50 g / 80 m)
- Amount: About 160 g of main color, 30 g of contrasting color, 5 g of accessory color.
- Scissors
- Crochet hook 3, 5 mm
- Tapestry needle
- Gauge: 5 rounds in hdc = 5 cm / 2 in
Instructions
Size recommendations
Sizes can vary depending on the yarn you use. If your size comes out too small, then try a thicker yarn and a bigger hook to meet the gauge.
Crown
Work in joining rounds.
For size S, work increases to 80 sts; for M, work increases to 90 sts; and for size L, work increases to 100 sts.
Rnd 1: 10 hdc into a mr, sl st into the first st, ch 2 (10)
Rnd 2: 2 hdc in each st around, sl st into the first st, ch 2 (20)
Rnd 3: (1 hdc, inc) x 10, sl st into the first st, ch 2 (30)
Rnd 4: (2 hdc, inc) x 10, sl st into the first st, ch 2 (40)
Rnd 5: (3 hdc, inc) x 10 , sl st into the first st, ch 2(50)
Rnd 6: (4 hdc, inc) x 10, sl st into the first st, ch 2 (60)
Rnd 7: (5 hdc, inc) x 10, sl st into the first st, ch 2 (70)
Rnd 8: (6 hdc, inc) x 10, sl st into the first st, ch 2 (80) (stop here for size S)
Rnd 9: (7 hdc, inc) x 10, sl st into the first st, ch 2 (90) (stop here for size M)
Rnd 10: (8 hdc, inc) x 10, sl st into the first st, ch 2 (100) (stop here for size L)
Rnd 11: 1 hdc in each st around (80, 90, 100)
For the next part, follow the stitch graph and work in tapestry crochet.
Carry the unused yarn inside your stitches while working the colored sections. Once you have finished the colored section of each round, cut the contrast yarn so you don’t have to carry it all the way around the hat.
Changing colors: When the next stitch on the graph is a different color, work the current stitch until the final pull-through. Complete the final pull-through with the new color. You are now ready to work the next stitch in the new color.
Continue changing colors this way as you follow the graph.
Rnd 12: 1 HDC in the first 20 sts, start to follow the graph on stitch 21. Follow the graph and change colors as indicated.
13 - 20: 1 hdc in each st around (80, 90, 100). Follow the graph and change colors as indicated.
21: For sizes M and L, add an extra round of hdc in each st around (90,100)
.
Brim
Continue working in joined rounds. Work the first round in the front loops only (FLO) to create a defined edge between the hat and the brim.
Size S – 80 sts
Rnd 1: Working in FLO, (7 hdc, inc) x 10, sl st into the first st, ch 2 (90 hdc)
Rnd 2: (8 hdc, inc) x 10, sl st into the first st, ch 2 (100 hdc)
Rnd 3: (9 hdc, inc) x 10, sl st into the first st, ch 2 (110 hdc)
Rnd 4: (10 hdc, inc) x 10, sl st into the first st (120 hdc)
Change to the same color used for the BOO! text.
Rnd 5: Ch 1, 1 sc in each st around, sl st into the first st (120 sc)
Fasten off and weave in the ends.
Size M – 90 sts
Rnd 1: Working in FLO, (8 hdc, inc) x 10, sl st into the first st, ch 2 (100 hdc)
Rnd 2: (9 hdc, inc) x 10, sl st into the first st, ch 2 (110 hdc)
Rnd 3: (10 hdc, inc) x 10, sl st into the first st, ch 2 (120 hdc)
Rnd 4: (11 hdc, inc) x 10, sl st into the first st, ch 2 (130 hdc)
Rnd 5: (12 hdc, inc) x 10, sl st into the first st (140 hdc)
Change to the same color used for the BOO! text.
Rnd 6: Ch 1, 1 sc in each st around, sl st into the first st (140 sc)
Fasten off and weave in the ends.
Size L – 100 sts
Rnd 1: Working in FLO, (9 hdc, inc) x 10, sl st into the first st, ch 2 (110 hdc)
Rnd 2: (10 hdc, inc) x 10, sl st into the first st, ch 2 (120 hdc)
Rnd 3: (11 hdc, inc) x 10, sl st into the first st, ch 2 (130 hdc)
Rnd 4: (12 hdc, inc) x 10, sl st into the first st, ch 2 (140 hdc)
Rnd 5: (13 hdc, inc) x 10, sl st into the first st (150 hdc)
Change to the same color used for the BOO! text.
Rnd 6: Ch 1, 1 sc in each st around, sl st into the first st (150 sc)
Fasten off and weave in the ends.
Häkelanleitung BOO! Hut Deutsch
Größenempfehlungen
Die Größe kann je nach verwendetem Garn unterschiedlich ausfallen. Sollte dein Hut zu klein werden, verwende ein dickeres Garn und eine größere Häkelnadel, um die angegebene Maschenprobe zu erreichen.
Hutkrone
Die Runden werden mit einer Kettmasche geschlossen.
Für Größe S werden die Zunahmen bis 80 Maschen gearbeitet, für Größe M bis 90 Maschen und für Größe L bis 100 Maschen.
Rd 1: 10 hStb in einen Fadenring häkeln, 1 KM in das erste hStb, 2 LM (10)
Rd 2: Je 2 hStb in jede M, 1 KM in das erste hStb, 2 LM (20)
Rd 3: (1 hStb, 1 Zun) × 10, 1 KM in das erste hStb, 2 LM (30)
Rd 4: (2 hStb, 1 Zun) × 10, 1 KM in das erste hStb, 2 LM (40)
Rd 5: (3 hStb, 1 Zun) × 10, 1 KM in das erste hStb, 2 LM (50)
Rd 6: (4 hStb, 1 Zun) × 10, 1 KM in das erste hStb, 2 LM (60)
Rd 7: (5 hStb, 1 Zun) × 10, 1 KM in das erste hStb, 2 LM (70)
Rd 8: (6 hStb, 1 Zun) × 10, 1 KM in das erste hStb, 2 LM (80 )Hier bei Größe S mit den Zunahmen aufhören.
Rd 9: (7 hStb, 1 Zun) × 10, 1 KM in das erste hStb, 2 LM (90) Hier bei Größe M mit den Zunahmen aufhören.
Rd 10: (8 hStb, 1 Zun) × 10, 1 KM in das erste hStb, 2 LM (100) Hier bei Größe L mit den Zunahmen aufhören.
Rd 11: Je 1 hStb in jede M (80, 90, 100)
Für den nächsten Abschnitt arbeitest du nach dem Zählmuster in der Tapestry-Häkeltechnik.
Führe den gerade nicht verwendeten Faden während der farbigen Abschnitte in den Maschen mit. Sobald du den farbigen Abschnitt einer Runde beendet hast, kannst du den Kontrastfaden abschneiden. So musst du ihn nicht um den gesamten Hut herum mitführen.
Farbwechsel
Wenn die nächste Masche im Zählmuster eine andere Farbe hat, häkelst du die aktuelle Masche nur bis zum letzten Durchholen des Fadens. Den letzten Schritt arbeitest du bereits mit der neuen Farbe. Nun kannst du die nächste Masche mit der neuen Farbe häkeln.
Wechsle die Farben auf diese Weise und folge dabei dem Zählmuster.
Rd 12: Je 1 hStb in die ersten 20 M. Beginne ab der 21. M mit dem Zählmuster. Folge dem Muster und wechsle die Farben wie angegeben.
Rd 13–20: Je 1 hStb in jede M (80, 90, 100). Folge dabei dem Zählmuster und wechsle die Farben wie angegeben.
Rd 21: Für die Größen M und L eine zusätzliche Runde mit je 1 hStb in jede M arbeiten (90, 100).
Krempe
Weiterhin in geschlossenen Runden arbeiten. Die erste Runde wird nur in die vorderen Maschenglieder gehäkelt. Dadurch entsteht eine deutlich definierte Kante zwischen dem Hut und der Krempe.
Größe S – 80 Maschen
Rd 1: Nur in die vorderen Maschenglieder häkeln: (7 hStb, 1 Zun) × 10, 1 KM in das erste hStb, 2 LM (90 hStb)
Rd 2: (8 hStb, 1 Zun) × 10, 1 KM in das erste hStb, 2 LM (100 hStb)
Rd 3: (9 hStb, 1 Zun) × 10, 1 KM in das erste hStb, 2 LM (110 hStb)
Rd 4: (10 hStb, 1 Zun) × 10, 1 KM in das erste hStb (120 hStb)
Zur Farbe wechseln, die für den „BOO!“-Schriftzug verwendet wurde.
Rd 5: 1 LM, je 1 fM in jede M, 1 KM in die erste fM (120 fM)
Faden abschneiden, vernähen und die Arbeit beenden.
Größe M – 90 Maschen
Rd 1: Nur in die vorderen Maschenglieder häkeln: (8 hStb, 1 Zun) × 10, 1 KM in das erste hStb, 2 LM (100 hStb)
Rd 2: (9 hStb, 1 Zun) × 10, 1 KM in das erste hStb, 2 LM (110 hStb)
Rd 3: (10 hStb, 1 Zun) × 10, 1 KM in das erste hStb, 2 LM (120 hStb)
Rd 4: (11 hStb, 1 Zun) × 10, 1 KM in das erste hStb, 2 LM (130 hStb)
Rd 5: (12 hStb, 1 Zun) × 10, 1 KM in das erste hStb (140 hStb)
Zur Farbe wechseln, die für den „BOO!“-Schriftzug verwendet wurde.
Rd 6: 1 LM, je 1 fM in jede M, 1 KM in die erste fM (140 fM)
Faden abschneiden, vernähen und die Arbeit beenden.
Größe L – 100 Maschen
Rd 1: Nur in die vorderen Maschenglieder häkeln: (9 hStb, 1 Zun) × 10, 1 KM in das erste hStb, 2 LM (110 hStb)
Rd 2: (10 hStb, 1 Zun) × 10, 1 KM in das erste hStb, 2 LM (120 hStb)
Rd 3: (11 hStb, 1 Zun) × 10, 1 KM in das erste hStb, 2 LM (130 hStb)
Rd 4: (12 hStb, 1 Zun) × 10, 1 KM in das erste hStb, 2 LM (140 hStb)
Rd 5: (13 hStb, 1 Zun) × 10, 1 KM in das erste hStb (150 hStb)
Zur Farbe wechseln, die für den „BOO!“-Schriftzug verwendet wurde.
Rd 6: 1 LM, je 1 fM in jede M, 1 KM in die erste fM (150 fM)
Faden abschneiden, vernähen und die Arbeit beenden.