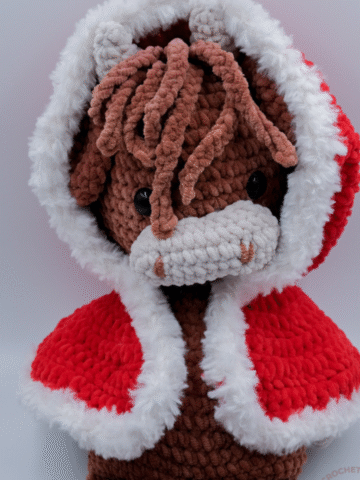
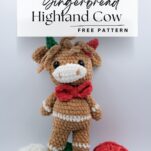
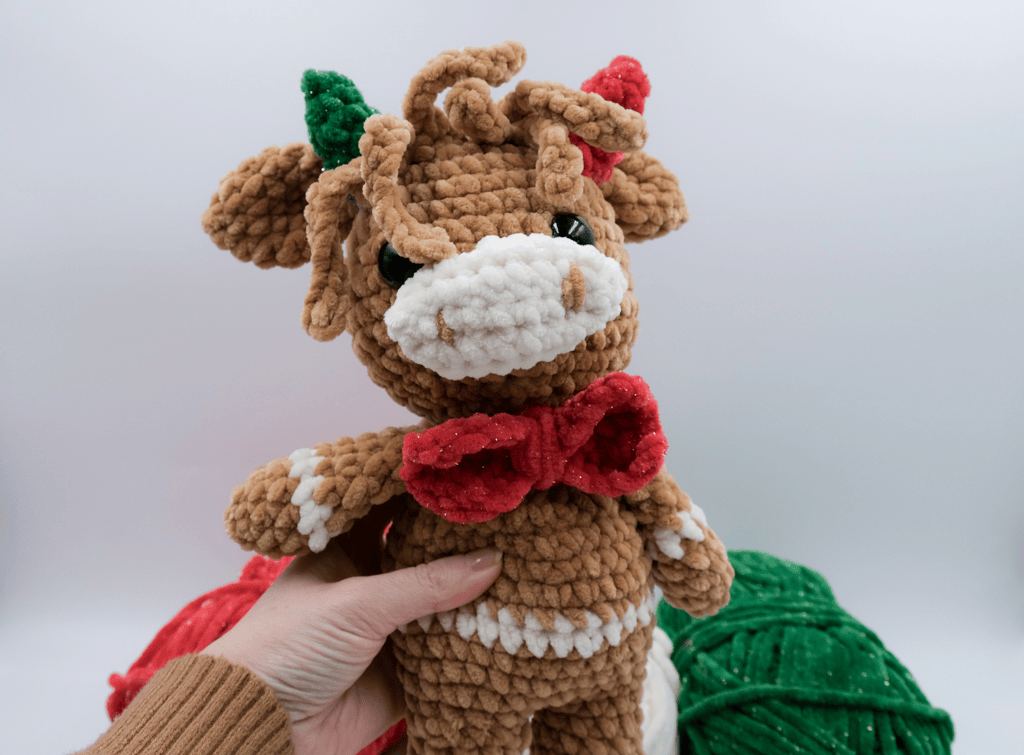
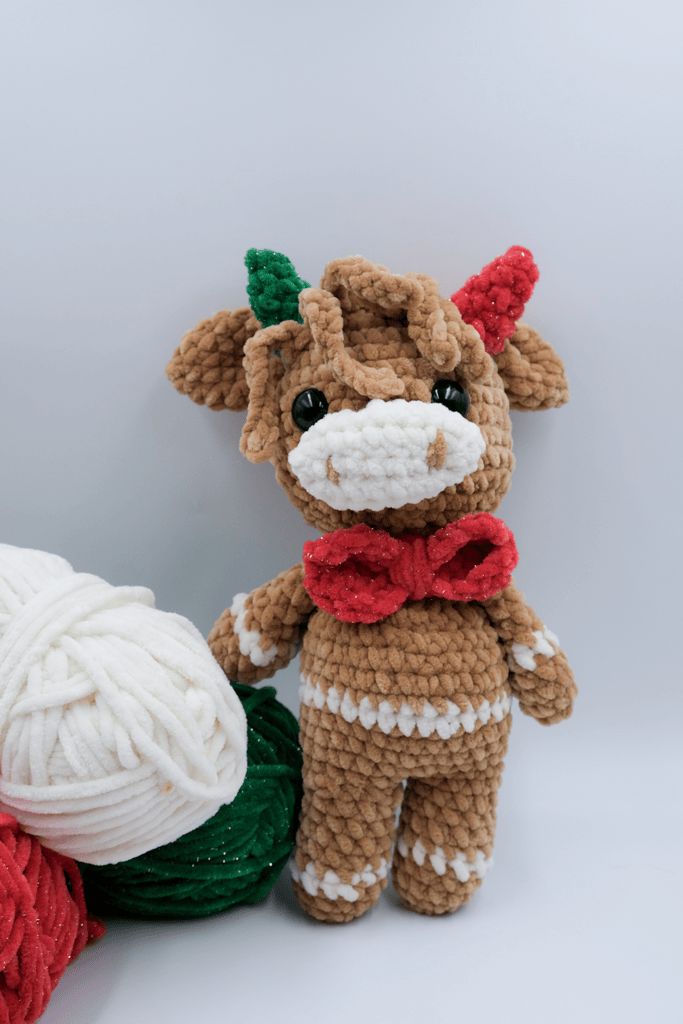
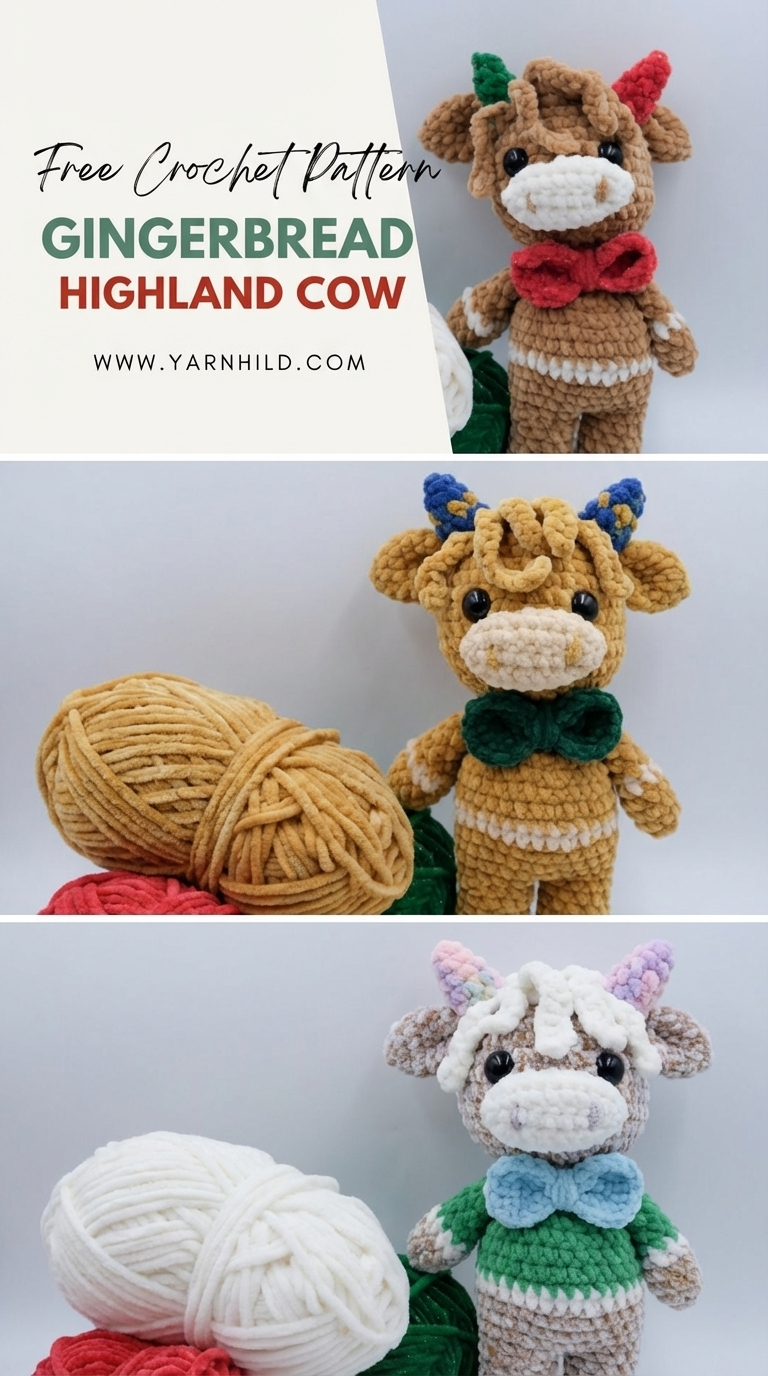
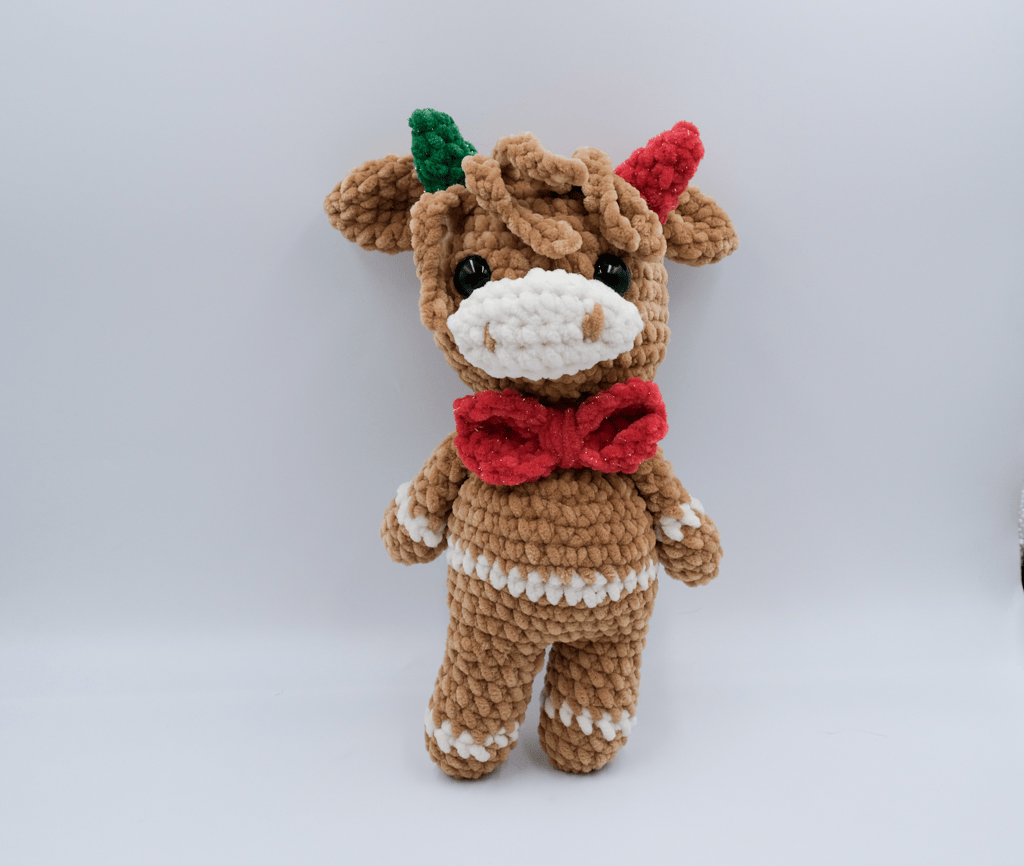
Molly the Crochet Gingerbread Highland Cow - German and English
Meet Molly, the coziest crochet Gingerbread Highland Cow, designed to be quick and easy to make. Since you all loved my crochet highland cow, Fergus, I had to make a Christmas version too!
First, I thought about making a crochet Gingerbread Man, but since cows, and especially Highland cows, are so popular, I decided to make a Gingerbread addition!
And I do not regret my decision, this turned out so cute!
Scroll down for the free pattern, or purchase the ad-free version here.
Add it to your Ravelry queue here.
Es gibt auch ein Video-Tutorial auf Deutsch – einfach nach unten scrollen.

The inspiration behind the design
Since my other crochet highland cows are so big, I decided to make a smaller version this time. The crochet gingerbread higland cow, Molly, is about 34 cm/13,3 inches when worked up with the same yarn as the pattern uses.
I love making farm animals, next to cows, I have made hens, chickens, lambs, sheep, mice, and many more!
Crochet Highland Gingerbread Cow Video Tutorial
Here is the video tutorial for the crochet Gingerbread Highland Cow, Holly. Make sure to subscribe to my YouTube channel.
Suppose you do decide to make this crochet cow. I would be so happy if you could share a picture on Facebook or tag me on Instagram! It is always lovely to see your versions! Also, be sure to follow me on Facebook so you don’t miss any of my FREE patterns!
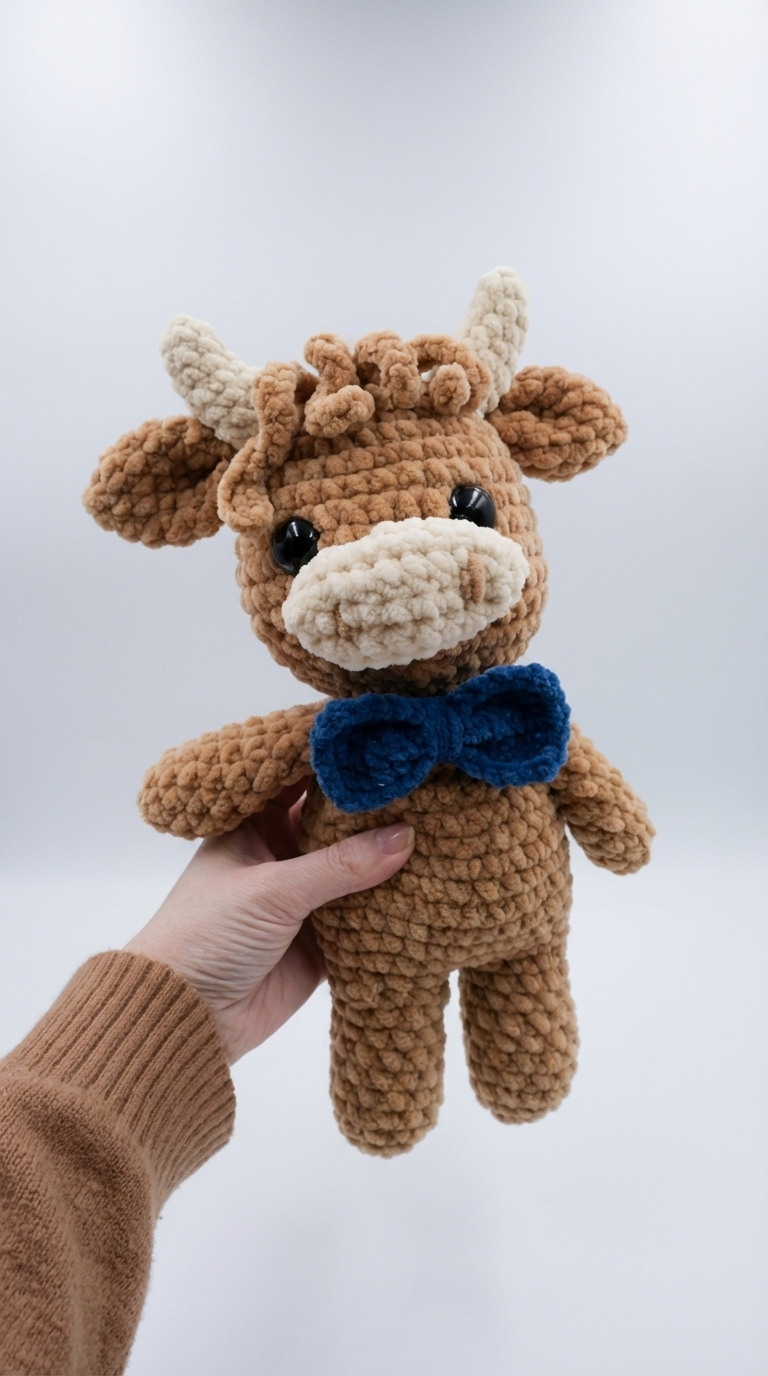
Here are a few color variations. These images are AI-generated and meant to show possible color options.
Das Deutsche video häkelnvideo
Hier findest du das Video-Tutorial für das gehäkelte Lebkuchen-Highland-Rind Molly.
Vergiss nicht, meinen YouTube-Kanal zu abonnieren, um keine neuen Videos zu verpassen
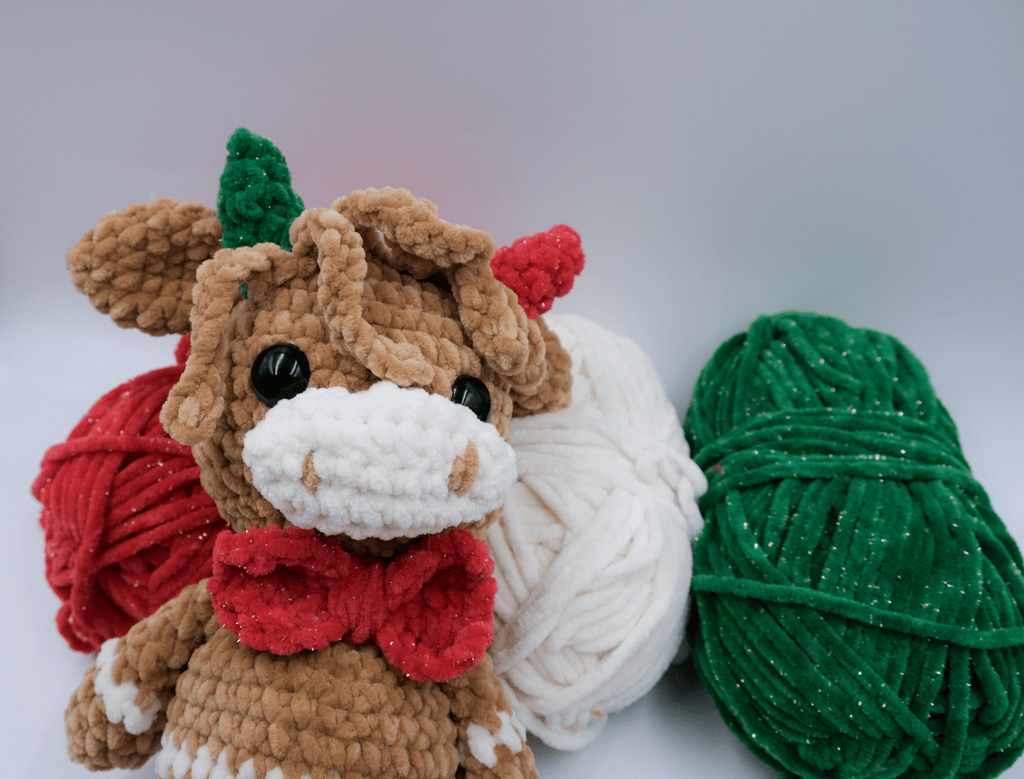
The Yarn
I used Chenille yarn for my crochet Gingerbread Cow, but you can also make this one in other kinds of yarn, but keep in mind that the size and the look will change. I would love to see your versions too, so don't forget to tag me on social media so I can see your Gingerbread Highland cow.
©2025 Yarnhild. All rights reserved. This pattern is for personal use only and may not be used for commercial purposes. This pattern may not be reproduced, distributed, or transmitted in any form or by any means, including photocopying, recording, or other electronic or mechanical methods, without the prior written permission of the copyright holder. For permission requests, please contact Yarnhild at yarnhild@outllook.com. Unauthorized use and/or duplication of this pattern or any portion thereof is strictly prohibited and may result in legal action. Thank you for respecting the hard work and creativity of Yarnhild.

Crochet Gingerbread Highland Cow, Molly
Make a cute crochet Gingerbread Highland Cow with me! The feet and body are crocheted together, and the other parts are made separately and sewn together. All parts are made in continuous rounds.
Finished size: 34 cm/13,3 inches
Materials
- This pattern uses Chenille yarn, but other yarns, such as cotton and acrylic, can be used as well. You can just use a hook that fits your yarn. Note that the size will change
- You`ll need 4 colors of yarn, the featured example uses:
- (A) Primary color, brown: About 70 g
- (B) Frosting and snout, cream: About 20 g
- (C) Horn and bow, red glitter: About 30 g
- (D) Bow, green glitter: About 10 g
- 4,5 mm crochet hook
- Filling materials
- Scissors
- Safety eyes 20 mm
- Knitting needles for support for attaching the body parts.
- Empty toilet roll or simular for support of the head.
Tools
- ch - chain
- rnd – round
- St(s) – stitches
- Inc – increase
- dec - decrease
- sc - single crochet
- mr – magic ring
- sl st - slip stitch
Instructions
Feet and body
The feet and body are made in one piece. First, we start with the feet. The feet will later be joined, and the body will be crocheted on top of the feet.
Feet
Make 2
In color A and B
Start with color A
Rnd 1: 6 sc into a mr (6 sc)
Rnd 2: 2 sc in each st around (12 sc)
Rnd 3-4: 1 sc in each st for 2 rounds.
Change to color B on the last pull-through of the last sc of round 4.
Rnd 5: 1 sc in each st
Change to color A on the last pull-through of the last sc of round 5.
Rnd 6-10: 1 sc in each st for 5 rounds.
Fasten off for the first leg, do not fasten off for the second.
Extra help, joining legs
Do not cut the yarn on the second foot. Place the feet next to each other and join them as follows: Place the feet side by side. Join the feet with single crochet, and go from the working leg directly into the other leg, and connect them with single crochet.
Place a stitch marker after the first stitch. Continue crocheting around both feet, working 1 single crochet (sc) in each stitch around. Be sure to work across both feet, including the stitches from the joining slip stitch if necessary.
You should have a total of 24 single crochet (sc) stitches at the end of the round.
From here, follow the pattern as instructed to continue crocheting the feet and body as one piece.
Body
Join Legs + Start Body
Rnd 11 (joining round): With the second leg still on
hook – 1 sc in each of the 12 sts of the second leg, (24 sts total around both legs).
Place a stitch marker; this is now the new beginning
of the round (preferably center back).
Rnd 12: sc in each st around (24 sc)
Rnd 13: (3 sc, sc inc) x 6 (30 sc)
Rnd 14: Change to color B, SC around (30 sc)
15-22: Change to color A, SC around for 8 rounds. (30 sc)
Rnd 23: (3 sc, sc dec) x 6 (24 sc)
Add stuffing.
Rnd 24: (2 sc, sc dec) x 6 = (18 sc)
Rnd 25: (1 sc, sc dec) x 6 = (12 sc)
Sl st into the first stitch and fasten off. Leave a long tail for sewing.
Head.
Color A
Rnd 1: 12 sc into a mr (12 sc)
Rnd 2: 2 sc in each st around (24 sc)
Rnd 3: (3 sc, sc inc) x 6 (30 sc)
Rnd 4: (4 sc, sc inc) x 6 (36 sc)
Rnd 5-12: 1 sc in each st for 8 rounds.
Rnd 13: (4 sc, sc dec) x 6 (30 sc)
Rnd 14: (3 sc, sc dec) x 6 (24 sc)
Add stuffing.
Place the safety eyes between rounds 10 and 11, 6 sc stitches apart.
Rnd 15: (2 sc, sc dec) x 6 = (18 sc)
Rnd 16: (1 sc, sc dec) x 6 = (12 sc)
Sl st into the first stitch and fasten off. Leave a long tail for sewing.
Horn
Make 2
One in color C and one in color D.
Rnd 1: 4 sc in a mr (4 sc)
Rnd 2: 4 sc
Rnd 3: sc inc, 3 sc (5 sc)
Rnd 4: sc inc, 4 sc (6 sc)
Rnd 5: sc inc, 5 sc (7 sc)
Sl st into the first sc and fasten off. Leave a tail for sewing. Shape it with your hands.
Nose
Nose
In color B.
Rnd 1: Ch 11, 1 sc in each st. (10 sc)
Work on the opposite side, 1 sc in each st. (20 sc)
Place a stitch marker before round 2.
Rnd 2: Sc inc, 9 sc, sc inc, 9 sc. (22 sc)
Rnd 3: Sc inc, 10 sc, sc inc, 10 sc. (24 sc)
Rnd 4: 1 sc in each st. (24 sc)
Sl st into the first st and fasten off. Leave a long tail for sewing.
Ears
In color A.
Rnd 1: 4 sc in a mr
Rnd 2: sc inc x 4 (8 sc)
Rnd 3: ( 1 sc, sc inc) x 4 (12 sc)
Rnd 4-6. 1 sc in each st for 3 rounds.
Rnd 7: ( 1 sc, sc dec) x 4 (8 sc)
Rnd 8: 1 sc in each st (8 sc)
Sl st into the first sc and fasten off. Leave a long tail for sewing.
Grab the tail and pinch the ear together on rounds 1-2. Sew back and forth to shape the ear.
Arms
Make 2
In color A and B
Start with color A
Rnd 1: 6 sc into a mr (6 sc)
Rnd 2: 2 sc in each st around (12 sc)
Rnd 3-4: 1 sc in each st for 2 rounds.
Change to color B on the last pull-through of the last sc of round 4.
Rnd 5: 1 sc in each st
Change to color A on the last pull-through of the last sc of round 5.
Rnd 6-10: 1 sc in each st for 5 rounds.
Do not stuff the arms. Close the hole with single crochet