Retro Daisy Granny Square - Free Crochet Pattern
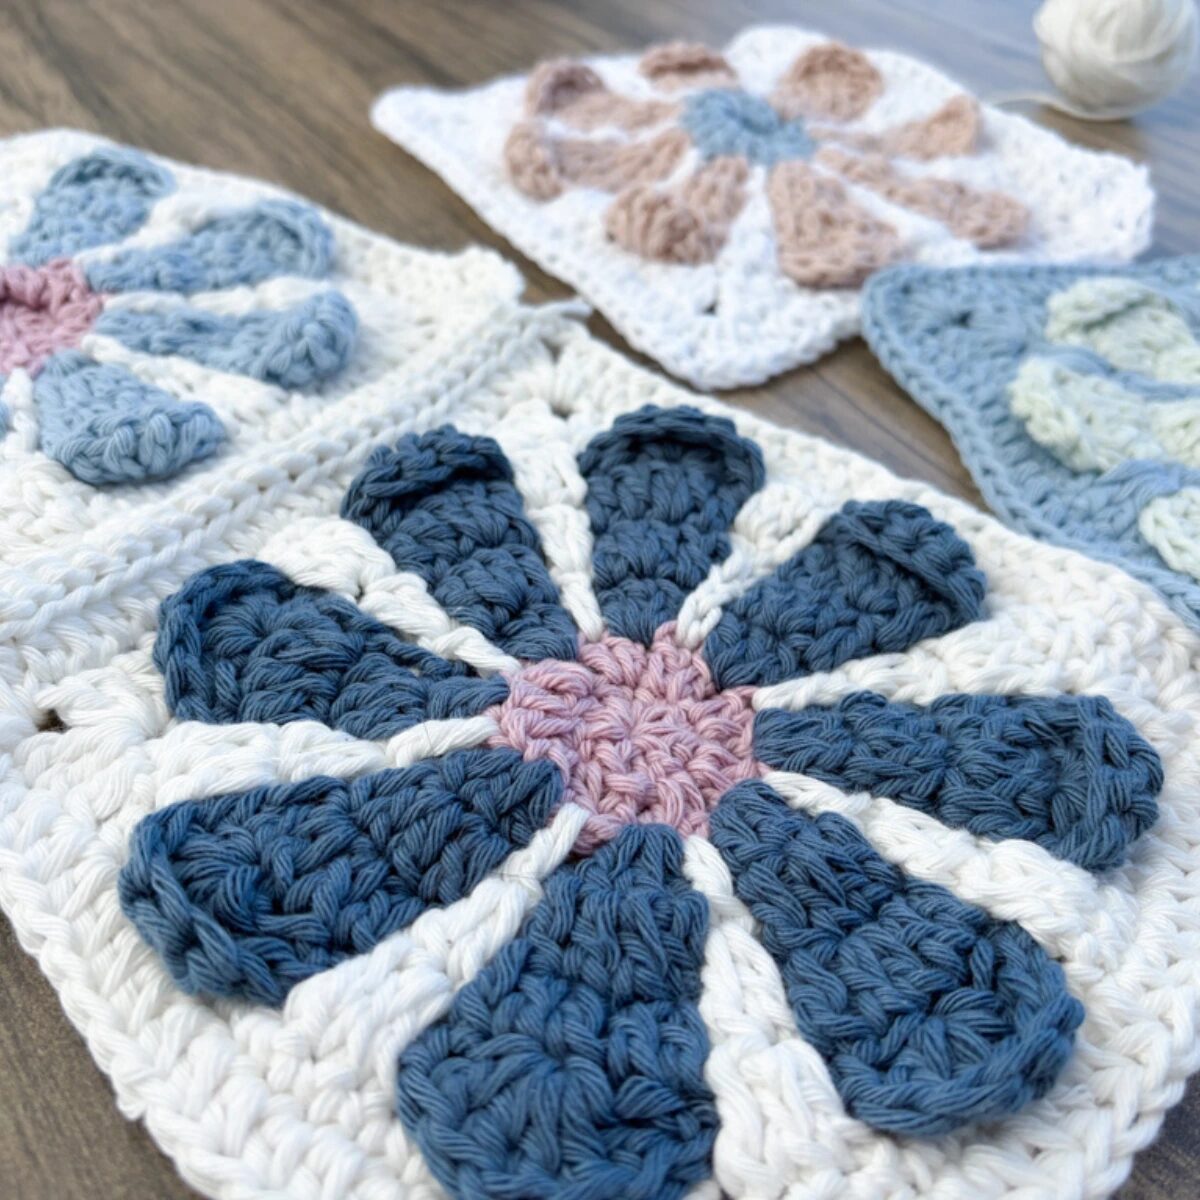
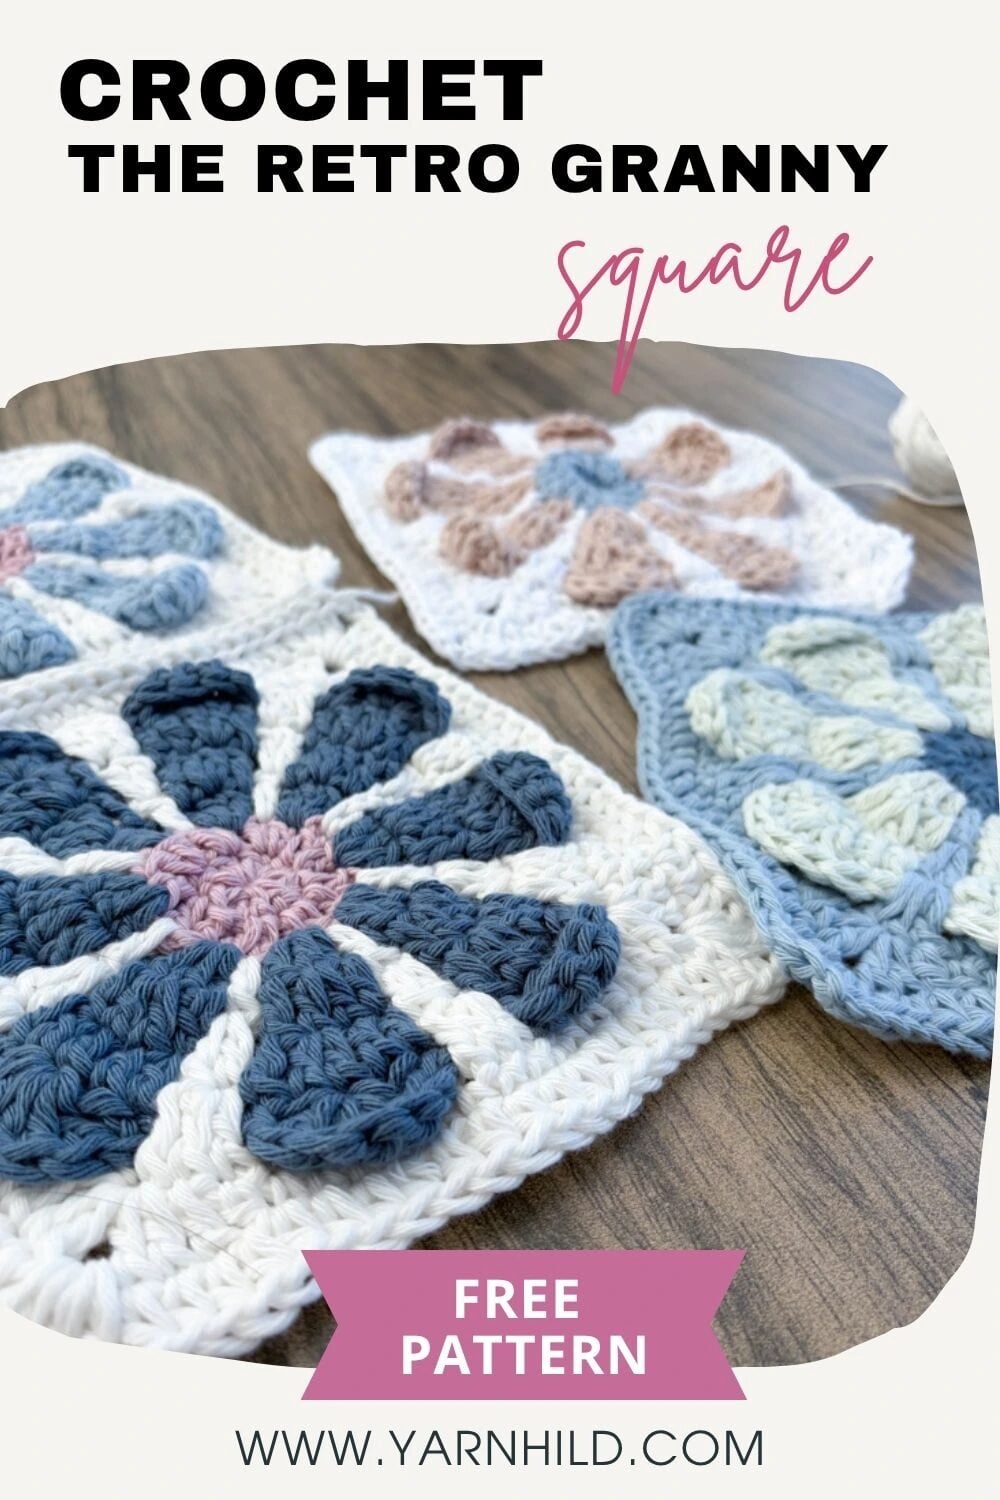
In this blogpost, you will learn how to make the Retro Daisy Granny Square. There is a video tutorial and a written pattern with pictures, so you can follow along and make this beautiful square too.
Pin this for later on Pinterest.
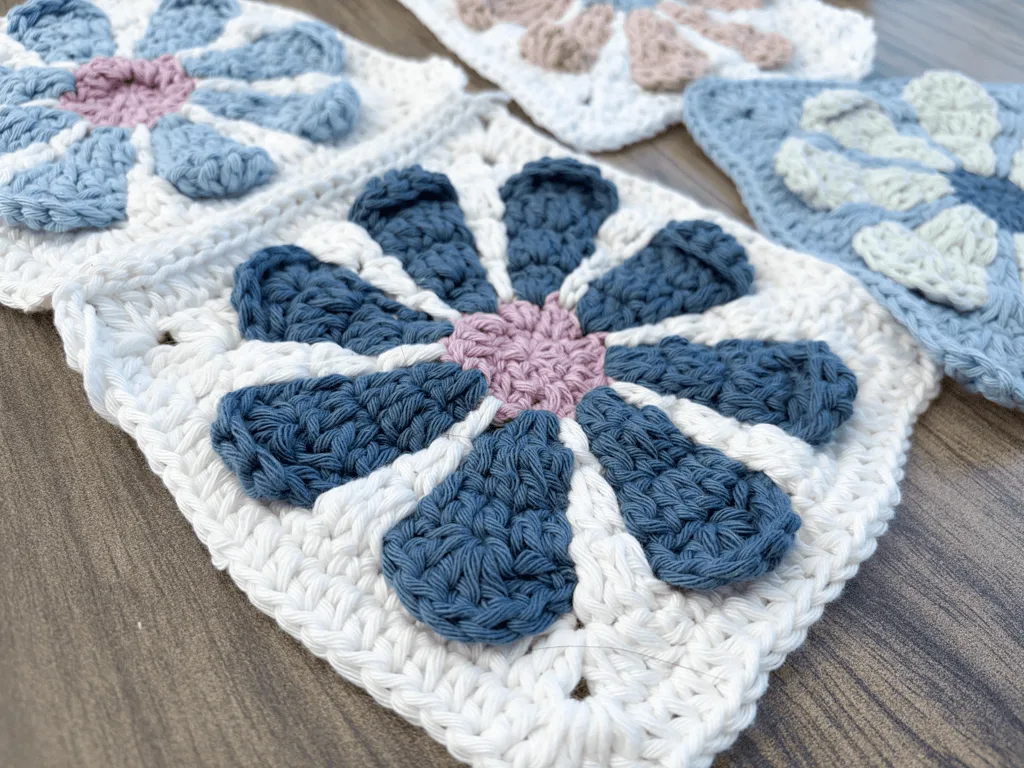
The Retro Daisy Granny Square
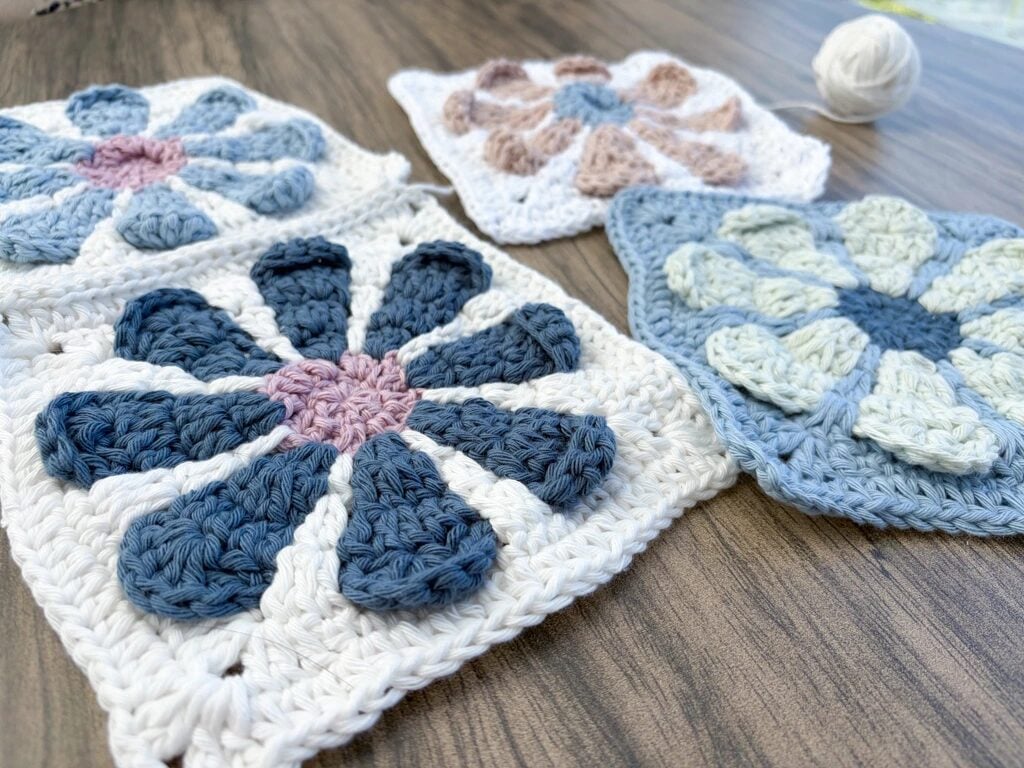
There’s something about a daisy that never really goes out of style. But right now, the retro daisy granny square is everywhere, from boho blankets on Pinterest to handmade cardigans on Instagram reels, and here’s why.
The retro daisy granny square reminds me of the 1970s, and I see it everywhere right now. It is so versatile, and can be used for so many things, like purses, pillows, bags, tops, skirts, the list goes on and on. The squares are so fun, and also a little challenging to make at first, but once you get the hang of it, it is hard to stop!
First, you make 1, then 2, and suddenly, you are making 20, and then you want a blanket.
So consider yourself warned, these are so addictive. *
Materials
- Yarn: DK weight yarn in 3 colors (flower center, petals, background)
- Approx. 10 g per color per square
- Hook: 4.0 mm crochet hook
- Other: Yarn needle for weaving in ends, scissors
Finished Size
17 × 17 cm (approx. 6.7 × 6.7 in) using DK weight yarn and a 4.0 mm hook.
Gauge and finished size may vary depending on your yarn and tension. The beauty of granny squares is that small differences in gauge don’t matter much — just make sure all your squares match each other if you’re joining them into a larger project.
Video Tutorial
Before diving into the written pattern, watch the full step-by-step video tutorial below. I walk you through every round, show close-ups of the petal construction, and share a few tips for keeping your tension even.
📺
(Prefer to follow along with text? The full written pattern is below.)
Looking for more Granny Square tutorials
Check out the popular Willow Granny Square.
Color Combination Ideas
One of the best things about this square is how dramatically different it can look depending on your color choices. Here are some of my favorite combinations:
Classic Retro: Mustard yellow center, cream petals, burnt orange background. Instantly 1970s.
Modern Scandi: Off-white center, sage green petals, warm beige background. Clean and calm.
Playful Bright: Hot pink center, white petals, cobalt blue background. Bold and fun — perfect for children’s projects.
Muted Boho: Terracotta center, dusty rose petals, oatmeal background. Soft and earthy.
Monochrome: Three shades of the same color family. Sophisticated and surprisingly striking.
Tip: When planning a blanket, choose a background colour that will work with all your flower combinations, a neutral like cream, oatmeal, or grey tends to unify even very different flower colours beautifully.
What to Make with the Square
Once you’ve got one square down, the possibilities are really endless. Here are some ideas to spark your imagination:
Blankets and throws: The most classic choice. A simple join-as-you-go method works beautifully here. A lap blanket needs around 35–40 squares; a full throw needs 80–100.
Bags and totes: A granny square tote is one of the most popular crochet projects right now. Work 6 squares into a flat rectangle, fold and seam, add handles — done.
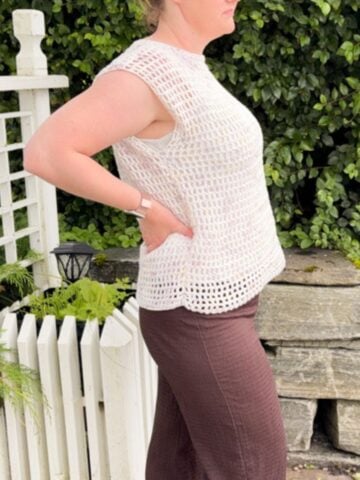
Cardigans and tops: Granny-square garments are having a major moment. Even a simple short cardigan can be built entirely from squares with very little shaping needed.
Cushion covers: Four squares joined together make a perfect cushion front. Back it with fabric or a simple crocheted panel.
Wall art: Frame a single square or group several together. Blocked and stretched, they look genuinely beautiful on a wall.
Coasters and mug rugs : If you’re new to the pattern, a set of coasters is a low-stakes way to practice. Quick to make, lovely to gift.
FAQ
Can I use a different yarn weight?
Yes! This pattern works well in any weight, just adjust your hook accordingly. With chunky yarn, you’ll get a much larger, cozier square; with fingering weight, you’ll get a delicate, miniature version. Your finished size will vary from the 17 × 17 cm given above.
What does “magic ring” mean?
A magic ring (also called a magic circle or adjustable ring) is a way to start a crochet project in the round so there’s no hole in the center. I show how to make one in the video tutorial, it’s easier than it sounds!
Can I use a different join method for a blanket?
Absolutely. I love join-as-you-go for larger projects, as it saves the finishing step, but a flat slip-stitch join, a flat single-crochet join, or even a decorative “granny join” all look great. The join you choose will slightly affect the overall look and drape of your finished project.
How do I weave in ends neatly?
With a granny square, you’ll have quite a few ends, one per color change per square! I recommend using a yarn needle to weave each end in opposite directions (forward a few stitches, then back) for added security. Some crocheters prefer to crochet over the tails as they go to reduce finishing time.
Happy crocheting! If you make this square, I’d love to see it — tag me on Instagram at [@yourusername] or leave a comment below. And if you found this tutorial helpful, you can subscribe to my channel 🌼
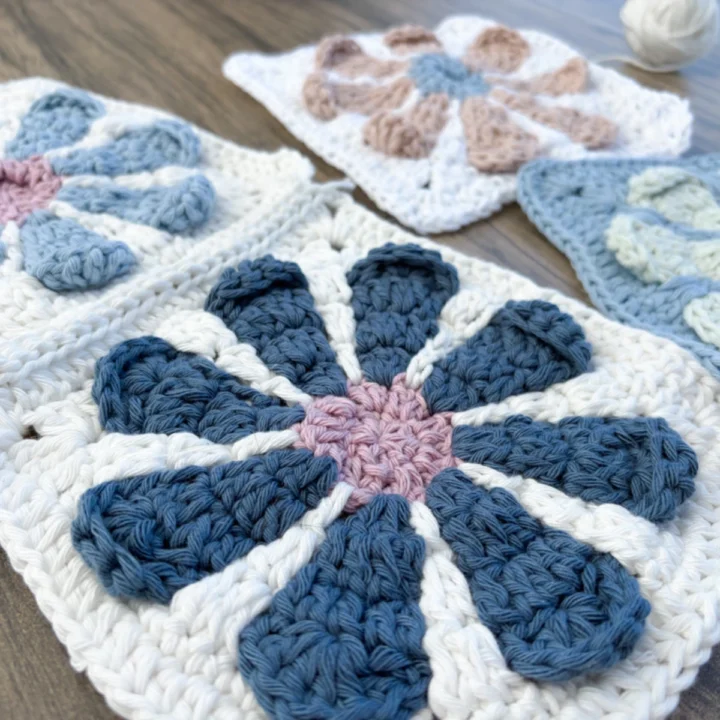
The Retro Daisy Granny Square
- ch = chain
- ch-sp = chain space
- sl st = slip stitch
- sc = single crochet
- hdc = half double crochet
- dc = double crochet
- dc inc = double crochet increase (work 2 dc in the same stitch)
- st = stitch
- sts = stitches
- sk = skip
- rep = repeat
- rnd = round
- MR = magic ring
- FO = fasten off
Materials
- Yarn: DK weight yarn in 3 colours (flower centre, petals, background)
- Approx. 10 g per colour per square
- Hook: 4.0 mm crochet hook
- Other: Yarn needle for weaving in ends, scissors
Tools
- Crochet hook 3,5 mm (or what your yarn reccomends)
- Scisscors
- Tapestry needle
Instructions
Round 1
Using Color A, create a magic ring (or ch 4 and join with a sl st to form a ring).
Ch 3 (does count as a stitch), work 7 dc into the ring.
Join with a sl st to the first dc. (8 dc)
Round 2
Ch 3 (does count as a stitch).
Work 2 dc in each stitch around.
Join with a sl st to the first dc. (16 dc)
Fasten off and cut yarn.
Round 3
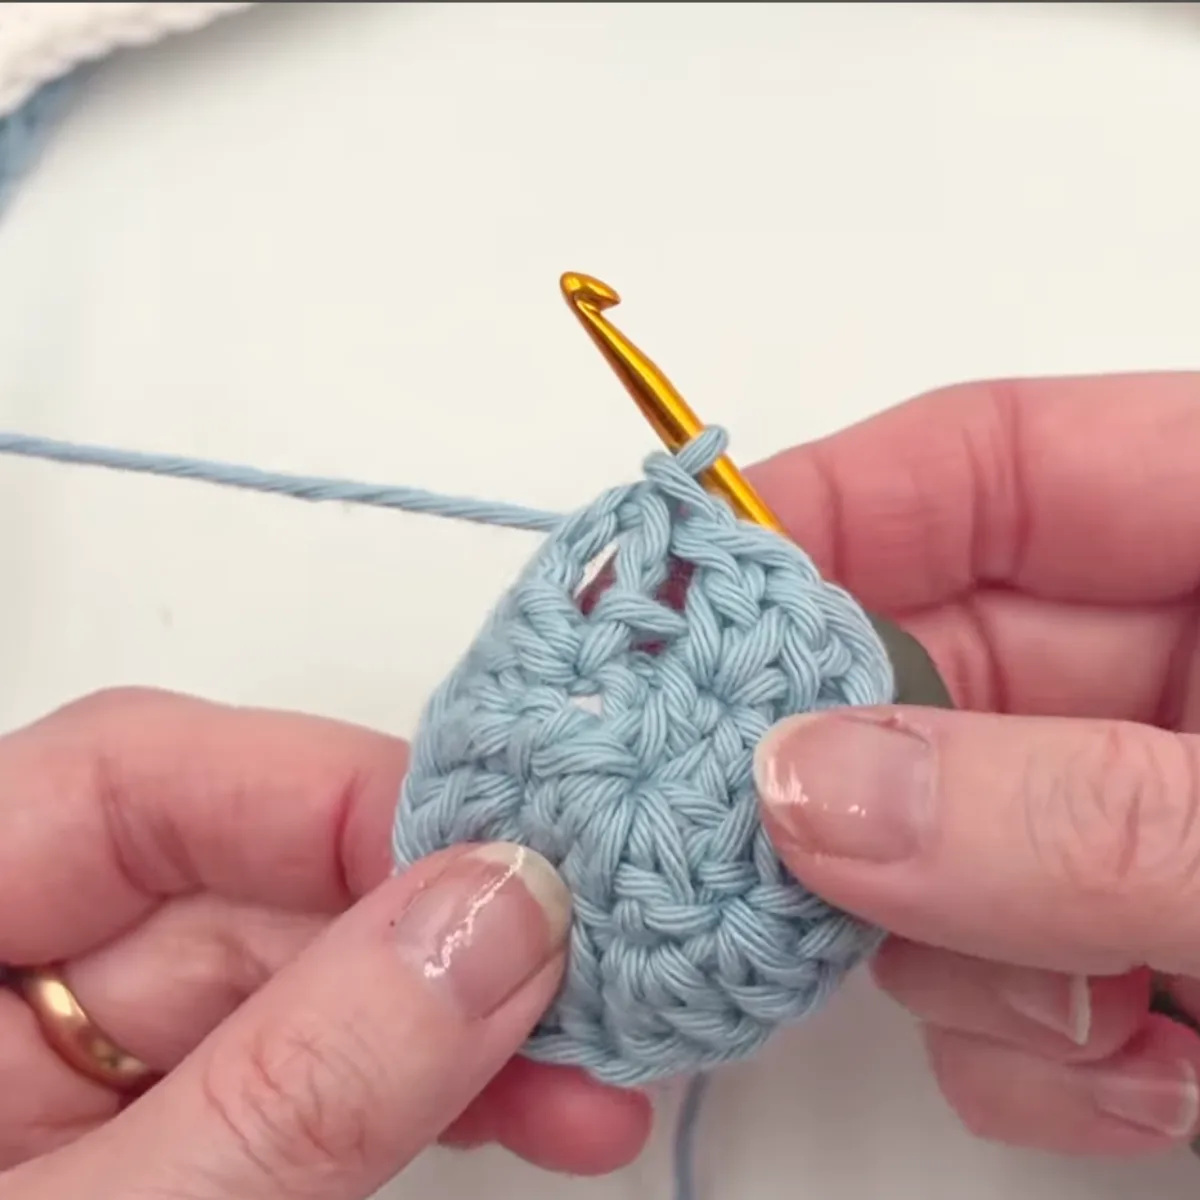
Join Color B in any stitch.
Ch 3 (counts as a stitch), work 2 dc in the same stitch, ch 1, skip next stitch.
*Work 3 dc in the next stitch, ch 1, skip next stitch.*
Repeat from * to * around.
Join with a sl st to the top of the beginning ch-3. (8 clusters of 3 dc.) Do not cut the yarn; pull the loop to make it bigger and leave. it. We will pick up the yarn and continue working here later.
Round 4
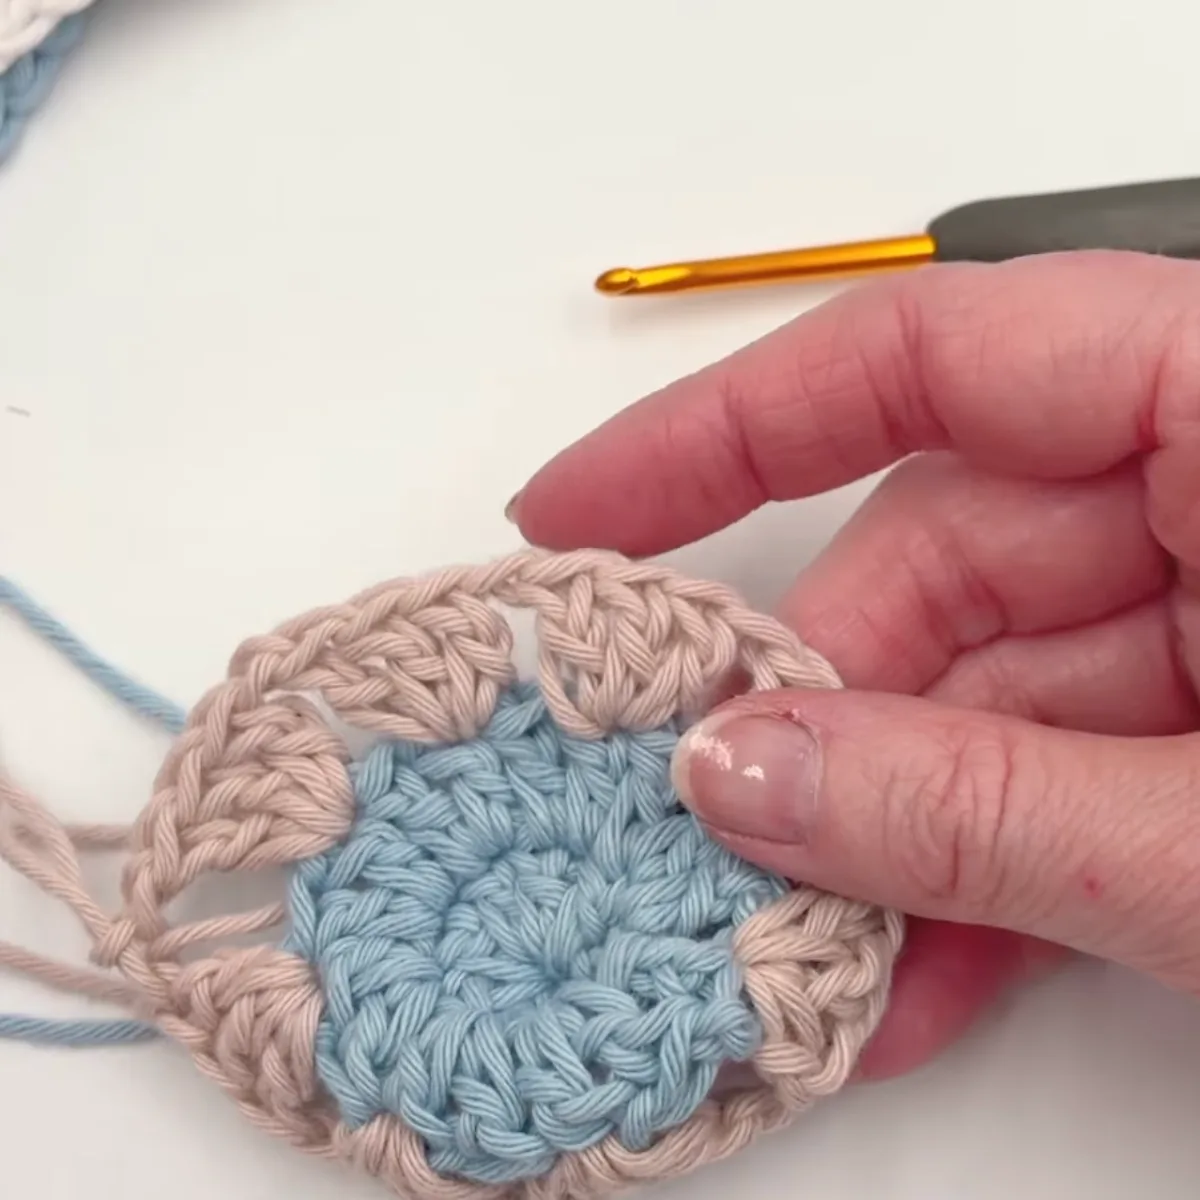
Change the color to the background color (Color C). Fasten the yarn in one of the stitches of round 2 that we skipped in the previous round. Tie a knot or use a slip stitch through a loop on the hook to add the new yarn color. On this round, push the stitches from round 3 away a bit. The stitches from round 4 will be worked in front of the round 3 stitches, and into the round 2 stitches. Ch 3 (counts as one dc), ch 4, skip the 3dc cluster, and go into the space in round 2 and work a dc in round 2.
* ch 4, skip the 3 dc cluster, work a dc into the next skipped stitch in rnd 2* Repeat from *- *all the way around. At the end, ch 4 and sl st into the 3 ch. Do not cut the yarn, but pull the loop to make it bigger and leave. it. We will pick up the yarn and continue working here later.
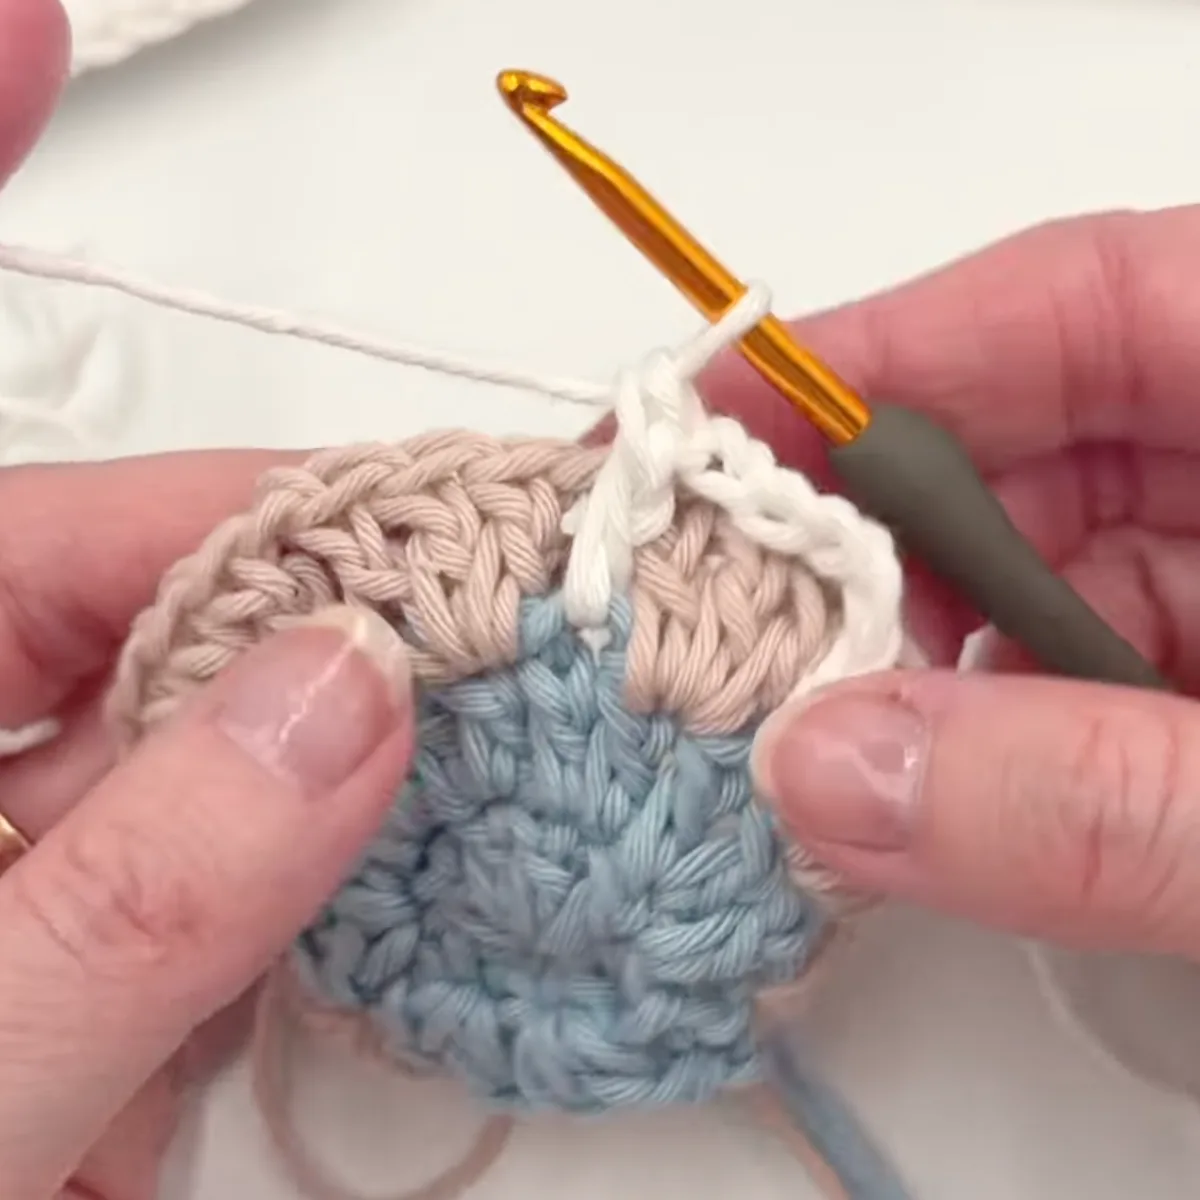
Round 5.
Return to Color B.
Insert your hook through any ch-4 space from Round 4 and pull up the working loop from Round 3. Make sure the loop is on the front of your work. Keep the ch-4 spaces from Round 4 pushed toward the back as you work.
You will be working into the petal clusters from Round 3 and crocheting over the chains from round 4.
Ch 3 (counts as 1 dc), dc inc in the next dc, 1 dc in the next dc, ch 2, skip the dc from Round 4 behind the petal cluster.
* 1 dc in the next dc, dc inc in the next dc, 1 dc in the next dc, ch 2, skip the next dc from Round 4.*
Repeat from * to * around.
End with ch 2 and join with a sl st to the top of the beginning ch 3.
(8 clusters of 4 dc, 8 ch-2 spaces)
Do not fasten off. Pull up the working loop to prevent unraveling. You will return to this round later. 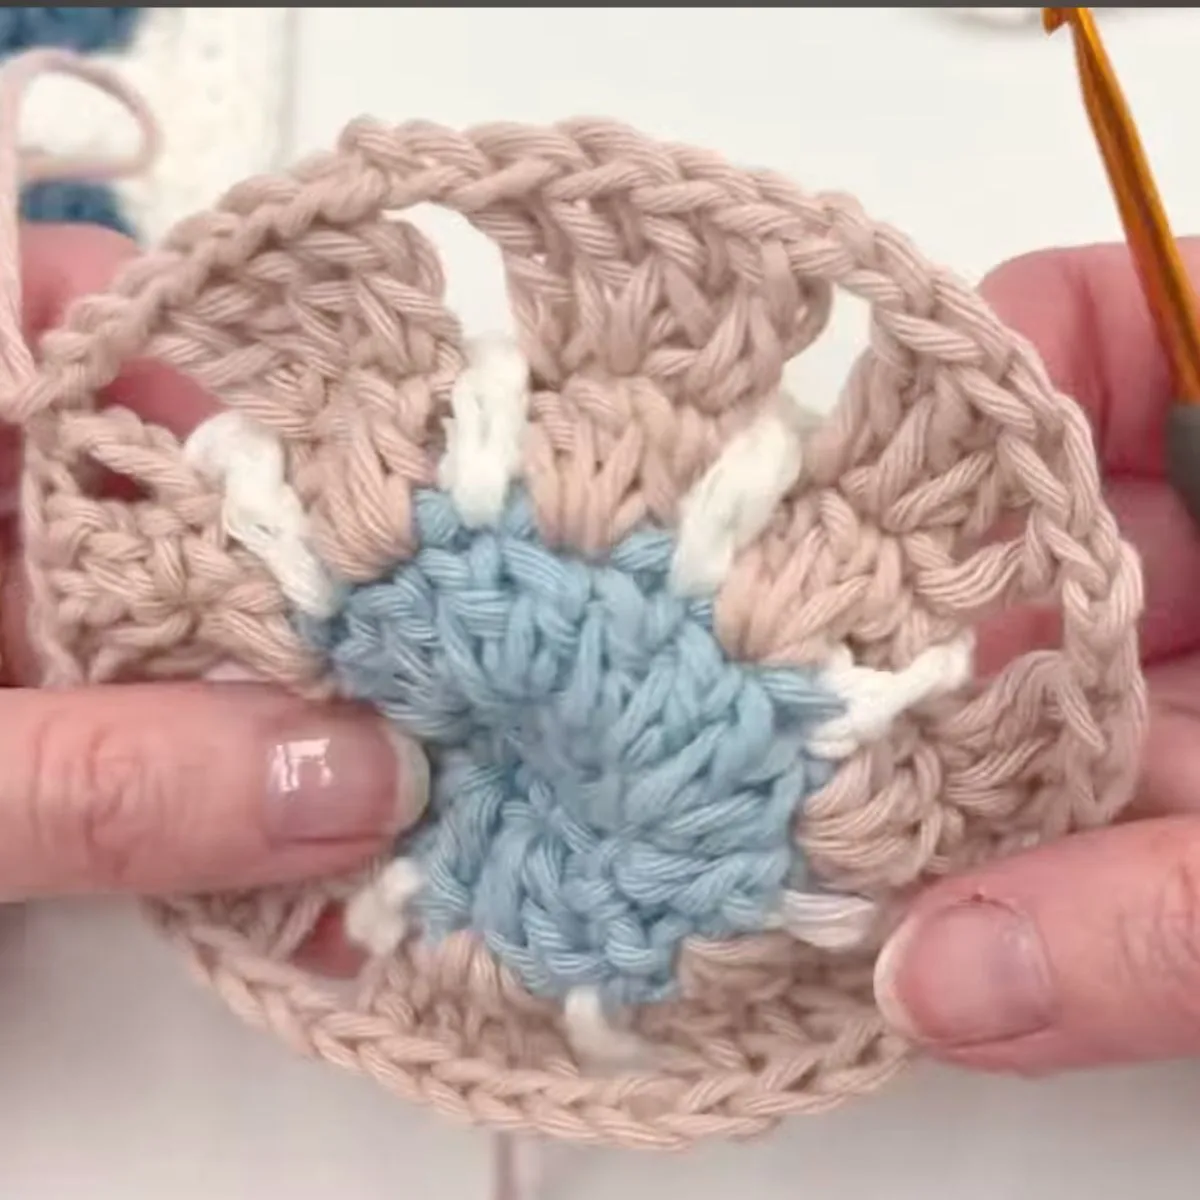
Round 6
Return to color C from round 4
Pull the working loop from Round 4 to the front of your work so it sits in front of the ch-5 spaces.
You will be working into the dc stitches from Round 4 while keeping the petal layer pushed toward the back.
Ch 3 (counts as 1 dc), work 1 dc in the same stitch, ch 5.
Skip the next 4 dc from Round 5.
*Work 2 dc in the next dc from Round 4, ch 5, skip the next 4 dc from Round 5.*
Repeat from * to * around.
End with ch 5 and join with a sl st to the top of the beginning ch 3.
(16 dc, 8 ch-5 spaces)
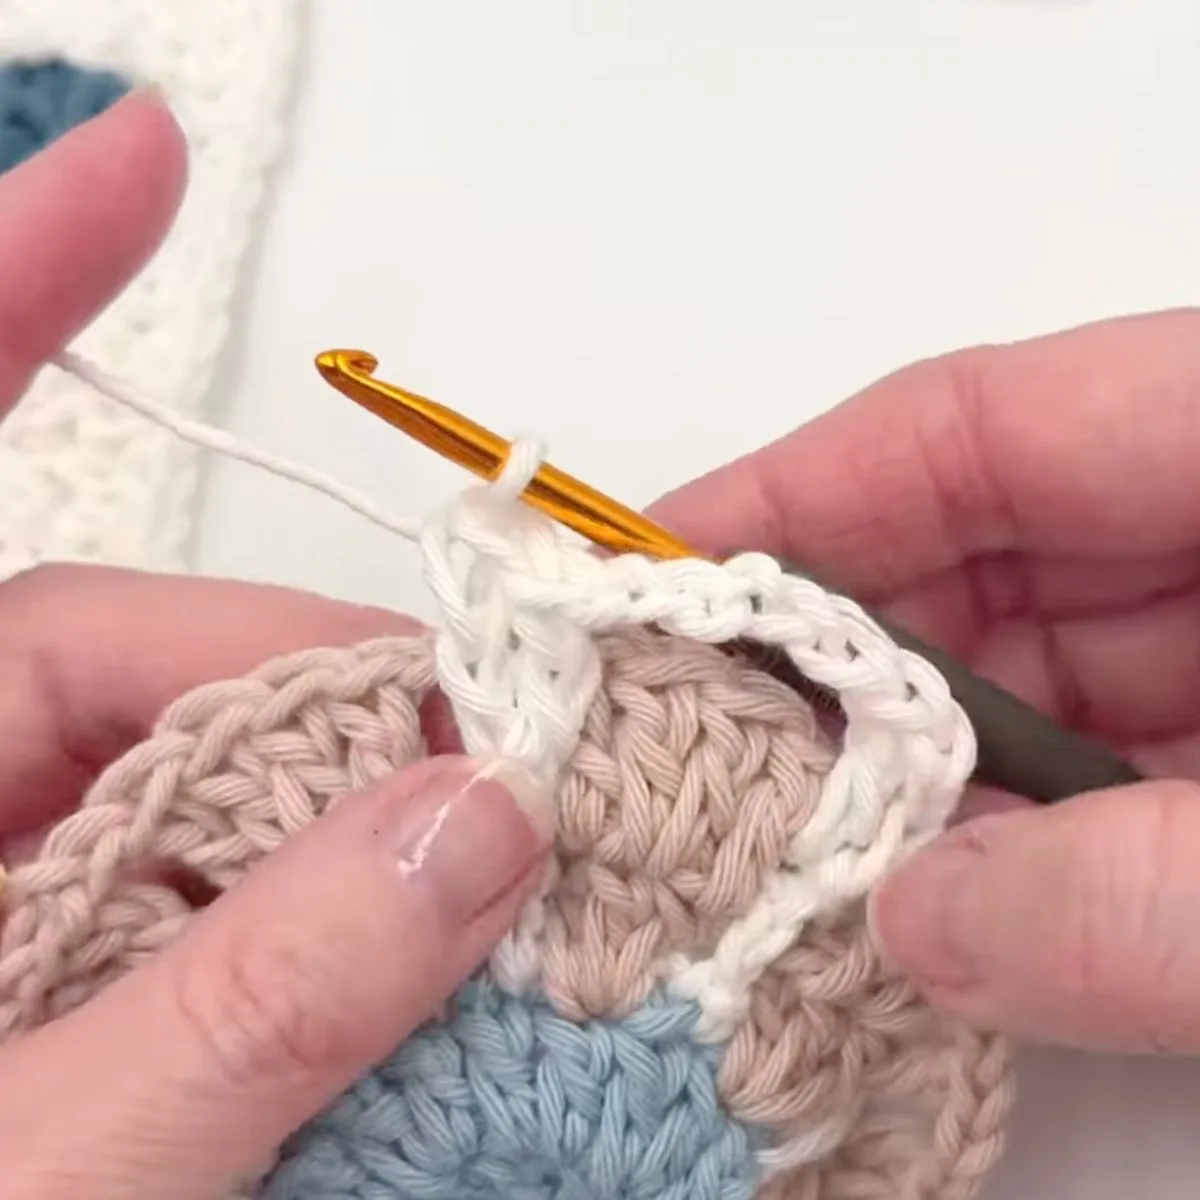
Round 7
Return to Color B.
Insert your hook through any ch-5 space from Round 6 and pull up the working loop from Round 5 to the front of your work.
You will be working into the stitches from Round 5 while keeping the ch-5 spaces from Round 6 pushed toward the back.
Ch 3 (counts as 1 dc).
Work 2 dc in the next dc, 1 dc in each of the next 2 dc, ch 2.
Skip the 2 dc from Round 6.
*Work 1 dc in the next dc, 2 dc in the next dc, 1 dc in each of the next 2 dc, ch 2. Skip the next 2 dc from Round 6.*
Repeat from * to * around.
Join with a sl st to the top of the beginning ch 3.
(8 clusters of 5 dc, 8 ch-2 spaces)
Do not fasten off. Pull up the working loop to prevent unraveling. You will return to this round later.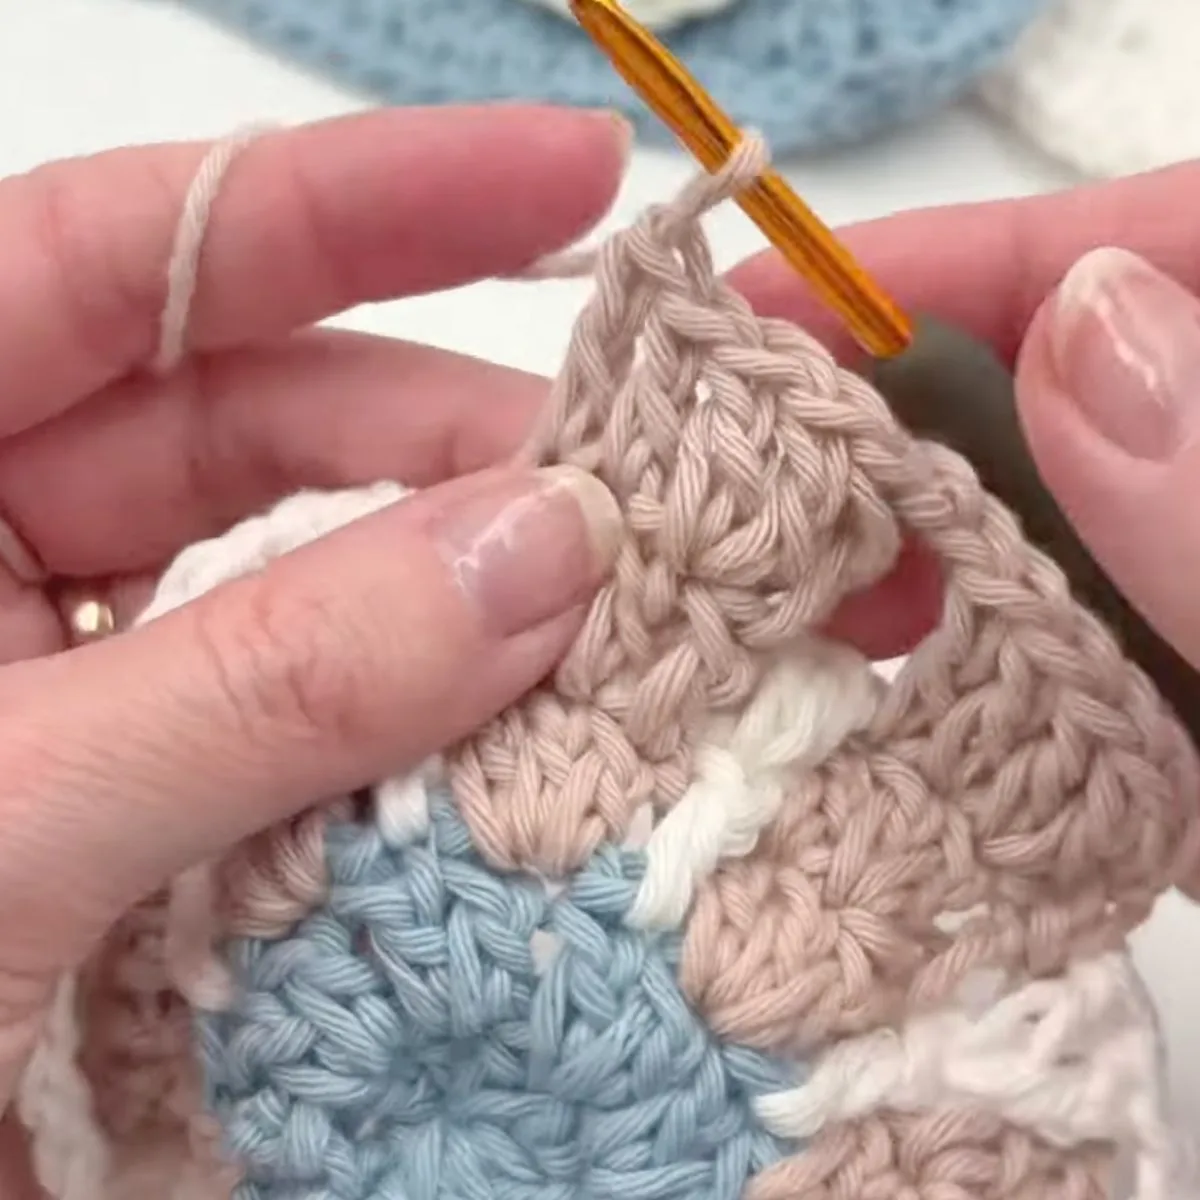
Round 8
Continue with Color B.
This round forms the tops of the flower petals.
Ch 1 (does not count as a stitch).
Work 1 sc in the first dc (same as the ch 1), skip the next dc, work 5 dc in the next dc (center dc of the cluster), skip the next dc, work 1 sc in the next dc.
*Ch 2, skip the ch-2 space from Round 7, work 1 sc in the first dc of the next cluster, skip the next dc, work 5 dc in the next dc, skip the next dc, work 1 sc in the last dc of the cluster.*
Repeat from * to * around.
End with ch 2 and join with a sl st to the first sc.
(8 petal sections consisting of sc, 5 dc, sc)
Fasten off and cut the yarn, leaving a 6–10 inch tail. Pull the yarn tail through the final loop and tighten.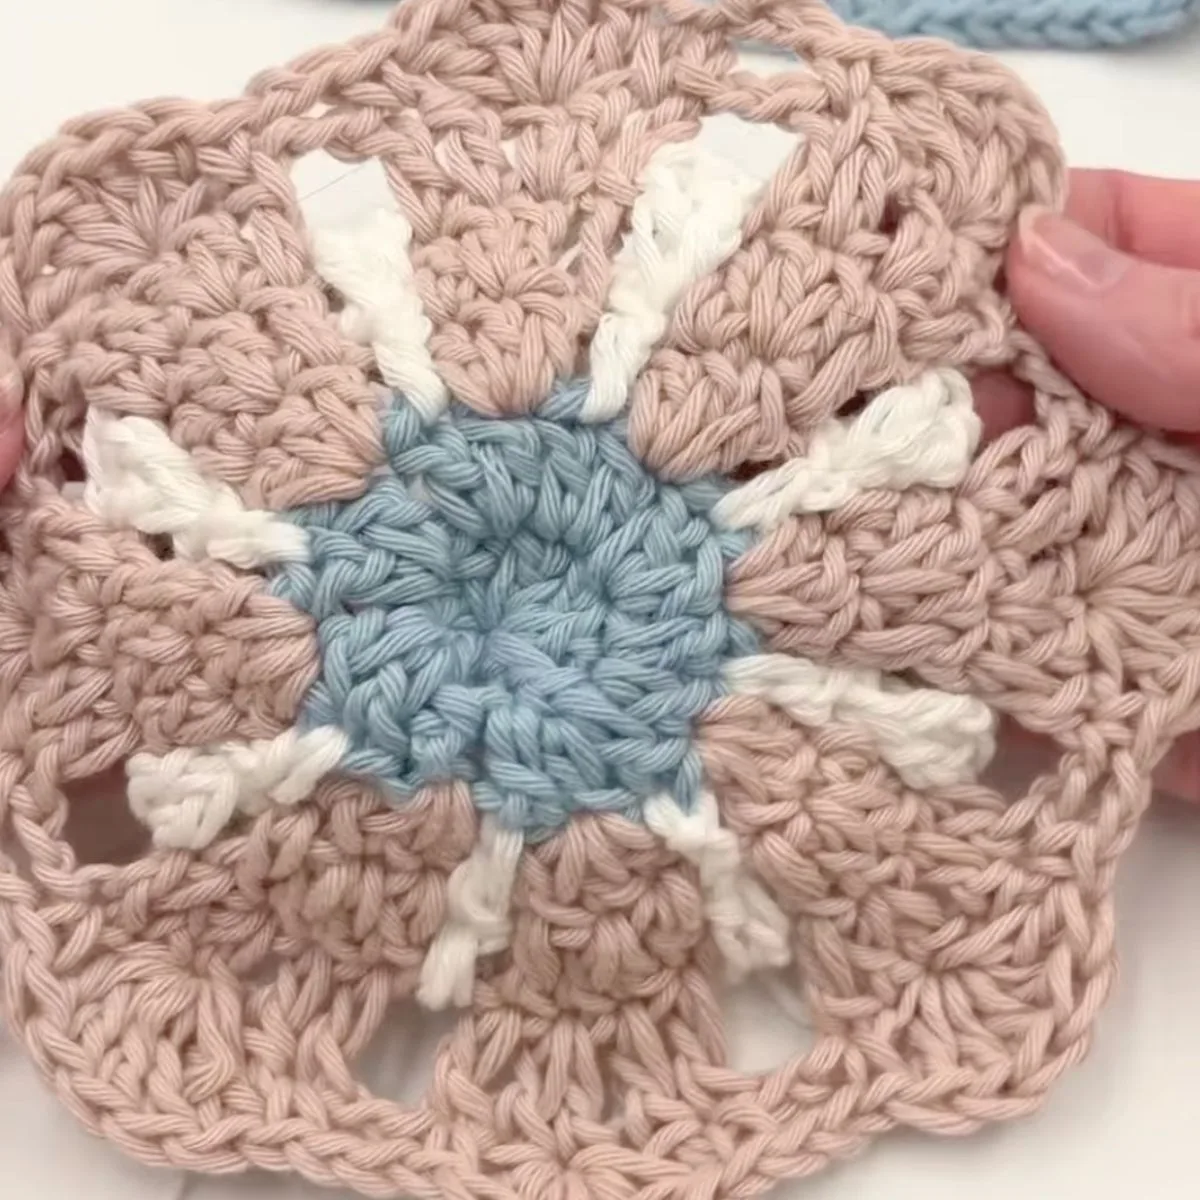
Round 9
Return to Color B.
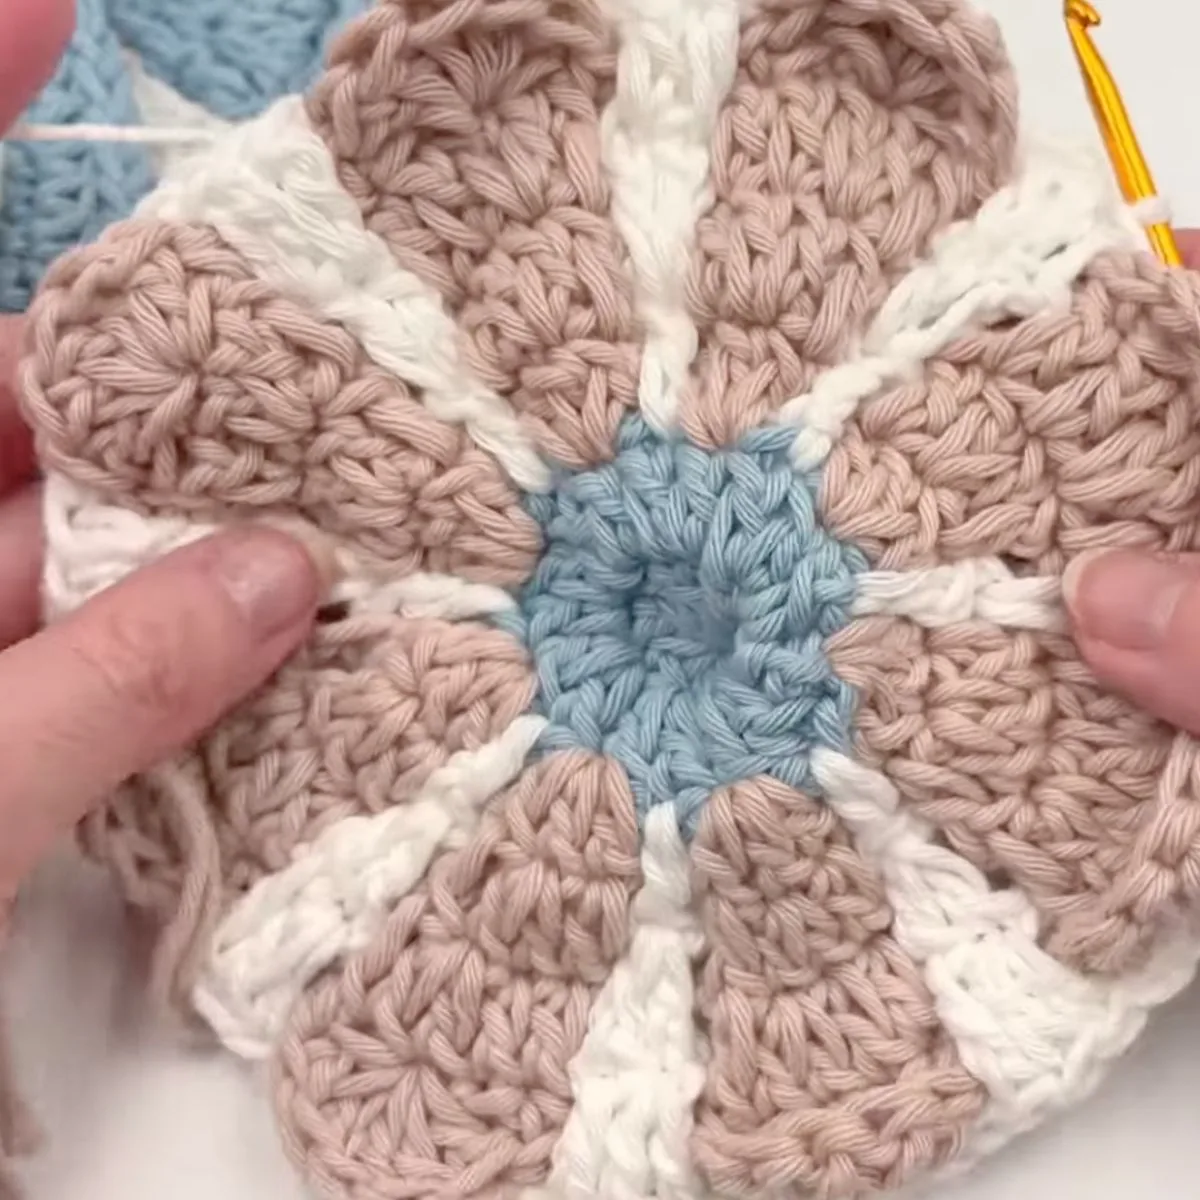
Pull the working loop from Round 7 to the front of your work.
Insert your hook through any ch-5 space from Round 6 and pull up the working loop from Round 7.
Ch 3 (counts as 1 dc).
Work 2 dc in the next dc.
Next, fold the flower petal from Round 8 forward to access the ch-2 space from Round 7 behind it.
Work 5 dc in the ch-2 space from Round 7.
Flip the petal back into place.
Working in front of the stitches from Round 8, work 1 dc in the first dc and 2 dc in the next dc.
Fold the next petal forward and work 5 dc in the ch-2 space behind the petal. Flip the petal back into place. Work 1 dc in the first dc and 2 dc in the next dc.
Repeat from * to * around.
Join with a sl st to the top of the beginning ch 3.
(8 sections of 3 dc between the petals and 8 sections of 5 dc behind the petals)
Do not fasten off.
Round 10
This round transforms the flower from a circle into a square.
Ch 1 (does not count as a stitch).
Work 1 sc in the first stitch and in each of the next 5 stitches.
Work 1 hdc in the next stitch and 1 dc in the next stitch.
Corner: Work (2 dc, ch 2, 2 dc) in the next stitch.
Work 1 dc in the next stitch and 1 hdc in the next stitch.
Work 1 sc in each of the next 11 stitches.
Work 1 hdc in the next stitch and 1 dc in the next stitch.
Corner: Work (2 dc, ch 2, 2 dc) in the next stitch.
Work 1 dc in the next stitch and 1 hdc in the next stitch.
Work 1 sc in each of the next 11 stitches.
Work 1 hdc in the next stitch and 1 dc in the next stitch.
Corner: Work (2 dc, ch 2, 2 dc) in the next stitch.
Work 1 dc in the next stitch and 1 hdc in the next stitch.
Work 1 sc in each of the next 11 stitches.
Work 1 hdc in the next stitch and 1 dc in the next stitch.
Corner: Work (2 dc, ch 2, 2 dc) in the next stitch.
Work 1 dc in the next stitch and 1 hdc in the next stitch.
Work 1 sc in each of the last 5 stitches.
Join with a sl st to the first sc.
You should now have a square shape with 4 corners separated by ch-2 spaces.
Round 11
Continue with Color C.
Ch 1 (does not count as a stitch).
Work 1 hdc in the first stitch and in each of the next 10 stitches.
Corner: Work (2 dc, ch 2, 2 dc) in the corner ch-2 space.
Work 1 hdc in each of the next 19 stitches.
Corner: Work (2 dc, ch 2, 2 dc) in the corner ch-2 space.
Work 1 hdc in each of the next 19 stitches.
Corner: Work (2 dc, ch 2, 2 dc) in the corner ch-2 space.
Work 1 hdc in each of the next 19 stitches.
Corner: Work (2 dc, ch 2, 2 dc) in the corner ch-2 space.
Work 1 hdc in each of the last 9 stitches.
Join with a sl st to the first hdc.
Fasten off and cut the yarn, leaving a 6–10 inch tail. Pull the yarn tail through the final loop and tighten.